
经过在公司半个月的工作,主要学习以下内容:
1.第三方库(ThirdParty)
第三方库是在做SDK对接中学习到的,第三方库主要分为三个文件,分别是include,lib,redist。
其中include中存放的是第三方库的头文件,后缀为.h
lib为静态库,后缀为.lib
redist为动态库,后缀为.dll
在做UE4程序之前需要引入第三方库。
2.引入第三方库
首先将第三方库放入与工程文件.Build.cs同一级目录下
然后在.Build.cs中加入以下代码:
private string ModulePath {
    get {
    return ModuleDirectory; } } private string ThirdPartyPath {
    get {
    return Path.GetFullPath(Path.Combine(ModulePath, "ThirdParty")); } }
讯享网
需要注意的是要在.Bulid.cs中加上这个:
讯享网using System.IO;
接下来为头文件 ,静态库,动态库的引入:
PublicIncludePaths.Add(Path.Combine(ThirdPartyPath, "include")); PublicAdditionalLibraries.Add(Path.Combine(ThirdPartyPath, "lib", "imos_sdk.lib")); PublicAdditionalLibraries.Add(Path.Combine(ThirdPartyPath, "lib", "xp_frame.lib")); PublicAdditionalLibraries.Add(Path.Combine(ThirdPartyPath, "lib", "xp_player.lib")); string dllPath = Path.Combine(ThirdPartyPath, "redist"); RuntimeDependencies.Add("$(BinaryOutputDir)/imos_sdk.dll", Path.Combine(dllPath, "imos_sdk.dll")); RuntimeDependencies.Add("$(BinaryOutputDir)/xp_frame.dll", Path.Combine(dllPath, "xp_frame.dll")); RuntimeDependencies.Add("$(BinaryOutputDir)/xp_player.dll", Path.Combine(dllPath, "xp_player.dll")); 下面是在UE4C++编写过程中用到知识点
3.UE4C++用到的宏
在编写过程中代码中的宏我觉得是最烦人了,实在看不明白
下面记一下这次用到的一些宏:
1,UCLASS类说明符,声明包含一个类的标准 C++ 类声明。在标准声明之上,描述符(如类说明符和元数据)将被传递到 UCLASS 宏 ,UE4中的类是以A开头的。
讯享网UCLASS() class IMOS_UEF_1_API AMyActor: public AActor {
    GENERATED_BODY() };
2, 类中的一个,也不清楚具体作用是啥
GENERATED_BODY() //class GENERATED_USTRUCT_BODY() //struct 3.UPROPERTY 作用是定义能够被UE垃圾回收机制自动回收的属性变量
讯享网UPROPERTY(Editanywhere, BlueprintReadWrite) //定义一个可以显示面板的变量,而且蓝图可读写 FString a; //需要注意的是定义的变量必须是蓝图认可的变量 UPROPERTY(Editanywhere, BlueprintReadOnly) //定义蓝图只读的变量
4.UFUNCTION 定义能被UE识别的函数
UFUNCTION(BlueprintCallable) //定义一个函数可以在蓝图调用 void Function(); 5.USTRUCT() 结构体的类说明符,定义结构体需要用到,定义结构体时候需要注意,UE4的结构体名称必须以F开头,必须以F开头。
讯享网USTRUCT(BlueprintType) //能在蓝图中使用 struct Fstruct {
    GENERATED_USTRUCT_BODY() };
6.UFUNCTION(BlueprintImplementableEvent) 蓝图中event事件
UFUNCTION(BlueprintImplementableEvent) void OnUpdateCamera(); 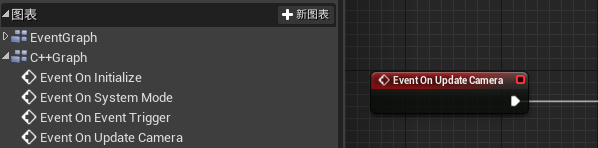

4.编写C++时遇到的问题
1.在编写一个可在蓝图中调用的函数时,函数的返回值和形参必须是蓝图认识的类型,在使用时需要做类型转化,还可以用函数封装的方法来实现,写一个例子:
讯享网.h文件 class Actor:public AActor{
    public: UFUNCTION(BlueprintCallable) void Box(); void Function(CHAR a); //CHAR类型蓝图不认识,所以不可以用UFUNCTION(BlueprintCallable) public: CHAR a; }; .cpp文件 void Actor::Box() {
    Function(a); } void Actor::Function(CHAR a) {
    //函数实现 }
2.在c++中使用Tarry容器
定义一个结构体 USTRUCT(BlueprintType) struct FSTRUCT {
    GENERATED_BODY() public: UPROPERTY(Editanywhere, BlueprintReadWrite) FString sName; UPROPERTY(Editanywhere, BlueprintReadWrite) FString sCode; UPROPERTY(Editanywhere, BlueprintReadWrite) int CameraState; }; 在类中做一个存储 FSTRUCT的TArray容器 class Actor:public AActor{
    public: UFUNCTION(BlueprintCallable) void GetBox(); UFUNCTION(BlueprintCallable)//获取列表 const TArray<FCAMINFO>& getCameraList() {
return cif; } UFUNCTION(BlueprintCallable) //返回容器元素个数 int getCount(); public: UPROPERTY(Editanywhere, BlueprintReadOnly) TArray<FSTRUCT> Box; }; 讯享网void Actor::GetBox() {
for(int i=0;i<100;i++) {
FSTRUCT cItem; //我犯的错误,直接就用Box了; cItem.sName=a; cItem.sCode=b; cItem.CameraState=1; Box.Add(cItem); } } int Actor::getCount() {
int count=0; for (int i = 0; i < cif.Num(); i++) //注意不是<= {
count++; } return count; }
目前用到关于TArry的应该就是这些知识点,以后用到别的再记录。
3.递归的使用递归函数以前有了解但是只是看看别人写的代码印象不深刻,经过这次教训对递归的印象加深了不少,在分页遍历中用到的,递归的用法很灵活,现在的能力无法掌握。。。
void DiGui(FString a,int b,int nlevel) {
    if(nleve>=4) //限制调用次数 return; for(int i=0;i<10;i++) {
    if(条件) {
    遍历内容 } else {
    DiGui(c,d,nlevel+1); //自己调用自己 } } return; }
4.写window窗口
window窗口的编写是调用一些接口,网上能查到,但是看不太明白
记录一下公司同事提供的编写代码
讯享网//创建窗口 void AMyActor_Window::CreateVideoWindow() {
    if (pHwnd) return; HWND parentHandel = (HWND)GEngine->GameViewport->GetWindow()->GetNativeWindow()->GetOSWindowHandle(); uint32 extyle = WS_EX_WINDOWEDGE; //1 uint32 winstyle = WS_POPUPWINDOW | WS_CLIPCHILDREN | WS_CLIPSIBLINGS;//2,4,8 TCHAR winName[] = TEXT("DHSDK_Window"); TCHAR className[] = TEXT("UnrealWindow"); HINSTANCE tpinsHandle = (HINSTANCE)GetModuleHandle(NULL); HWND oldTypeWind = CreateWindowEx(extyle, className, winName, winstyle, 300, 300, 600, 600, parentHandel, NULL, tpinsHandle, NULL); ::ShowWindow(oldTypeWind, SW_HIDE ); //SW_HIDE是创建时隐藏窗口 SW_SHOW是创建时显示窗口,这个根据自己的需求来定 pHwnd = oldTypeWind; //pHwnd是在头文件中定义的窗口句柄,类型是HWND }
//销毁窗口 void AMyActor_Window::CloseVideoWindow() {
    if (pHwnd) {
::SendMessageA((HWND)pHwnd, WM_CLOSE, 0, 0); pHwnd = NULL; } } 讯享网//调整窗口尺寸 void AMyActor_Window::ReSize(FVector2D imgPos, FVector2D imgSize) {
if (pHwnd) {
int32 WindowX = imgPos.X; int32 WindowY = imgPos.Y; int32 NewWidth = imgSize.X; int32 NewHeight = imgSize.Y; ::SetWindowPos((HWND)pHwnd, nullptr, WindowX, WindowY, NewWidth, NewHeight, SWP_NOZORDER | SWP_NOACTIVATE); } }
//判断窗口显示与隐藏 void AMyActor_Window::ShowWindow(bool IsShow) {
    if (pHwnd) {
    ::ShowWindow(pHwnd, IsShow ? SW_SHOW : SW_HIDE); } }
5.创建C++的Actor类时,官方提供的默认函数 ,在这里要记住如果要使用tick函数那么就不要删掉构造函数,因为类中的构造函数内容是设置tick函数可以执行,默认是不执行的。而且c++中的BeginPlay要比蓝图中的好,因为他好像涉及到一个执行先后的问题。
讯享网 UCLASS() class IMOS_UEF_1_API AMyActor_Window : public AActor {
    GENERATED_BODY() public: // Sets default values for this actor's properties AMyActor_Window(); protected: // Called when the game starts or when spawned virtual void BeginPlay() override; // Called when the game starts or when destroy virtual void BeginDestroy() override; //public: // // Called every frame virtual void Tick(float DeltaTime) override; }
AMyActor_Window::AMyActor_Window() {
    // Set this actor to call Tick() every frame. You can turn this off to improve performance if you don't need it. PrimaryActorTick.bCanEverTick = true; } void AMyActor_Window::BeginPlay() {
    Super::BeginPlay(); //CreateVideoWindow(); } / Called when the game starts or when destroy void AMyActor_Window::BeginDestroy() {
    Super::BeginDestroy(); //CloseVideoWindow(); } void AMyActor_Window::Tick(float DeltaTime) {
Super::Tick(DeltaTime); } 讯享网#include“Actor1.h” UCLASS() class Actor2 : public AActor {
GENERATED_BODY() public: UPROPERTY(Editanywhere, BlueprintReadWrite) class Actor1* A1 = nullptr; //这样就可以通过A1调用Actor1中的函数了 }
 PrivateDependencyModuleNames.AddRange(new string[] {
"Slate", "SlateCore", "UMG" }); 讯享网UPROPERTY(EditAnywhere, BlueprintReadWrite) class UImage* m_pAnchorSizeImg; //这里需要开启UMG模块
8.FString类型转char*
FString FNum string Snum = TCHAR_TO_UTF8(*Fnum); char* Cnum = (char*)malloc(sizeof(char) * (Snum.length() + 1)); strncpy_s(Cnum, Snum.length() + 1, Snum.c_str(), Snum.length()); 9.开空间
讯享网int* Num = (int*)malloc(10 * sizeof(int)); free(Num);
10.检测内存泄漏(还没用过,先记录一下,用F5调试才会出现结果,而且应该只能在VS中用)
_CrtSetDbgFlag(_CRTDBG_ALLOC_MEM_DF | _CRTDBG_LEAK_CHECK_DF);
版权声明:本文内容由互联网用户自发贡献,该文观点仅代表作者本人。本站仅提供信息存储空间服务,不拥有所有权,不承担相关法律责任。如发现本站有涉嫌侵权/违法违规的内容,请联系我们,一经查实,本站将立刻删除。
如需转载请保留出处:https://51itzy.com/kjqy/63172.html