
1. 集群软件版本说明
| kubeadm | kubelet | kubectl | |
|---|---|---|---|
| 版本 | 1.21.0 | 1.21.0 | 1.21.0 |
| 安装位置 | 集群所有主机 | 集群所有主机 | 集群所有主机 |
| 作用 | 初始化集群、管理集群等 | 用于接收api-server指令,对pod生命周期进行管理 | 集群应用命令行管理工具 |
2. kubernetes YUM源准备
在/etc/yum.repos.d/目录中创建k8s.repo文件,把下面内容复制进去即可。
2.1 谷歌YUM源
[kubernetes]
name=Kubernetes
baseurl=https://packages.cloud.google.com/yum/repos/kubernetes-el7-x86_64
enabled=1
gpgcheck=1
repo_gpgcheck=1
gpgkey=https://packages.cloud.google.com/yum/doc/yum-key.gpg
https://packages.cloud.google.com/yum/doc/rpm-package-key.gpg
2.2 阿里云YUM源
[kubernetes]
name=Kubernetes
baseurl=https://mirrors.aliyun.com/kubernetes/yum/repos/kubernetes-el7-x86_64/
enabled=1
gpgcheck=1
repo_gpgcheck=1
gpgkey=https://mirrors.aliyun.com/kubernetes/yum/doc/yum-key.gpg https://mirrors.aliyun.com/kubernetes/yum/doc/rpm-package-key.gpg
查看yum源
yum repolist
3. 集群软件安装
查看指定版本
yum list kubeadm.x86_64 --showduplicates | sort -r
yum list kubelet.x86_64 --showduplicates | sort -r
yum list kubectl.x86_64 --showduplicates | sort -r
4. 配置kubelet
为了实现docker使用的cgroupdriver与kubelet使用的cgroup的一致性,建议修改如下文件内容。
增加配置:
# vim /etc/sysconfig/kubelet
KUBELET_EXTRA_ARGS="--cgroup-driver=systemd"
查看 kubelet是否自动启动
设置kubelet为开机自启动即可,由于没有生成配置文件,集群初始化后自动启动
systemctl enable kubelet
5. 集群镜像准备
5.1 查看
#kubeadm config images list --kubernetes-version=v1.21.0
k8s.gcr.io/kube-apiserver:v1.21.0
k8s.gcr.io/kube-controller-manager:v1.21.0
k8s.gcr.io/kube-scheduler:v1.21.0
k8s.gcr.io/kube-proxy:v1.21.0
k8s.gcr.io/pause:3.4.1
k8s.gcr.io/etcd:3.4.13-0
k8s.gcr.io/coredns/coredns:v1.8.0
5.2 编辑下载脚本
vim image_download.sh
#将下面脚本cpoy
#!/bin/bash
images_list='
k8s.gcr.io/kube-apiserver:v1.21.0
k8s.gcr.io/kube-controller-manager:v1.21.0
k8s.gcr.io/kube-scheduler:v1.21.0
k8s.gcr.io/kube-proxy:v1.21.0
k8s.gcr.io/pause:3.4.1
k8s.gcr.io/etcd:3.4.13-0
k8s.gcr.io/coredns/coredns:v1.8.0'for i in $images_list
do
docker pull $i
donedocker save -o k8s-1-21-0.tar $images_list
#执行脚本即可
连不上使用下面
vim image_download.sh
#将下面脚本cpoy
#!/bin/bash
images_list='
aiotceo/kube-apiserver:v1.21.0
aiotceo/kube-controller-manager:v1.21.0
aiotceo/kube-scheduler:v1.21.0
aiotceo/kube-proxy:v1.21.0
aiotceo/pause:3.4.1
aiotceo/etcd:3.4.13-0
aiotceo/coredns/coredns:v1.8.0'for i in $images_list
do
docker pull $i
donedocker save -o k8s-1-21-0.tar $images_list
#执行脚本即可
images_list='
registry.aliyuncs.com/google_containers/kube-apiserver:v1.21.0
registry.aliyuncs.com/google_containers/kube-controller-manager:v1.21.0
registry.aliyuncs.com/google_containers/kube-scheduler:v1.21.0
registry.aliyuncs.com/google_containers/kube-proxy:v1.21.0
registry.aliyuncs.com/google_containers/pause:3.4.1
registry.aliyuncs.com/google_containers/etcd:3.4.13-0
registry.aliyuncs.com/google_containers/coredns/coredns:v1.8.0'
最后会在目下生成一个 k8s-1-21-0.tar 文件
注意:如果coredns报错请使用下面命令
docker pull coredns/coredns:1.8.0
docker tag coredns/coredns:1.8.0 registry.aliyuncs.com/google_containers/coredns/coredns:v1.8.0
kubeadm config images pull --image-repository registry.aliyuncs.com/google_containers --cri-socket unix:///var/run/cri-dockerd.sock
6. 集群初始化
kubeadm init --image-repository=registry.aliyuncs.com/google_containers --kubernetes-version=v1.21.0 --pod-network-cidr=10.244.0.0/16 --apiserver-advertise-address=192.168.80.200
kubeadm init 命令
--apiserver-advertise-address string 设置 apiserver 绑定的 IP. --apiserver-bind-port int32 设置apiserver 监听的端口. (默认 6443) --apiserver-cert-extra-sans strings api证书中指定额外的Subject Alternative Names (SANs) 可以是IP 也可以是DNS名称。 证书是和SAN绑定的。 --cert-dir string 证书存放的目录 (默认 "/etc/kubernetes/pki") --certificate-key string kubeadm-cert secret 中 用于加密 control-plane 证书的key --config string kubeadm 配置文件的路径. --cri-socket string CRI socket 文件路径,如果为空 kubeadm 将自动发现相关的socket文件; 只有当机器中存在多个 CRI socket 或者 存在非标准 CRI socket 时才指定. --dry-run 测试,并不真正执行;输出运行后的结果. --feature-gates string 指定启用哪些额外的feature 使用 key=value 对的形式。 -h, --help 帮助文档 --ignore-preflight-errors strings 忽略前置检查错误,被忽略的错误将被显示为警告. 例子: 'IsPrivilegedUser,Swap'. Value 'all' ignores errors from all checks. --image-repository string 选择拉取 control plane images 的镜像repo (default "k8s.gcr.io") --kubernetes-version string 选择K8S版本. (default "stable-1") --node-name string 指定node的名称,默认使用 node 的 hostname. --pod-network-cidr string 指定 pod 的网络, control plane 会自动将 网络发布到其他节点的node,让其上启动的容器使用此网络 --service-cidr string 指定service 的IP 范围. (default "10.96.0.0/12") --service-dns-domain string 指定 service 的 dns 后缀, e.g. "myorg.internal". (default "cluster.local") --skip-certificate-key-print 不打印 control-plane 用于加密证书的key. --skip-phases strings 跳过指定的阶段(phase) --skip-token-print 不打印 kubeadm init 生成的 default bootstrap token --token string 指定 node 和control plane 之间,简历双向认证的token ,格式为 [a-z0-9]{6}\.[a-z0-9]{16} - e.g. abcdef.0abcdef --token-ttl duration token 自动删除的时间间隔。 (e.g. 1s, 2m, 3h). 如果设置为 '0', token 永不过期 (default 24h0m0s) --upload-certs 上传 control-plane 证书到 kubeadm-certs Secret.
讯享网
执行报错1
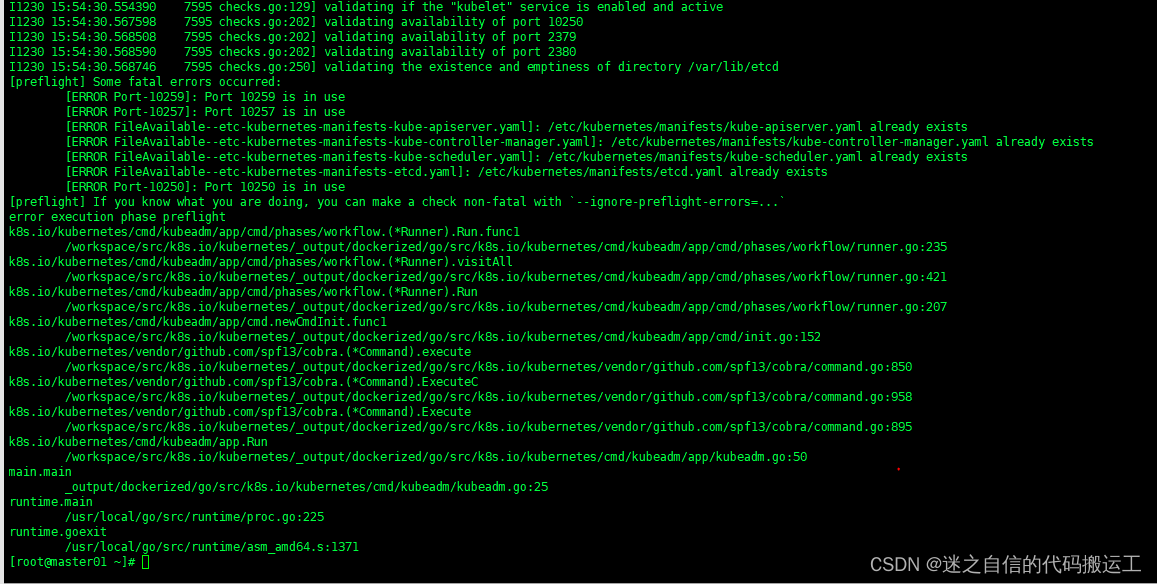
解决方法:
1. 首先清空上次初始化产生的文件
rm -rf /etc/kubernetes/*
rm -rf ~/.kube/*
rm -rf /var/lib/etcd/*
2. 然后下载个包,这个包是用来停用被占用的端口的
yum install lsof
3. 然后停用被占用的端口号,端口号替换成自己报错的端口
docker ps -a | grep kube | grep -v pause
lsof -i :10259|grep -v "PID"|awk '{print "kill -9",$2}'|sh
lsof -i :10250|grep -v "PID"|awk '{print "kill -9",$2}'|sh
lsof -i :10257|grep -v "PID"|awk '{print "kill -9",$2}'|sh
lsof -i :6443|grep -v "PID"|awk '{print "kill -9",$2}'|sh
4. 重启
kubeadm reset
5. 重新执行init 命令

6.如果安装报错了,可以清理一下
swapoff -a && kubeadm reset && systemctl daemon-reload && systemctl restart kubelet && iptables -F && iptables -t nat -F && iptables -t mangle -F && iptables -X
安装成功
[root@master01 member]# kubeadm init --image-repository=registry.aliyuncs.com/google_containers --kubernetes-version=v1.21.0 --pod-network-cidr=10.244.0.0/16 --apiserver-advertise-address=192.168.80.200 --v=5
I1230 17:20:05. 33175 initconfiguration.go:115] detected and using CRI socket: /var/run/dockershim.sock
[init] Using Kubernetes version: v1.21.0
[preflight] Running pre-flight checks
I1230 17:20:05. 33175 checks.go:582] validating Kubernetes and kubeadm version
I1230 17:20:05. 33175 checks.go:167] validating if the firewall is enabled and active
I1230 17:20:05. 33175 checks.go:202] validating availability of port 6443
I1230 17:20:05. 33175 checks.go:202] validating availability of port 10259
I1230 17:20:05. 33175 checks.go:202] validating availability of port 10257
I1230 17:20:05. 33175 checks.go:287] validating the existence of file /etc/kubernetes/manifests/kube-apiserver.yaml
I1230 17:20:05. 33175 checks.go:287] validating the existence of file /etc/kubernetes/manifests/kube-controller-manager.yaml
I1230 17:20:05. 33175 checks.go:287] validating the existence of file /etc/kubernetes/manifests/kube-scheduler.yaml
I1230 17:20:05. 33175 checks.go:287] validating the existence of file /etc/kubernetes/manifests/etcd.yaml
I1230 17:20:05. 33175 checks.go:437] validating if the connectivity type is via proxy or direct
I1230 17:20:05. 33175 checks.go:476] validating http connectivity to first IP address in the CIDR
I1230 17:20:05. 33175 checks.go:476] validating http connectivity to first IP address in the CIDR
I1230 17:20:05. 33175 checks.go:103] validating the container runtime
I1230 17:20:05. 33175 checks.go:129] validating if the "docker" service is enabled and active
I1230 17:20:05. 33175 checks.go:336] validating the contents of file /proc/sys/net/bridge/bridge-nf-call-iptables
I1230 17:20:05. 33175 checks.go:336] validating the contents of file /proc/sys/net/ipv4/ip_forward
I1230 17:20:05. 33175 checks.go:654] validating whether swap is enabled or not
I1230 17:20:05. 33175 checks.go:377] validating the presence of executable conntrack
I1230 17:20:05. 33175 checks.go:377] validating the presence of executable ip
I1230 17:20:05. 33175 checks.go:377] validating the presence of executable iptables
I1230 17:20:05. 33175 checks.go:377] validating the presence of executable mount
I1230 17:20:05. 33175 checks.go:377] validating the presence of executable nsenter
I1230 17:20:05. 33175 checks.go:377] validating the presence of executable ebtables
I1230 17:20:05. 33175 checks.go:377] validating the presence of executable ethtool
I1230 17:20:05. 33175 checks.go:377] validating the presence of executable socat
I1230 17:20:05. 33175 checks.go:377] validating the presence of executable tc
I1230 17:20:05. 33175 checks.go:377] validating the presence of executable touch
I1230 17:20:05. 33175 checks.go:525] running all checks
I1230 17:20:05. 33175 checks.go:408] checking whether the given node name is valid and reachable using net.LookupHost
I1230 17:20:05. 33175 checks.go:623] validating kubelet version
I1230 17:20:06.058585 33175 checks.go:129] validating if the "kubelet" service is enabled and active
I1230 17:20:06.071287 33175 checks.go:202] validating availability of port 10250
I1230 17:20:06.071938 33175 checks.go:202] validating availability of port 2379
I1230 17:20:06.071979 33175 checks.go:202] validating availability of port 2380
I1230 17:20:06.072018 33175 checks.go:250] validating the existence and emptiness of directory /var/lib/etcd
[preflight] Pulling images required for setting up a Kubernetes cluster
[preflight] This might take a minute or two, depending on the speed of your internet connection
[preflight] You can also perform this action in beforehand using 'kubeadm config images pull'
I1230 17:20:06.092436 33175 checks.go:844] image exists: registry.aliyuncs.com/google_containers/kube-apiserver:v1.21.0
I1230 17:20:06. 33175 checks.go:844] image exists: registry.aliyuncs.com/google_containers/kube-controller-manager:v1.21.0
I1230 17:20:06. 33175 checks.go:844] image exists: registry.aliyuncs.com/google_containers/kube-scheduler:v1.21.0
I1230 17:20:06. 33175 checks.go:844] image exists: registry.aliyuncs.com/google_containers/kube-proxy:v1.21.0
I1230 17:20:06. 33175 checks.go:844] image exists: registry.aliyuncs.com/google_containers/pause:3.4.1
I1230 17:20:06. 33175 checks.go:844] image exists: registry.aliyuncs.com/google_containers/etcd:3.4.13-0
I1230 17:20:06. 33175 checks.go:844] image exists: registry.aliyuncs.com/google_containers/coredns/coredns:v1.8.0
[certs] Using certificateDir folder "/etc/kubernetes/pki"
I1230 17:20:06. 33175 certs.go:110] creating a new certificate authority for ca
[certs] Generating "ca" certificate and key
I1230 17:20:06. 33175 certs.go:487] validating certificate period for ca certificate
[certs] Generating "apiserver" certificate and key
[certs] apiserver serving cert is signed for DNS names [kubernetes kubernetes.default kubernetes.default.svc kubernetes.default.svc.cluster.local master01] and IPs [10.96.0.1 192.168.80.200]
[certs] Generating "apiserver-kubelet-client" certificate and key
I1230 17:20:06. 33175 certs.go:110] creating a new certificate authority for front-proxy-ca
[certs] Generating "front-proxy-ca" certificate and key
I1230 17:20:07. 33175 certs.go:487] validating certificate period for front-proxy-ca certificate
[certs] Generating "front-proxy-client" certificate and key
I1230 17:20:07. 33175 certs.go:110] creating a new certificate authority for etcd-ca
[certs] Generating "etcd/ca" certificate and key
I1230 17:20:07. 33175 certs.go:487] validating certificate period for etcd/ca certificate
[certs] Generating "etcd/server" certificate and key
[certs] etcd/server serving cert is signed for DNS names [localhost master01] and IPs [192.168.80.200 127.0.0.1 ::1]
[certs] Generating "etcd/peer" certificate and key
[certs] etcd/peer serving cert is signed for DNS names [localhost master01] and IPs [192.168.80.200 127.0.0.1 ::1]
[certs] Generating "etcd/healthcheck-client" certificate and key
[certs] Generating "apiserver-etcd-client" certificate and key
I1230 17:20:08. 33175 certs.go:76] creating new public/private key files for signing service account users
[certs] Generating "sa" key and public key
[kubeconfig] Using kubeconfig folder "/etc/kubernetes"
I1230 17:20:08. 33175 kubeconfig.go:101] creating kubeconfig file for admin.conf
[kubeconfig] Writing "admin.conf" kubeconfig file
I1230 17:20:08. 33175 kubeconfig.go:101] creating kubeconfig file for kubelet.conf
[kubeconfig] Writing "kubelet.conf" kubeconfig file
I1230 17:20:08. 33175 kubeconfig.go:101] creating kubeconfig file for controller-manager.conf
[kubeconfig] Writing "controller-manager.conf" kubeconfig file
I1230 17:20:09. 33175 kubeconfig.go:101] creating kubeconfig file for scheduler.conf
[kubeconfig] Writing "scheduler.conf" kubeconfig file
I1230 17:20:09. 33175 kubelet.go:63] Stopping the kubelet
[kubelet-start] Writing kubelet environment file with flags to file "/var/lib/kubelet/kubeadm-flags.env"
[kubelet-start] Writing kubelet configuration to file "/var/lib/kubelet/config.yaml"
[kubelet-start] Starting the kubelet
[control-plane] Using manifest folder "/etc/kubernetes/manifests"
[control-plane] Creating static Pod manifest for "kube-apiserver"
I1230 17:20:09. 33175 manifests.go:96] [control-plane] getting StaticPodSpecs
I1230 17:20:09. 33175 certs.go:487] validating certificate period for CA certificate
I1230 17:20:09. 33175 manifests.go:109] [control-plane] adding volume "ca-certs" for component "kube-apiserver"
I1230 17:20:09. 33175 manifests.go:109] [control-plane] adding volume "etc-pki" for component "kube-apiserver"
I1230 17:20:09. 33175 manifests.go:109] [control-plane] adding volume "k8s-certs" for component "kube-apiserver"
I1230 17:20:09. 33175 manifests.go:126] [control-plane] wrote static Pod manifest for component "kube-apiserver" to "/etc/kubernetes/manifests/kube-apiserver.yaml"
[control-plane] Creating static Pod manifest for "kube-controller-manager"
I1230 17:20:09. 33175 manifests.go:96] [control-plane] getting StaticPodSpecs
I1230 17:20:09. 33175 manifests.go:109] [control-plane] adding volume "ca-certs" for component "kube-controller-manager"
I1230 17:20:09. 33175 manifests.go:109] [control-plane] adding volume "etc-pki" for component "kube-controller-manager"
I1230 17:20:09. 33175 manifests.go:109] [control-plane] adding volume "flexvolume-dir" for component "kube-controller-manager"
I1230 17:20:09. 33175 manifests.go:109] [control-plane] adding volume "k8s-certs" for component "kube-controller-manager"
I1230 17:20:09. 33175 manifests.go:109] [control-plane] adding volume "kubeconfig" for component "kube-controller-manager"
I1230 17:20:09. 33175 manifests.go:126] [control-plane] wrote static Pod manifest for component "kube-controller-manager" to "/etc/kubernetes/manifests/kube-controller-manager.yaml"
[control-plane] Creating static Pod manifest for "kube-scheduler"
I1230 17:20:09. 33175 manifests.go:96] [control-plane] getting StaticPodSpecs
I1230 17:20:09. 33175 manifests.go:109] [control-plane] adding volume "kubeconfig" for component "kube-scheduler"
I1230 17:20:09. 33175 manifests.go:126] [control-plane] wrote static Pod manifest for component "kube-scheduler" to "/etc/kubernetes/manifests/kube-scheduler.yaml"
[etcd] Creating static Pod manifest for local etcd in "/etc/kubernetes/manifests"
I1230 17:20:09. 33175 local.go:74] [etcd] wrote Static Pod manifest for a local etcd member to "/etc/kubernetes/manifests/etcd.yaml"
I1230 17:20:09. 33175 waitcontrolplane.go:87] [wait-control-plane] Waiting for the API server to be healthy
[wait-control-plane] Waiting for the kubelet to boot up the control plane as static Pods from directory "/etc/kubernetes/manifests". This can take up to 4m0s
[kubelet-check] Initial timeout of 40s passed.
[apiclient] All control plane components are healthy after 58. seconds
I1230 17:21:08. 33175 uploadconfig.go:108] [upload-config] Uploading the kubeadm ClusterConfiguration to a ConfigMap
[upload-config] Storing the configuration used in ConfigMap "kubeadm-config" in the "kube-system" Namespace
I1230 17:21:08. 33175 uploadconfig.go:122] [upload-config] Uploading the kubelet component config to a ConfigMap
[kubelet] Creating a ConfigMap "kubelet-config-1.21" in namespace kube-system with the configuration for the kubelets in the cluster
I1230 17:21:08. 33175 uploadconfig.go:127] [upload-config] Preserving the CRISocket information for the control-plane node
I1230 17:21:08. 33175 patchnode.go:30] [patchnode] Uploading the CRI Socket information "/var/run/dockershim.sock" to the Node API object "master01" as an annotation
[upload-certs] Skipping phase. Please see --upload-certs
[mark-control-plane] Marking the node master01 as control-plane by adding the labels: [node-role.kubernetes.io/master(deprecated) node-role.kubernetes.io/control-plane node.kubernetes.io/exclude-from-external-load-balancers]
[mark-control-plane] Marking the node master01 as control-plane by adding the taints [node-role.kubernetes.io/master:NoSchedule]
[bootstrap-token] Using token: 874v22.cuk7cmslc4j950y0
[bootstrap-token] Configuring bootstrap tokens, cluster-info ConfigMap, RBAC Roles
[bootstrap-token] configured RBAC rules to allow Node Bootstrap tokens to get nodes
[bootstrap-token] configured RBAC rules to allow Node Bootstrap tokens to post CSRs in order for nodes to get long term certificate credentials
[bootstrap-token] configured RBAC rules to allow the csrapprover controller automatically approve CSRs from a Node Bootstrap Token
[bootstrap-token] configured RBAC rules to allow certificate rotation for all node client certificates in the cluster
[bootstrap-token] Creating the "cluster-info" ConfigMap in the "kube-public" namespace
I1230 17:21:09. 33175 clusterinfo.go:45] [bootstrap-token] loading admin kubeconfig
I1230 17:21:09. 33175 clusterinfo.go:56] [bootstrap-token] copying the cluster from admin.conf to the bootstrap kubeconfig
I1230 17:21:09. 33175 clusterinfo.go:68] [bootstrap-token] creating/updating ConfigMap in kube-public namespace
I1230 17:21:09. 33175 clusterinfo.go:82] creating the RBAC rules for exposing the cluster-info ConfigMap in the kube-public namespace
I1230 17:21:09. 33175 kubeletfinalize.go:88] [kubelet-finalize] Assuming that kubelet client certificate rotation is enabled: found "/var/lib/kubelet/pki/kubelet-client-current.pem"
[kubelet-finalize] Updating "/etc/kubernetes/kubelet.conf" to point to a rotatable kubelet client certificate and key
I1230 17:21:09. 33175 kubeletfinalize.go:132] [kubelet-finalize] Restarting the kubelet to enable client certificate rotation
[addons] Applied essential addon: CoreDNS
I1230 17:21:09. 33175 request.go:600] Waited for 138.76319ms due to client-side throttling, not priority and fairness, request: POST:https://192.168.80.200:6443/apis/rbac.authorization.k8s.io/v1/namespaces/kube-system/rolebindings?timeout=10s
[addons] Applied essential addon: kube-proxyYour Kubernetes control-plane has initialized successfully!
To start using your cluster, you need to run the following as a regular user:
mkdir -p $HOME/.kube
sudo cp -i /etc/kubernetes/admin.conf $HOME/.kube/config
sudo chown $(id -u):$(id -g) $HOME/.kube/configAlternatively, if you are the root user, you can run:
export KUBECONFIG=/etc/kubernetes/admin.conf
You should now deploy a pod network to the cluster.
Run "kubectl apply -f [podnetwork].yaml" with one of the options listed at:
https://kubernetes.io/docs/concepts/cluster-administration/addons/Then you can join any number of worker nodes by running the following on each as root:
kubeadm join 192.168.80.200:6443 --token 874v22.cuk7cmslc4j950y0 \
--discovery-token-ca-cert-hash sha256:fb7763cda54e9a3fc012c1f0b88fbce7de08d92c9164f49d4fb
[root@master01 member]#
7. 集群应用客户端管理集群文件准备
mkdir -p $HOME/.kube
sudo cp -i /etc/kubernetes/admin.conf $HOME/.kube/config
sudo chown $(id -u):$(id -g) $HOME/.kube/configexport KUBECONFIG=/etc/kubernetes/admin.conf
8 集群网络来配置
使用calico插件
使用calico部署集群网络
安装参考网址:About Calico | Calico Documentation
8.1 calicao安装
1. 创建calico自定义类型命令
kubectl create -f https://raw.githubusercontent.com/projectcalico/calico/v3.27.0/manifests/tigera-operator.yaml
2. 配置calico的核心资源配置文件
# This section includes base Calico installation configuration.
# For more information, see: https://docs.tigera.io/calico/latest/reference/installation/api#operator.tigera.io/v1.Installation
apiVersion: operator.tigera.io/v1
kind: Installation
metadata:
name: default
spec:
# Configures Calico networking.
calicoNetwork:
# Note: The ipPools section cannot be modified post-install.
ipPools:
- blockSize: 26#这个需要改成你自己的iip
cidr: 10.244.0.0/16
encapsulation: VXLANCrossSubnet
natOutgoing: Enabled
nodeSelector: all()---
# This section configures the Calico API server.
# For more information, see: https://docs.tigera.io/calico/latest/reference/installation/api#operator.tigera.io/v1.APIServer
apiVersion: operator.tigera.io/v1
kind: APIServer
metadata:
name: default
spec: {}
3. 执行命令
kubectl apply -f custom-resources.yaml
4. 检查是否安装成功
已经全部运行
# kubectl get pods -n calico-system
NAME READY STATUS RESTARTS AGE
calico-kube-controllers-666bb9949-dzp68 1/1 Running 0 11m
calico-node-jhcf4 1/1 Running 4 11m
calico-typha-68b96d8d9c-7qfq7 1/1 Running 2 11m
8.2 calico 客户端安装
查看添加权限后文件
# ls /usr/bin/calicoctl
/usr/bin/calicoctl查看calicoctl版本
# calicoctl version
Client Version: v3.21.4
Git commit: 220d04c94
Cluster Version: v3.21.4
Cluster Type: typha,kdd,k8s,operator,bgp,kubeadm
通过~/.kube/config连接kubernetes集群,查看已运行节点
# DATASTORE_TYPE=kubernetes KUBECONFIG=~/.kube/config calicoctl get nodes
NAME
master01
9. 集群工作节点添加
要使用你初始化master节点最下面的命令
在master节点上执行,检查网络节点是否添加成功
DATASTORE_TYPE=kubernetes KUBECONFIG=~/.kube/config calicoctl get nodes
[root@master01 calico]# DATASTORE_TYPE=kubernetes KUBECONFIG=~/.kube/config calicoctl get nodes
NAME
master01
worker01
worker02
10. 检查集群可用性
查看所有的节点
[root@master01 ~]# kubectl get nodes
NAME STATUS ROLES AGE VERSION
master01 Ready control-plane,master 169m v1.21.0
worker01 Ready <none> 28m v1.21.0
worker02 Ready <none> 28m v1.21.0
查看集群健康情况,理想状态
[root@master01 ~]# kubectl get cs
NAME STATUS MESSAGE ERROR
controller-manager Healthy ok
scheduler Healthy ok
etcd-0 Healthy {"health":"true"}
有问题的情况
[root@master01 calico]# kubectl get cs
Warning: v1 ComponentStatus is deprecated in v1.19+
NAME STATUS MESSAGE ERROR
controller-manager Unhealthy Get "http://127.0.0.1:10252/healthz": dial tcp 127.0.0.1:10252: connect: connection refused
scheduler Unhealthy Get "http://127.0.0.1:10251/healthz": dial tcp 127.0.0.1:10251: connect: connection refused
etcd-0 Healthy {"health":"true"}
查看kubernetes集群pod运行情况
[root@master01 ~]# kubectl get pods -n kube-system
NAME READY STATUS RESTARTS AGE
coredns-558bd4d5db-4jbdv 1/1 Running 1 169m
coredns-558bd4d5db-pw5x5 1/1 Running 1 169m
etcd-master01 1/1 Running 1 170m
kube-apiserver-master01 1/1 Running 1 170m
kube-controller-manager-master01 1/1 Running 14 170m
kube-proxy-kbx4z 1/1 Running 1 169m
kube-proxy-rgtr8 1/1 Running 0 29m
kube-proxy-sq9xv 1/1 Running 0 29m
kube-scheduler-master01 1/1 Running 11 170m
再次查看calico-system命名空间中pod运行情况。
[root@master01 ~]# kubectl get pods -n calico-system
NAME READY STATUS RESTARTS AGE
calico-kube-controllers-666bb9949-dzp68 1/1 Running 3 70m
calico-node-jhcf4 1/1 Running 15 70m
calico-node-jxq9p 1/1 Running 0 30m
calico-node-kf78q 1/1 Running 0 30m
calico-typha-68b96d8d9c-7qfq7 1/1 Running 13 70m
calico-typha-68b96d8d9c-wz2zj 1/1 Running 0 20m
kubectl get pods -n calico-system -o wide
10.
版权声明:本文内容由互联网用户自发贡献,该文观点仅代表作者本人。本站仅提供信息存储空间服务,不拥有所有权,不承担相关法律责任。如发现本站有涉嫌侵权/违法违规的内容,请联系我们,一经查实,本站将立刻删除。
如需转载请保留出处:https://51itzy.com/kjqy/48763.html