
1.安装Ubuntu22.04系统
2.配置网络源
安装好系统后,依次执行以下命令修改网络源:
GPT plus 代充 只需 145# 1.备份网络源配置文件 sudo cp /etc/apt/sources.list /etc/apt/sources.list.bak # 2.修改网络源配置文件 sudo tee /etc/apt/sources.list <<-‘EOF’ deb https://mirrors.aliyun.com/ubuntu/ jammy main restricted universe multiverse deb-src https://mirrors.aliyun.com/ubuntu/ jammy main restricted universe multiverse deb https://mirrors.aliyun.com/ubuntu/ jammy-security main restricted universe multiverse deb-src https://mirrors.aliyun.com/ubuntu/ jammy-security main restricted universe multiverse deb https://mirrors.aliyun.com/ubuntu/ jammy-updates main restricted universe multiverse deb-src https://mirrors.aliyun.com/ubuntu/ jammy-updates main restricted universe multiverse deb https://mirrors.aliyun.com/ubuntu/ jammy-backports main restricted universe multiverse deb-src https://mirrors.aliyun.com/ubuntu/ jammy-backports main restricted universe multiverse EOF # 3.导入22.04官方公钥(无弃用警告) sudo curl -fsSL https://keyserver.ubuntu.com/pks/lookup?op=get&search=0x3B4FE6ACC0B21F32 | sudo gpg –dearmor -o /etc/apt/trusted.gpg.d/ubuntu-official.gpg # 4.清理缓存并更新 sudo apt clean && sudo apt update
3.安装ssh服务支持远程部署(可不安装)
依次执行以下命令安装ssh服务:
# 1.安装SSH服务(必须装这个才能被其他设备远程连接) sudo apt install openssh-server -y # 2.立即启动SSH服务 sudo systemctl start ssh # 3.设置开机自启(重启电脑也能用) sudo systemctl enable ssh # 4.查看SSH状态 sudo systemctl status ssh 4.获取api-key
5.安装配置Openclaw
执行命令:curl -fsSL https://openclaw.ai/install.sh | bash
这个安装脚本会自动帮你搞定所有依赖(Node.js、Git……),然后直接进入交互式配置向导。
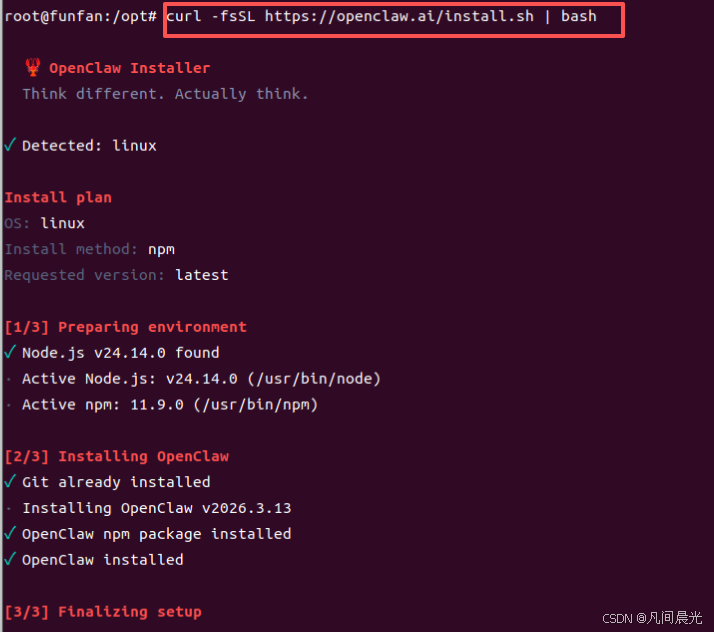
配置选择如下:
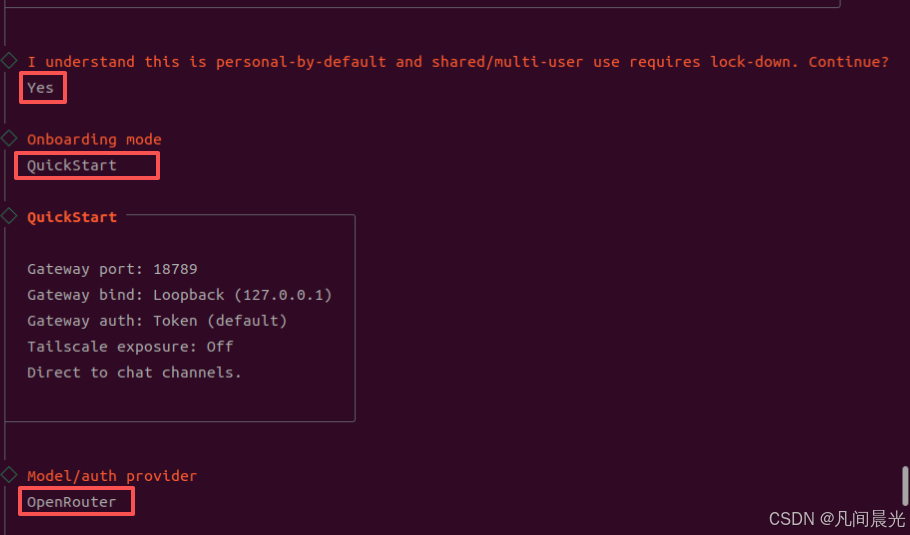

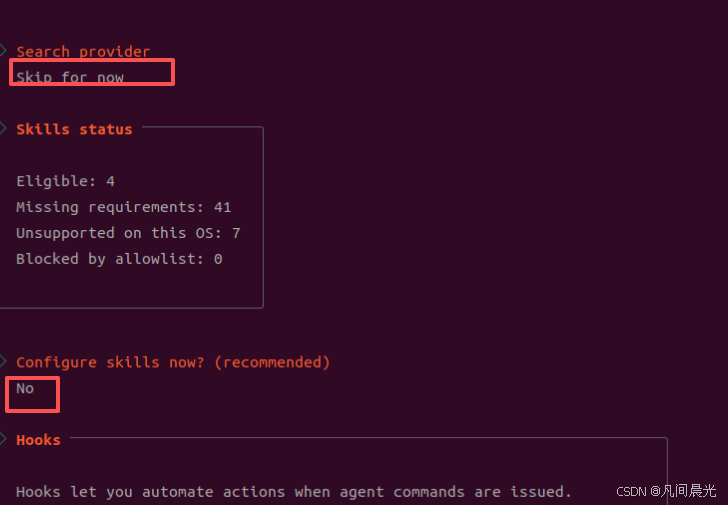
剩下的几个配置先跳过
6.安装过程中的问题解决
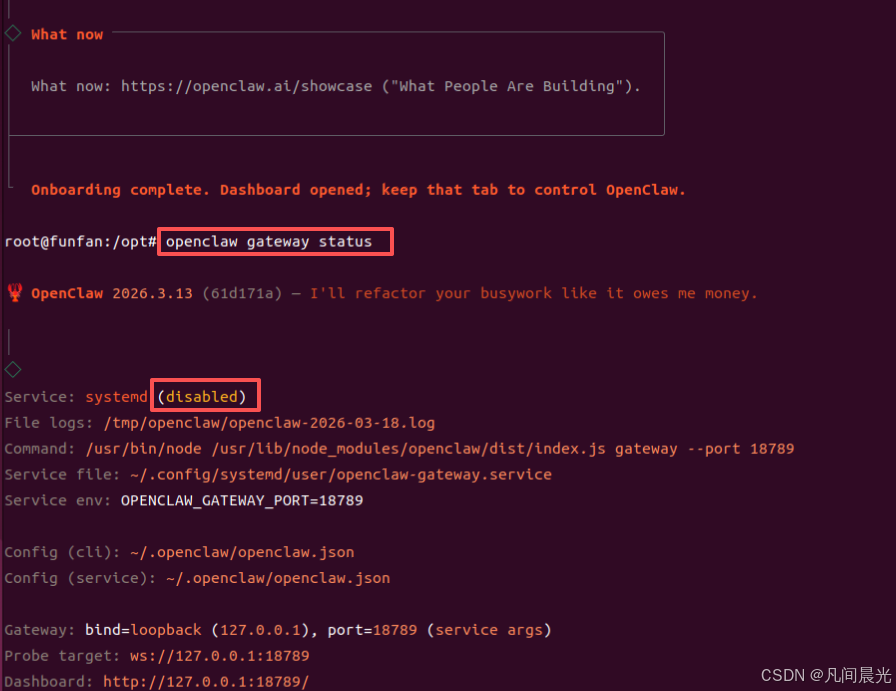
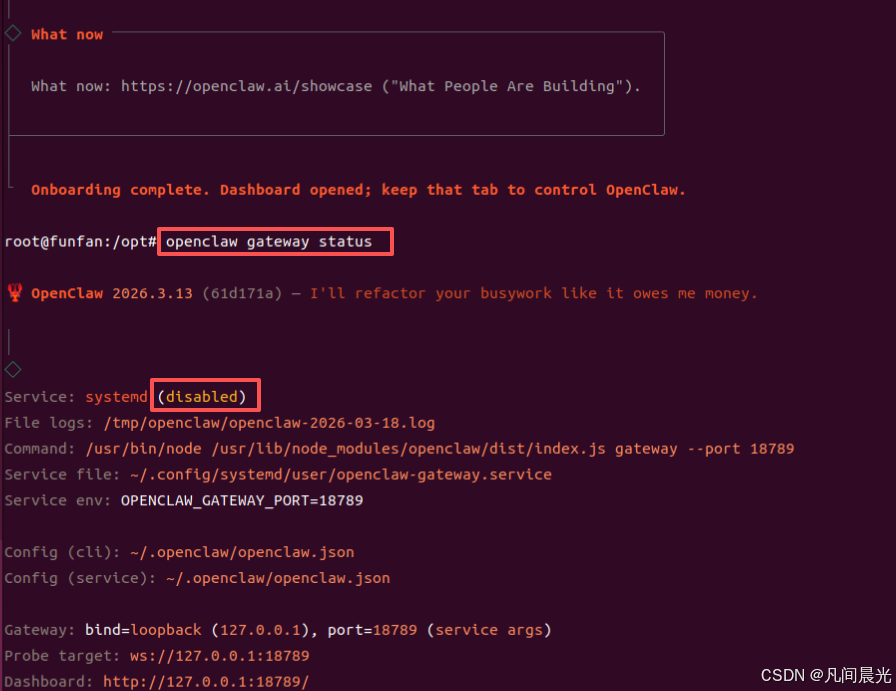
执行openclaw gateway status检查openclaw状态为未启动
修复步骤如下:
1.解决 Gateway service not installed
1.执行openclaw gateway install安装 OpenClaw 系统服务()
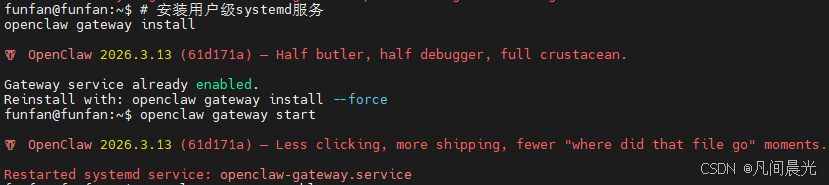
2.执行openclaw gateway start启动网关服务
3.执行openclaw gateway enable设置开机自启
4.执行openclaw gateway status查看网关状态
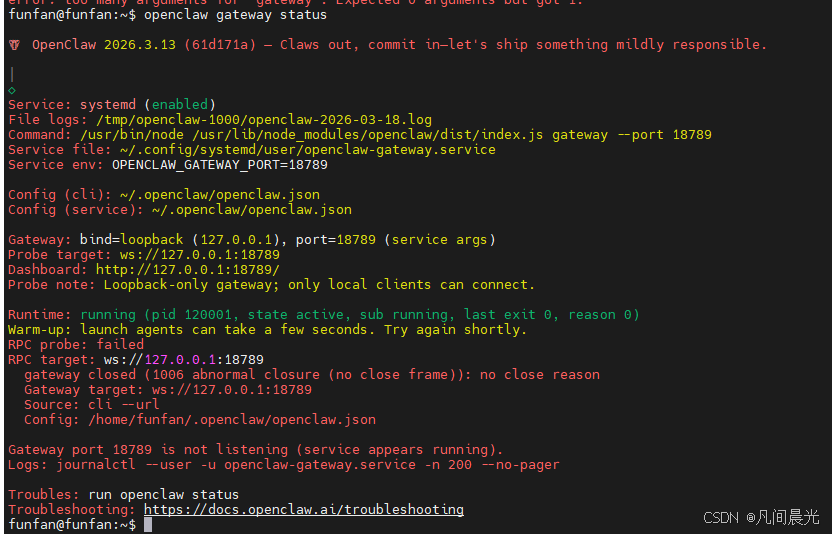
2.解决RPC probe: failed(Gateway start blocked: set gateway.mode=local (current: unset) or pass –allow-unconfigured.)
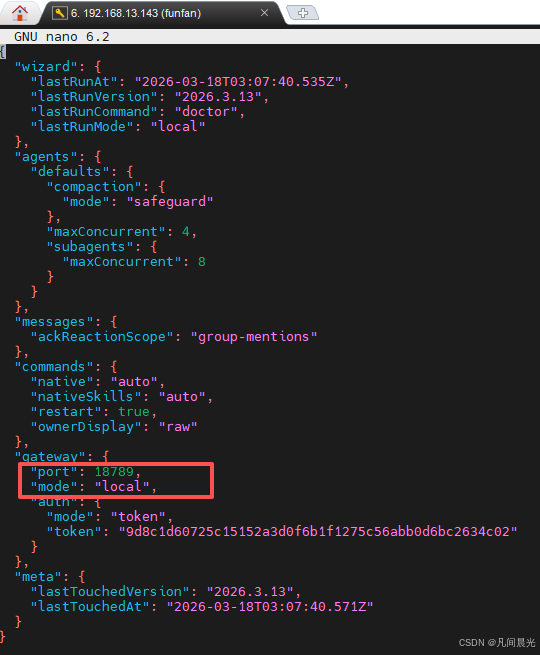
GPT plus 代充 只需 145# 1.编辑配置文件 nano ~/.openclaw/openclaw.json # 2.添加/修改 gateway.mode 字段(注意:记住这里的token配置,后面登录会用到) { “gateway”: {
"port": 18789, "mode": "local" "auth": { // 这里只放认证相关字段,如 "token" 或 "password" } }, // 其他配置... } # 3.保存文件并退出编辑器(nano 中按 Ctrl+O 保存,Ctrl+X 退出)。 # 4.重启 gateway 服务 systemctl –user restart openclaw-gateway # 5.检查服务状态 openclaw gateway status
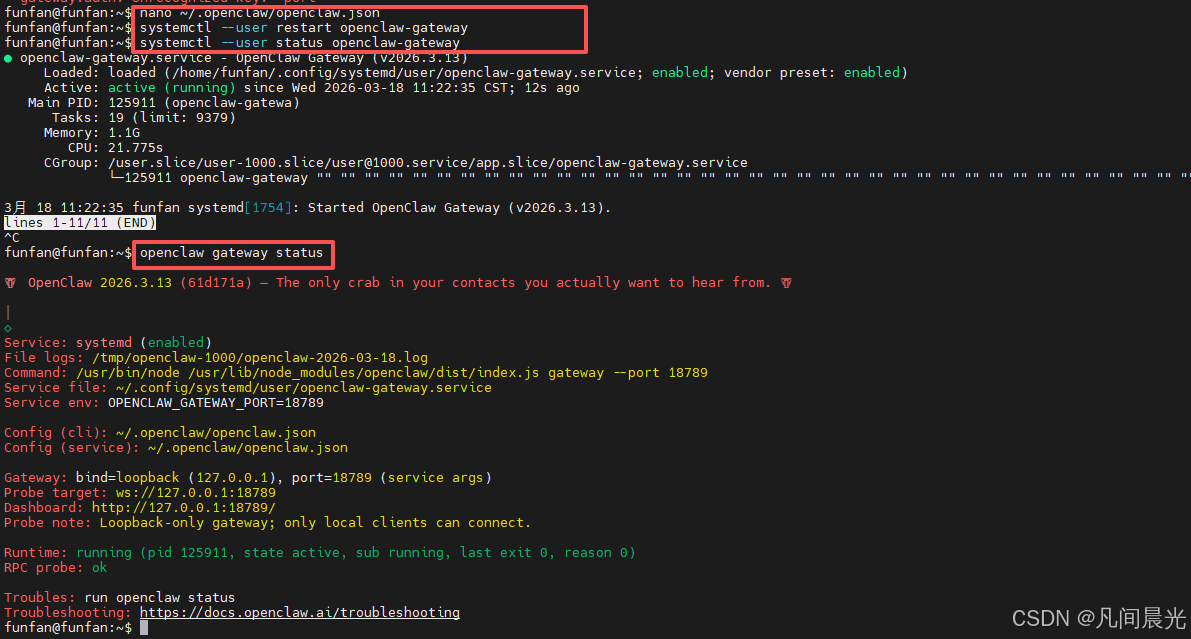
可以看到Openclaw正常启动了。
3.解决unauthorized: gateway token mismatch (open the dashboard URL and paste the token in Control UI settings)
执行openclaw dashboard –no-open生成包含正确令牌的仪表盘 URL
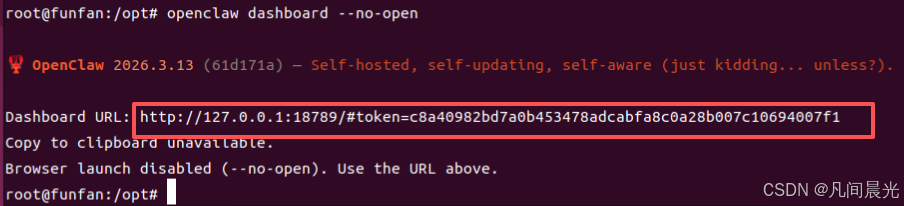
打开url地址,看到以下页面:
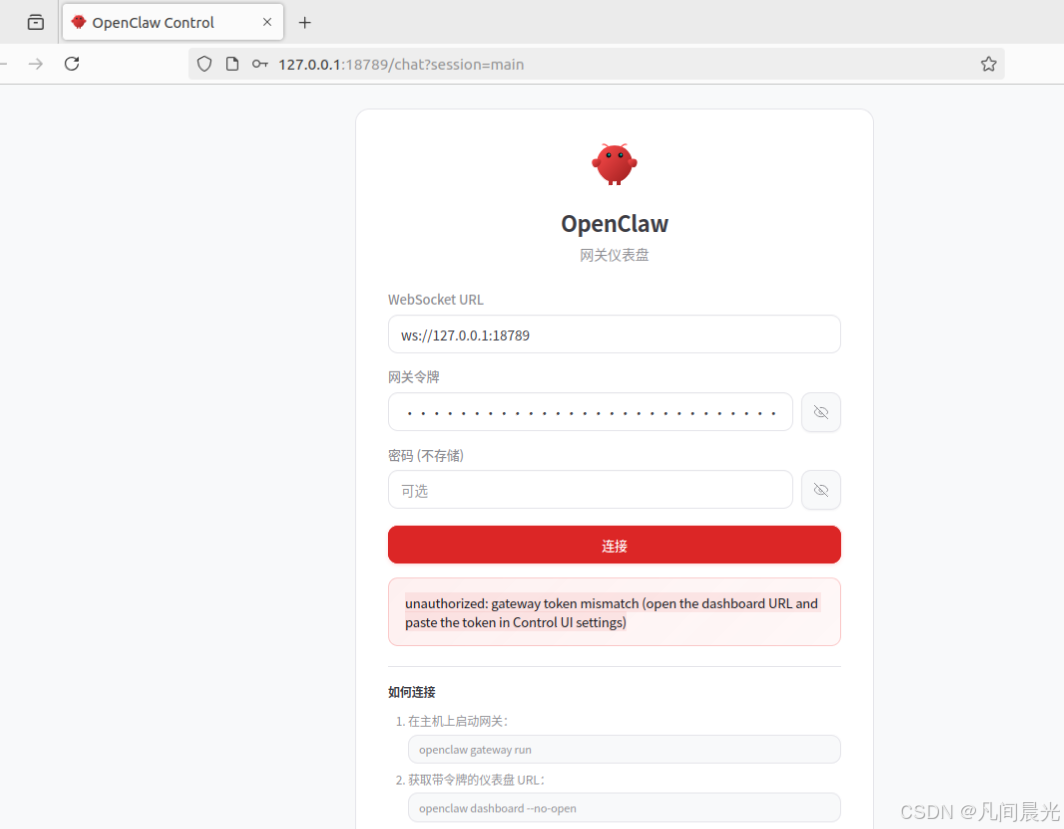
连接失败时,执行nano ~/.openclaw/openclaw.json,将其中的token配置项的值复制到网关令牌中即可连接成功
7. 配置模型和apikey
执行nano ~/.openclaw/openclaw.json编辑openclaw配置文件。可以参考以下配置(替换自己想用的模型和apikey)
GPT plus 代充 只需 145{ “meta”: {
"lastTouchedVersion": "2026.3.13", "lastTouchedAt": "2026-03-18T08:49:59.347Z" }, “wizard”: {
GPT plus 代充 只需 145"lastRunAt": "2026-03-18T08:37:25.135Z", "lastRunVersion": "2026.3.13", "lastRunCommand": "configure", "lastRunMode": "local"
}, “auth”: {
"profiles": { "openrouter:default": { "provider": "openrouter", "mode": "api_key" } } }, “env”: { “OPENROUTER_API_KEY”: “sk-orxxxxxxxxxxxxxxxxxxxxxxxxxx替换为自己的apikey” }, “agents”: {
GPT plus 代充 只需 145"defaults": { "model": { "primary": "openrouter/auto", "fallbacks": [ "openrouter/stepfun/step-3.5-flash:free", "openrouter/qwen/qwen3-coder:free", "openrouter/z-ai/glm-4.5-air:free" ] }, "models": { "openrouter/auto": { "alias": "OpenRouter" }, "openrouter/stepfun/step-3.5-flash:free": {}, "openrouter/qwen/qwen3-coder:free": {}, "openrouter/z-ai/glm-4.5-air:free": {} }, "compaction": { "mode": "safeguard" }, "maxConcurrent": 4, "subagents": { "maxConcurrent": 8 } }, "list": [ { "id": "main", "model": "openrouter/stepfun/step-3.5-flash:free" } ]
}, “messages”: {
"ackReactionScope": "group-mentions" }, “commands”: {
GPT plus 代充 只需 145"native": "auto", "nativeSkills": "auto", "restart": true, "ownerDisplay": "raw"
}, “gateway”: {
"port": 18789, "mode": "local", "auth": { "mode": "token", "token": "" } } }
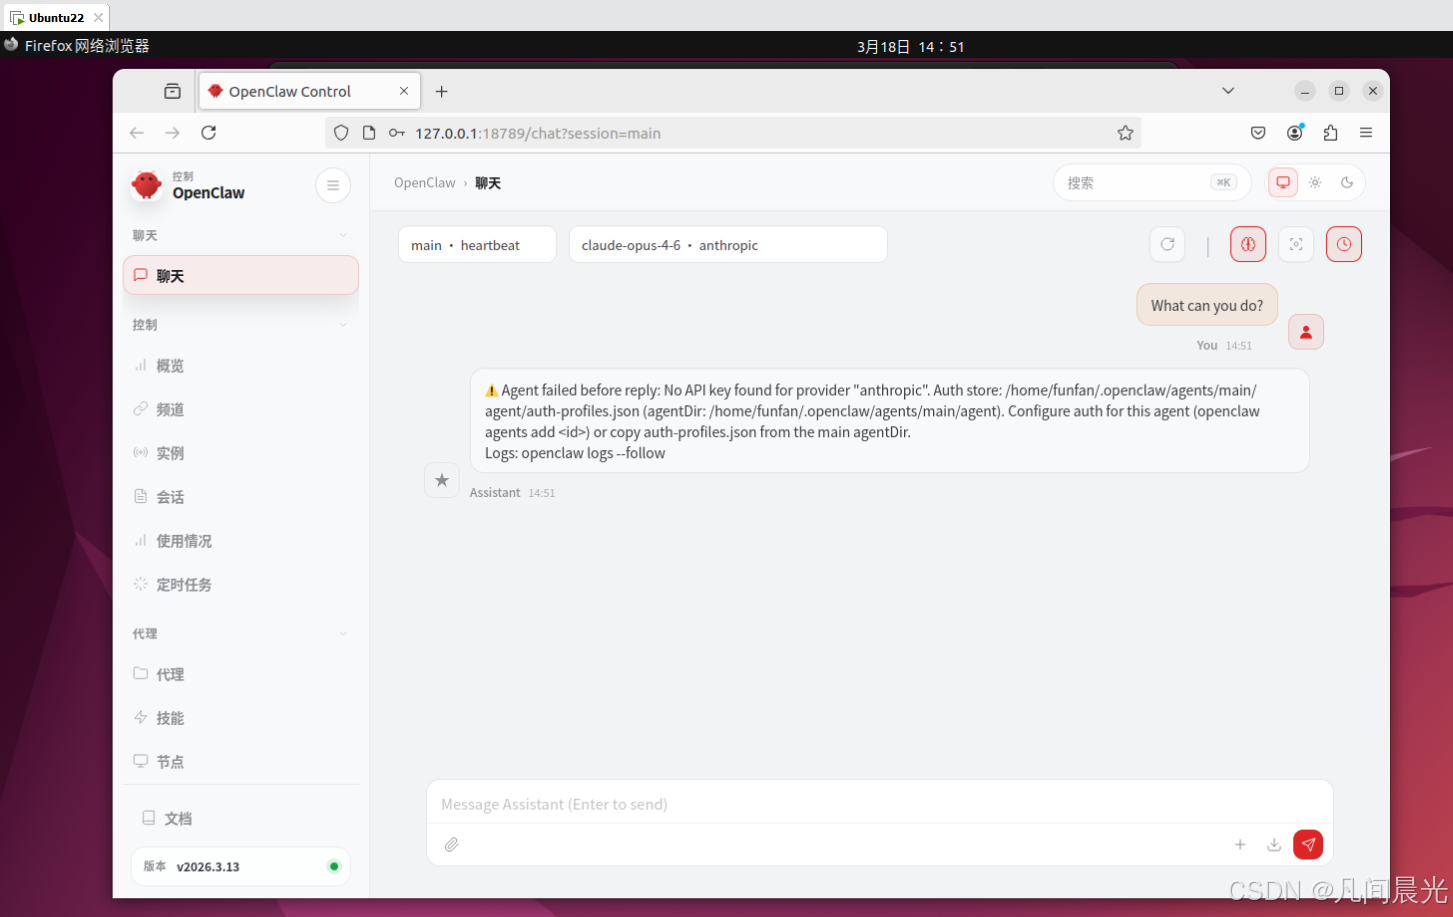
8.打开网页与龙虾交流
9.配置skills
未完待续
10.Openclaw实用案例
未完待续
版权声明:本文内容由互联网用户自发贡献,该文观点仅代表作者本人。本站仅提供信息存储空间服务,不拥有所有权,不承担相关法律责任。如发现本站有涉嫌侵权/违法违规的内容,请联系我们,一经查实,本站将立刻删除。
如需转载请保留出处:https://51itzy.com/kjqy/245044.html