
前言
就目前网上一些关于react中使用reflux的教程,坑比较多,解释的也不够通俗,代码也非常零碎,结合自己踩过的坑,给大家举个简单易懂的react中使用reflux的基础例子,希望对vue转react或者只接触过react的朋友一点帮助。
安装reflux
我自己采用的是ts + react的开发模式,不管你采用的是js还是ts,我这里不做赘述,假定你的开发环境全都安装好了,接下来我们需要安装reflux插件,执行命令:
npm install reflux

Reflux是根据React的flux创建的单向数据流类库。
Reflux的单向数据流模式主要由actions和stores组成。例如,当页面中数组litems新增item元素时,会调用actions的某个方法(如addItem(item)),并将新的数据当参数传递进去,通过事件机制,数据会传递到stroes中,stores更新数据并反馈到页面中。
就像这样:

创建actions
import Reflux from "reflux" //这里创建一个动作(函数)集,类似于消息发布者(通俗点叫动作发布者),下面制定了三个动作(函数) //在store中会对这三个动作进行监听 var actions = Reflux.createActions(["getAllItems","addItem","deleteItem"]); export default actions; 讯享网
创建stores
讯享网import Reflux from "reflux" //引入需要监听的actions import actions from "../actions/mainpageActions" var store = Reflux.createStore({
    //这是全局变量,随便定义 items: ["1", "2", "3"], //将actions加入监听队列 listenables: [actions], //这是actions中的"getAllItems","addItem","deleteItem"动作(函数)对应的监听回调函数 //调用"getAllItems","addItem","deleteItem"时实际上调用的是下面对应的回调函数,这些回调函数类似于动作接收者和动作执行者 //这里的命名有严格的规定,on表示监听,getAllItems要对应onGetAllItems命名 onGetAllItems:function(){
    console.log("onGetAllItems:", this.items); }, onAddItem: function (item) {
    this.items.push(item); console.log("onAddItem:", this.items); }, onDeleteItem:function () {
    this.items.pop(); console.log("onDeleteItem:", this.items); } }); export default store;
展示页面
// @ts-ignore import React, {
   Component} from 'react' import {
   View, Text} from '@tarojs/components' import {
   AtNavBar, AtToast, AtBadge, AtIcon, AtButton, AtInput} from "taro-ui" import Reflux from 'reflux' import actions from "../../actions/mainpageActions" import store from "../../store/mainpageStore" var Taro = require("@tarojs/taro") interface isState {
    pageTitle: string, num: any } export default class MainPage extends Component <any, isState> {
    constructor(props: any) {
    super(props) this.state = {
    pageTitle: '收件箱', num: "", } } componentWillMount() {
    } componentDidMount() {
    //页面挂载完成时发布获取所有元素的动作,然后回调函数执行获取所有元素的操作 actions.getAllItems() } componentWillUnmount() {
    } componentDidShow() {
    } componentDidHide() {
    } //添加元素动作,表示发布添加动作,然后回调函数会执行添加动作,并将更新后的数据保存在store中 add() {
    actions.addItem(this.state.num); } //删除最后一个元素,原理同上 delete() {
    actions.deleteItem(); } numChange(value: number) {
    this.setState({
    num: value }) } render() {
    return ( <View> <AtNavBar color='red' title={
   this.state.pageTitle} rightFirstIconType='bullet-list' /> <AtInput name='password' title='元素 :' type='number' placeholder='在此输入数字' value={
   this.state.num} onChange={
   this.numChange.bind(this)} /> <AtButton type="primary" onClick={
   this.add.bind(this)}>加一个元素</AtButton> <AtButton type="primary" onClick={
   this.delete.bind(this)}>减一个元素</AtButton> </View> ) } }
效果图
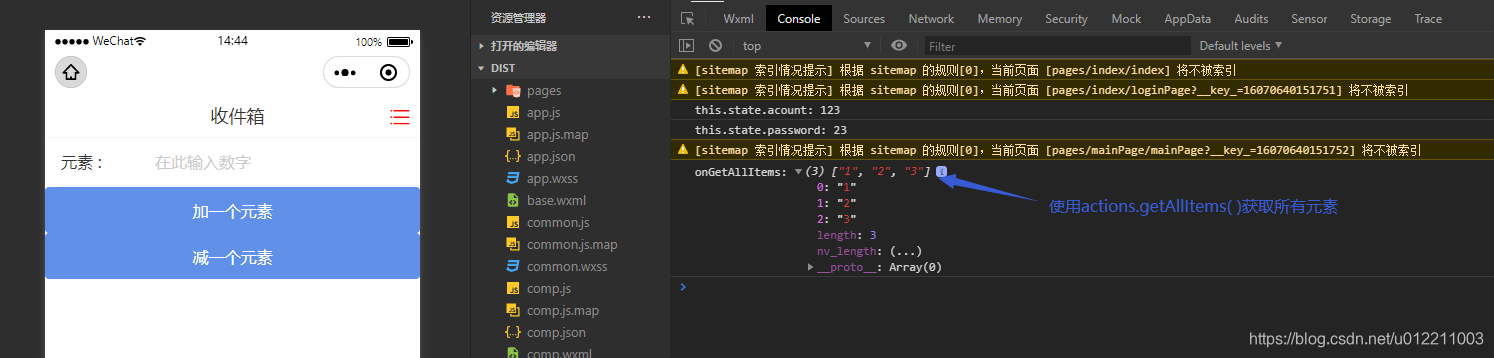
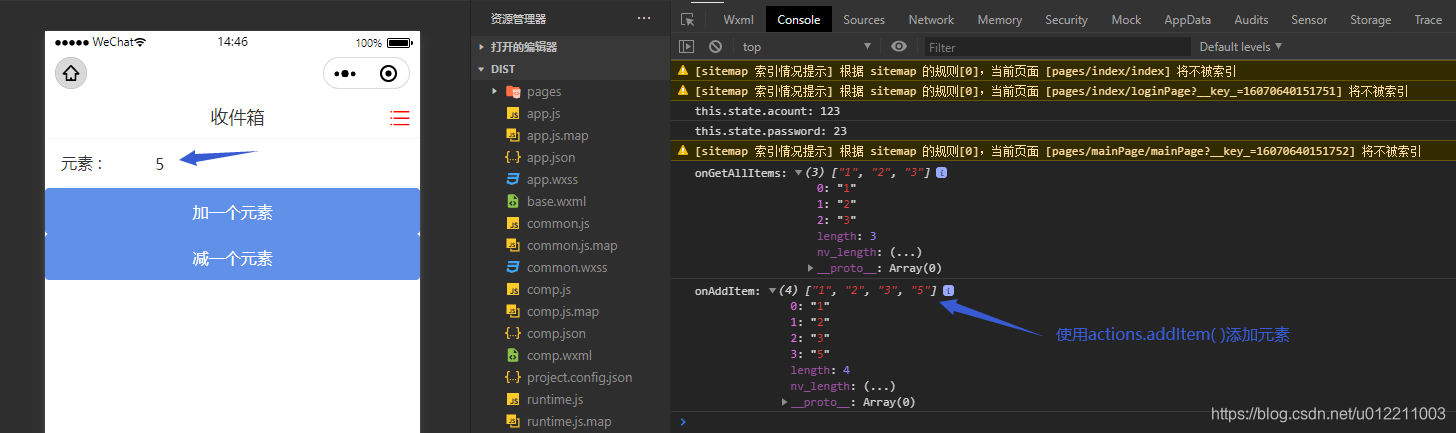
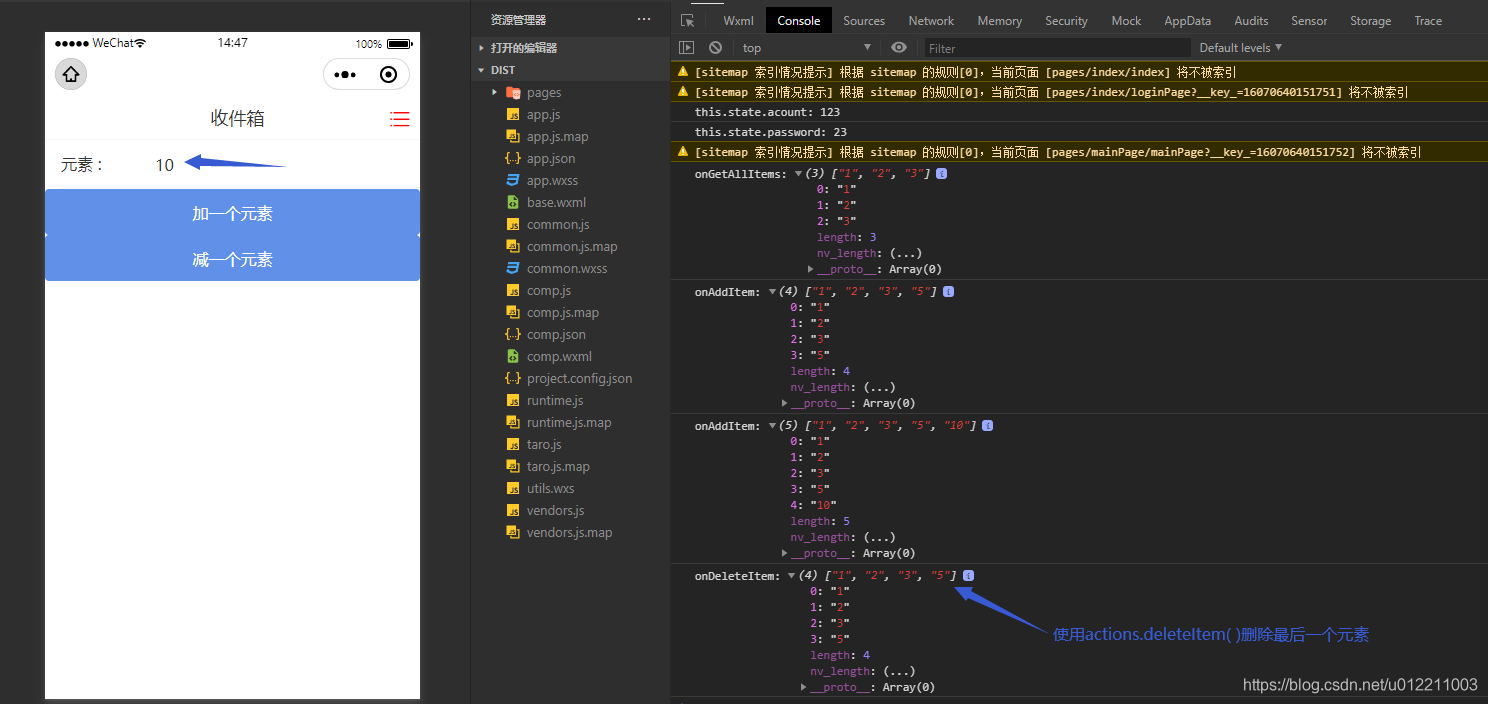
我就不在页面显示了,直接在后台打印出来,如果要在页面显示只要在state中定义一个变量接收这个全局变量数据即可。
获取所有元素:
添加元素:
删除最后一个元素:
版权声明:本文内容由互联网用户自发贡献,该文观点仅代表作者本人。本站仅提供信息存储空间服务,不拥有所有权,不承担相关法律责任。如发现本站有涉嫌侵权/违法违规的内容,请联系我们,一经查实,本站将立刻删除。
如需转载请保留出处:https://51itzy.com/kjqy/74413.html