
1、PE盘安装img到SSD
固件网址:https://firmware.koolshare.cn/
工具:DiskImage
软路由Openwrt固件:openwrt-koolshare-mod-v2.33-r12074-007caa48d1-x86-64-uefi-gpt-squashfs.img.gz
2、配置成非NUC模式或者配置网桥脚本

讯享网
如上图所示,根据实际硬件选择,发现配置成正常模式后,就不需要再NUC模式手动配置网桥,跳过以下步骤即可。
脚本:/usr/share/jerry/config_network
#! /bin/sh echo "config network" ifconfig eth1 up ifconfig eth2 up ifconfig eth3 up ifconfig eth4 up ifconfig eth5 up brctl addif br-lan eth1 brctl addif br-lan eth2 brctl addif br-lan eth3 brctl addif br-lan eth4 brctl addif br-lan eth5 brctl setfd br-lan 0 brctl br-lan promisc 讯享网
脚本自启动:
/etc/init.d/user_cfg_network
#!/bin/sh /etc/rc.common
START=99
start() {
sh /usr/share/jerry/config_network
}
执行/etc/init.d/user_cfg_network enable
3、配置/etc/config/network and PPPOE自动拨号
讯享网config interface 'loopback' option ifname 'lo' option proto 'static' option ipaddr '127.0.0.1' option netmask '255.0.0.0' config globals 'globals' option ula_prefix 'fd98:61ea:fc87::/48' option multipath 'disable' option mptcp_path_manager 'fullmesh' option mptcp_scheduler 'default' option mptcp_checksum '0' option mptcp_debug '0' option mptcp_syn_retries '5' option mptcp_fullmesh_num_subflows '1' option mptcp_fullmesh_create_on_err '1' option mptcp_ndiffports_num_subflows '1' option congestion 'cubic' config interface 'lan' option type 'bridge' option ifname 'eth1' option proto 'static' option ipaddr '192.168.3.1' option netmask '255.255.255.0' option ip6assign '60' config interface 'wan' option ifname 'eth0' option proto 'pppoe' option username 'username' option password 'passwd' option macaddr '00:E2:69:03:3A:D7'
最后一行mac地址一定要加上!!!
3、更换源
备份配置文件
cp /etc/opkg/distfeeds.conf /etc/opkg/distfeeds.conf.bak vim /etc/opkg/distfeeds.conf package需要对应内核版本 更改为如下:

讯享网src/gz openwrt_koolshare_mod_core https://downloads.openwrt.org/snapshots/targets/x86/64/kmods/4.19.75-1-9480b4e94b32c66a0573bd9ef6b88783/ src/gz openwrt_koolshare_mod_base https://mirrors.cloud.tencent.com/openwrt/snapshots/packages/x86_64/base src/gz openwrt_koolshare_mod_luci https://mirrors.cloud.tencent.com/openwrt/snapshots/packages/x86_64/luci src/gz openwrt_koolshare_mod_packages https://mirrors.cloud.tencent.com/openwrt/snapshots/packages/x86_64/packages src/gz openwrt_koolshare_mod_routing https://mirrors.cloud.tencent.com/openwrt/snapshots/packages/x86_64/routing src/gz openwrt_koolshare_mod_telephony https://mirrors.cloud.tencent.com/openwrt/snapshots/packages/x86_64/telephony
安装必要软件包
opkg update
opkg install git lrzsz
4、手动挂载磁盘剩余空间
经测试使用酷软的硬盘助手无效
1、分区命令fdisk /dev/sda
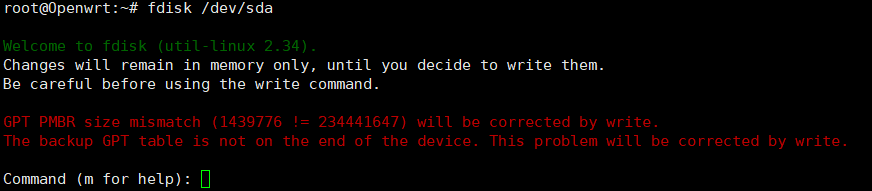
2、打印分区表(命令)p
显示磁盘的容量、型号、扇区、格式,和已有分区

3、新建分区(命令)n
默认参数,连续三次回车

4、将分区表写入磁盘并退出(命令)w

5、格式化分区mkfs.ext4 /dev/sda5

6、进入Openwrt控制台
系统->挂载点->添加

7、保存并应用,命令df -h查看结果

5、添加samba用户
6、mwan3
系统-启动项,禁用,为多线多拨,这里用不着,所以关闭
7、N2N
详见下一篇博文,交叉编译N2N-LEDE Koolshare x86_64
版权声明:本文内容由互联网用户自发贡献,该文观点仅代表作者本人。本站仅提供信息存储空间服务,不拥有所有权,不承担相关法律责任。如发现本站有涉嫌侵权/违法违规的内容,请联系我们,一经查实,本站将立刻删除。
如需转载请保留出处:https://51itzy.com/kjqy/47591.html