
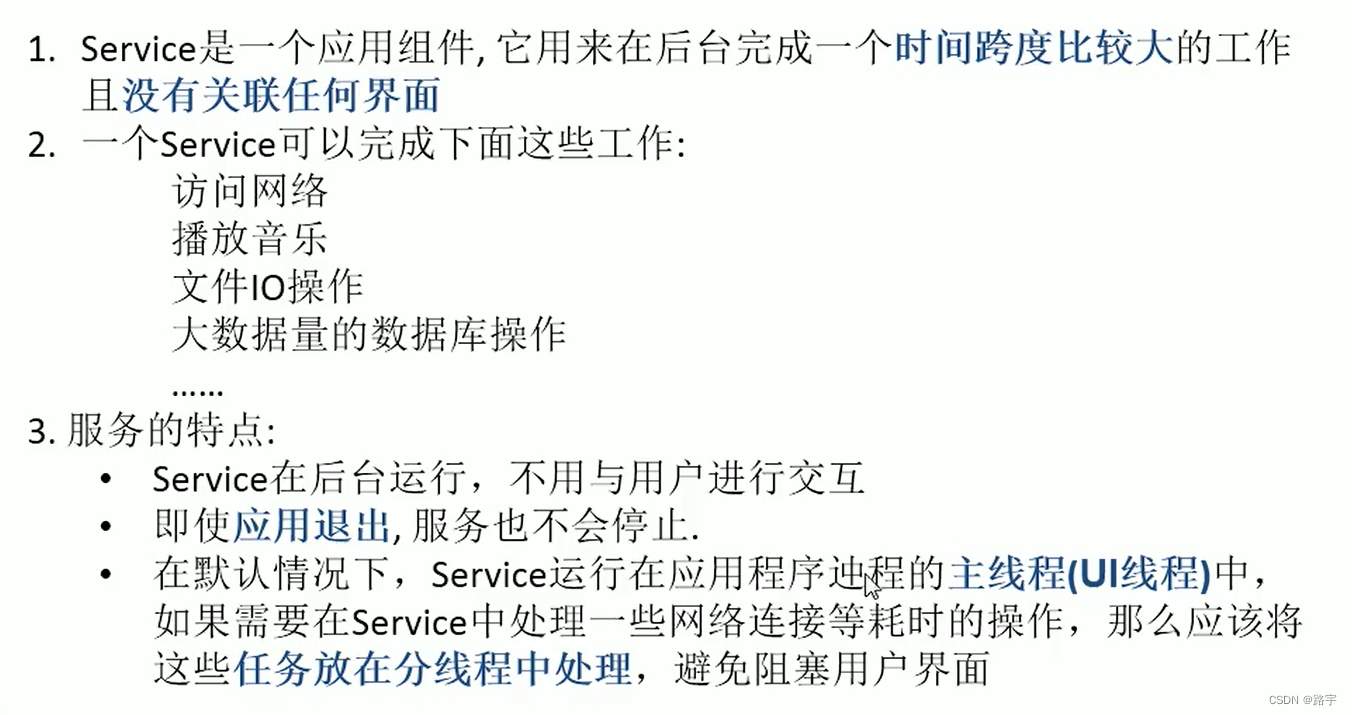
一、Service的简介
Service是Android中实现程序后台运行的解决方案,适用于去执行那些不需要和用户交互而且还要求长期运行的任务。Service是android 系统中的四大组件之一(Activity、Service、BroadcastReceiver、ContentProvider),它跟Activity的级别差不多,但不能自己运行只能后台运行,并且可以和其他组件进行交互。
讯享网
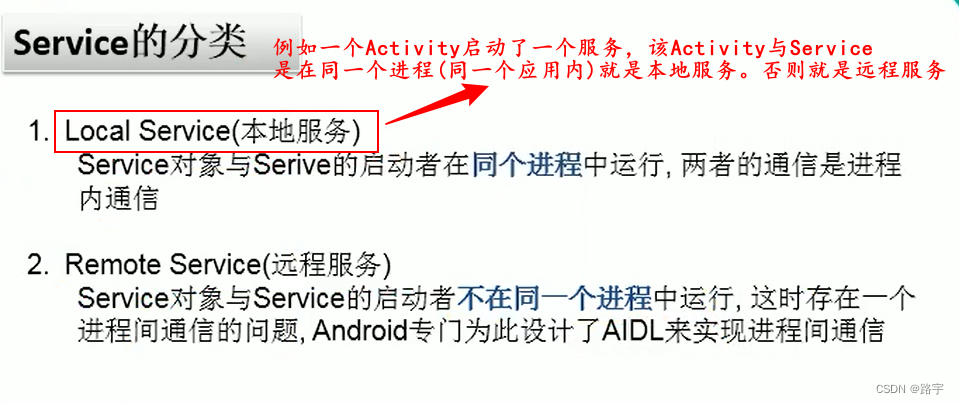
Service的分类如下
1、Service的生命周期 官方说明图
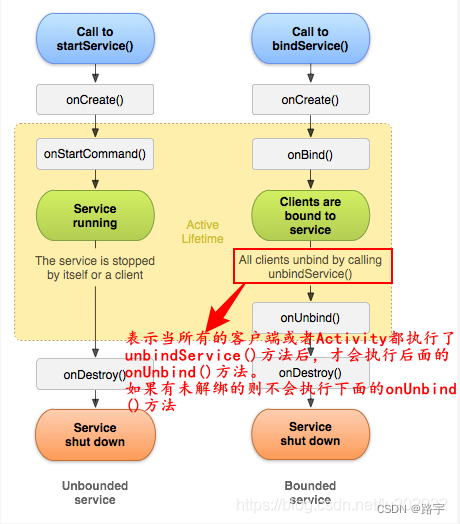
启动服务
生命周期为:onCreate->onStartCommand->onDestory
1.startService开启服务时,生命周期为
执行onCreate->onStartCommand(Android2.0之后用的都是这个,Android2.0以前是onStart)
stopService关闭服务时,执行onDestory
绑定服务
unbindSerivce解绑服务时,执行onUnBind->onDestory
1、首先创建MyService类继承Service
/ * 自定义本地服务 */ /* 1.startService() 第一次调用:-->构造方法()-->onCreate()-->onStartCommand() 后面再调用:-->onStartCommand() stopService():-->onDestroy() 2.bindService(Intent service, ServiceConnection conn,int flags) 第一次调用:-->构造方法()-->onCreate()-->onBind()-->onServiceConnected() unbindService(connection):-(只有当前Activity与Service连接)->onUnbind()-->onDestroy() */ public class MyService extends Service {
    public MyService() {
    Log.i("TAG", "MyService() "); } @Override public void onCreate() {
    super.onCreate(); Log.i("TAG", "MyService onCreate() "); } @Override public int onStartCommand(Intent intent, int flags, int startId) {
    Log.i("TAG", "MyService onStartCommand() "); return super.onStartCommand(intent, flags, startId); } @Override public void onDestroy() {
    super.onDestroy(); Log.i("TAG", "MyService onDestroy() "); } @Nullable @Override public IBinder onBind(Intent intent) {
    Log.i("TAG", "onBind() "); return new Binder(); } @Override public boolean onUnbind(Intent intent) {
    Log.i("TAG", "onUnbind() "); return super.onUnbind(intent); } }
讯享网
2、在AndroidManifest.xml中进行注册
讯享网<service android:name=".local.MyService" />
3、ServiceActivity代码如下
public class ServiceActivity extends AppCompatActivity {
private ServiceConnection connection; @Override protected void onCreate(Bundle savedInstanceState) {
super.onCreate(savedInstanceState); setContentView(R.layout.activity_service); } //启动服务 public void startMyService(View view) {
Intent intent = new Intent(this, MyService.class); startService(intent); Toast.makeText(this, "启动服务!", Toast.LENGTH_SHORT).show(); } public void stopMyService(View view) {
Intent intent = new Intent(this, MyService.class); stopService(intent); Toast.makeText(this, "停止服务!", Toast.LENGTH_SHORT).show(); } //绑定服务 public void bindMyService(View view) {
Intent intent = new Intent(this, MyService.class); //创建连接对象 if (connection == null) {
connection = new ServiceConnection() {
//当与服务连接上之后,回调该方法 @Override public void onServiceConnected(ComponentName name, IBinder service) {
Log.i("TAG", "onServiceConnected()"); } //这个方法始终不会执行,不用管它 @Override public void onServiceDisconnected(ComponentName name) {
Log.i("TAG", "onServiceDisconnected()"); } }; //绑定service //BIND_AUTO_CREATE表示:创建之后自动绑定 bindService(intent, connection, BIND_AUTO_CREATE); Toast.makeText(this, "绑定服务!", Toast.LENGTH_SHORT).show(); } else {
Toast.makeText(this, "已经绑定服务!", Toast.LENGTH_SHORT).show(); } } //解绑服务 public void unBindMyService(View view) {
if (connection != null) {
unbindService(connection); connection = null; Toast.makeText(this, "解绑服务!", Toast.LENGTH_SHORT).show(); } else {
Toast.makeText(this, "还未进行绑定服务!", Toast.LENGTH_SHORT).show(); } } //当绑定服务后,不解绑服务直接退出,会有错误抛出,所以需要在 //当前Activity页面销毁的时候,执行解绑服务 @Override protected void onDestroy() {
super.onDestroy(); if (connection != null) {
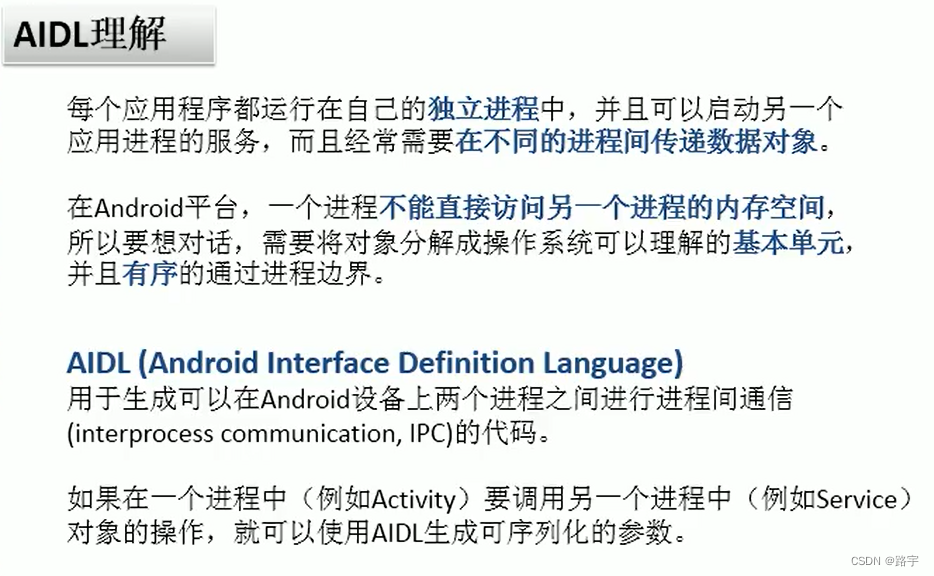
unbindService(connection); connection = null; } } } 二、远程服务AIDL的讲解

AIDL的理解
具体需求如下
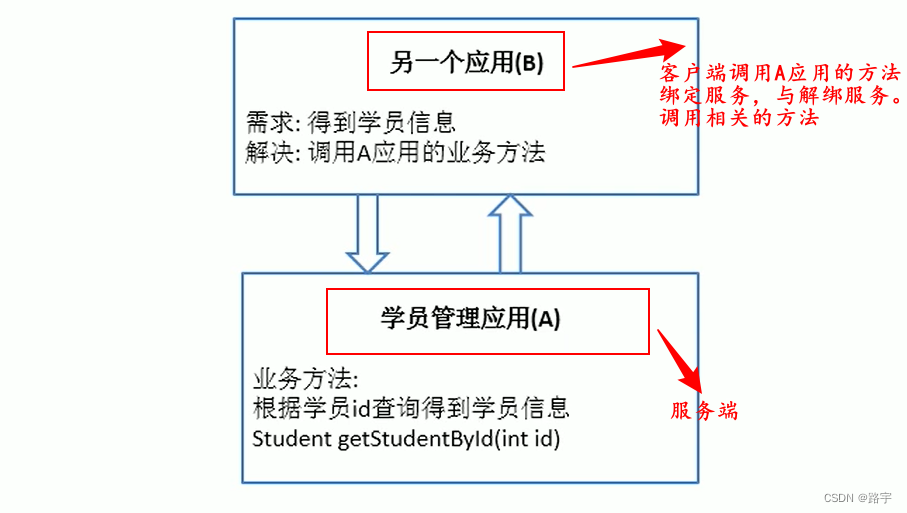
具体步骤如下,首先写服务端应用
1、创建远程服务类MyRemoteService继承Service类
讯享网/ * 远程服务 */ public class MyRemoteService extends Service {
    @Nullable @Override public IBinder onBind(Intent intent) {
    Log.i("TAG", "onBind() "); return new StudentService(); } @Override public boolean onUnbind(Intent intent) {
    Log.i("TAG", "onUnbind() "); return super.onUnbind(intent); } //处理Student相关的业务逻辑类 class StudentService extends IStudentService.Stub {
    @Override public Student getStudentById(int id) throws RemoteException {
    Log.i("TAG", "Service getStudentById() " + id); return new Student(id, "Tom", 10000); } } }
2、在AndroidManifest.xml文件中注册该服务
<service android:name=".local.MyRemoteService"> <intent-filter> <action android:name="local.MyRemoteService.Action" /> </intent-filter> </service> 3、创建Student类,并实现Parcelable接口,传递对象
讯享网public class Student implements Parcelable {
    private int id; private String name; private double price; public Student(int id, String name, double price) {
    this.id = id; this.name = name; this.price = price; } protected Student(Parcel in) {
    id = in.readInt(); name = in.readString(); price = in.readDouble(); } public static final Creator<Student> CREATOR = new Creator<Student>() {
    @Override public Student createFromParcel(Parcel in) {
    Log.i("TAG", "解包createFromParcel()"); return new Student(in); } //返回一个指定大小的对象容器 @Override public Student[] newArray(int size) {
    return new Student[size]; } }; public int getId() {
    return id; } public void setId(int id) {
    this.id = id; } public String getName() {
    return name; } public void setName(String name) {
    this.name = name; } public double getPrice() {
    return price; } public void setPrice(double price) {
    this.price = price; } @Override public String toString() {
    return "Student{" + "id=" + id + ", name='" + name + '\'' + ", price=" + price + '}'; } @Override public int describeContents() {
    return 0; } @Override public void writeToParcel(Parcel dest, int flags) {
    Log.i("TAG", "打包 writeToParcel() "); dest.writeInt(id); dest.writeString(name); dest.writeDouble(price); } }
4、在src的main目录下,创建aidl文件默认会生成aidl文件夹。创建两个aidl文件,分别为
IStudentService.aidl
package com.example.customviewproject.entity; import com.example.customviewproject.entity.Student; interface IStudentService {
    Student getStudentById(int id); }
Student.aidl
讯享网// Student.aidl package com.example.customviewproject.entity; // Declare any non-default types here with import statements parcelable Student;
AIDL的一些规则如下

服务端创建好后,客户端将服务端的aidl文件和Student类,原封不动的拷贝到客户端应用,意思就是说路径不要变。
客户端的界面如下
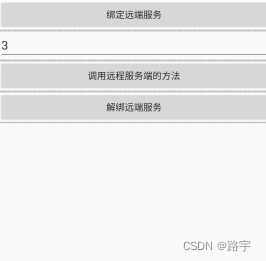
MainActivity中进行具体代码的编写,代码如下
public class MainActivity extends AppCompatActivity {
    private EditText edit_id; private ServiceConnection connection; private IStudentService iStudentService; @Override protected void onCreate(Bundle savedInstanceState) {
    super.onCreate(savedInstanceState); setContentView(R.layout.activity_main); edit_id = findViewById(R.id.edit_id); } //绑定远端服务 public void bindRemoteService(View view) {
    Intent intent = new Intent("local.MyRemoteService.Action"); intent.setPackage("com.example.customviewproject"); if (connection == null) {
    connection = new ServiceConnection() {
    @Override public void onServiceConnected(ComponentName componentName, IBinder iBinder) {
    Log.i("TAG", "onServiceConnected() "); iStudentService = IStudentService.Stub.asInterface(iBinder); } @Override public void onServiceDisconnected(ComponentName componentName) {
    } }; bindService(intent, connection, BIND_AUTO_CREATE); } else {
    Toast.makeText(this, "已经绑定远端服务!", Toast.LENGTH_SHORT).show(); } } //调用远程服务端的方法 public void callRemoteMethod(View view) {
    if (iStudentService != null) {
    int id = Integer.parseInt(edit_id.getText().toString()); try {
    Student student = iStudentService.getStudentById(id); Log.i("TAG", "callRemoteMethod() student.toString():" + student.toString()); } catch (RemoteException e) {
    e.printStackTrace(); } } } //解绑远端服务 public void UnbindService(View view) {
    if (connection != null) {
    unbindService(connection); connection = null; iStudentService = null; Toast.makeText(this, "解绑远端服务!", Toast.LENGTH_SHORT).show(); } else {
    Toast.makeText(this, "还未绑定远端服务!", Toast.LENGTH_SHORT).show(); } } }
当用户首次进入后,点击绑定远端服务按钮执行的流程依次为

点击调用远程服务端的按钮,执行的流程依次为

点击解绑远程服务按钮,执行的流程依次为

以上是Service讲解,有什么不当之处,可在评论区指正共同学习!
版权声明:本文内容由互联网用户自发贡献,该文观点仅代表作者本人。本站仅提供信息存储空间服务,不拥有所有权,不承担相关法律责任。如发现本站有涉嫌侵权/违法违规的内容,请联系我们,一经查实,本站将立刻删除。
如需转载请保留出处:https://51itzy.com/kjqy/35960.html