
关注:
1) 计算工具的通用与标准化
2) Ubuntu的简介:桌面版、服务器版
3) Ubuntu的使用:多系统的联网与共享
4) Ubuntu下常用编译器的安装
虚拟机上Ubuntu系统安装流程、更新及Phonopy安装:
1) 安装最新版的虚拟机;
2) 下载最新版Ubuntu的桌面版-Ubuntu-desk-iso;
3) 设置虚拟系统硬盘足够大>40G,默认安装;
4) 安装VM-tools;
5) 更新软件源后(如选择sohu源或163源等),执行sudo apt-get upgrade, sudo apt-get upgrade,sudo apt-get install openssh-server
6) 安装phonopy依赖包:
sudo apt-get install python-dev python-numpy
python-matplotlib python-yaml python-h5py
7) 解压tar xvfz phonopy-1.11.2.tar.gz;执行python setup.py install –user
虚拟系统之间拷贝数据,传递数据:
scp -r puh3-cmcm-150g xiaoqiu@192.168.156.141:/
参考网址:
https://www.ubuntu.com/download
http://forum.ubuntu.org.cn/
https://wiki.ubuntu.com/
Releases
http://wiki.ubuntu.org.cn/源列表
(一)Ubuntu的简介:桌面版、服务器版
https://zhidao.baidu.com/question/360411079874199732.html
不一样的地方还挺多。
(1)首先内核不一样,因为桌面版用户的硬件品种多样,所以桌面版的内核要支持更多的硬件,比如显卡,这个在服务器里就不怎么用得到,还有无线网卡之类的。
(2)另外,软件不一样,桌面版更多的是用来办公和娱乐,所以这方面软件很多,而服务器就不用。
其实linux系统很灵活,不像widows,服务器版就只能服务器,桌面版就只能个人用。
linux系统其实自己愿意折腾,桌面版和服务器版可以自己互换。或者是又当桌面版又能当服务器。
家用选桌面版,商用服务器,服务器版专门为长时间运行的服务器设计,桌面环境不好
(二) VMware虚拟ubuntu与主机数据共享
http://blog.sciencenet.cn/blog-685489-997435.html
通过Network方式实现主机与虚拟机共享任何文件的方法。
在虚拟机ubuntu左侧有“Network”,点击后出现下图
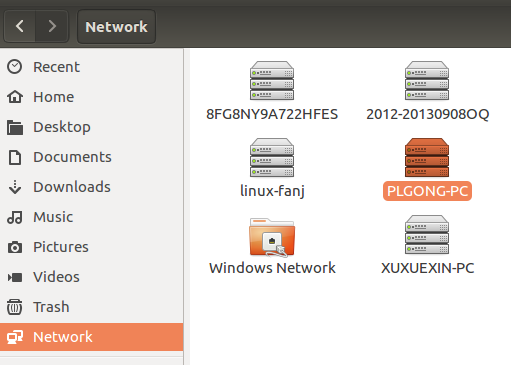
找到自己的win7主机名,登录后就可以访问主机任何文件,当然可以将win7里面的东西直接拖曳到ubuntu里面,反之亦然
如果你使用的是vmware , 设置虚拟机的联网方式为主机共享或者直接使用物理网络都是可以的。如果使用主机共享不行,可以试着在计算机—管理—-服务和应用—-服务 中找到VMware NAT Service 右键进行重启即可以了
https://zhidao.baidu.com/question/88698197.html
虚拟机安装ubuntu上网的设置方法,分为主机有线上网和无线上网,下面我们来分别介绍。
一、主机有线上网
1.首先完全关闭ubuntu;
2.打开虚拟机,找到unbutu,右键“设置”,如图所示。

3.然后点“网络适配器”,如图所示。

4.如果你没有设置过,默认的是NAT,点击确定即可。
PS.由于我是主机连接的wifi,这里就不演示了,是可以上网的。
二、主机无线上网
1.同样是首先完全关闭ubuntu;

2.还是找到unbutu,右键“设置”找到“网络适配器”,如图所示。

3.然后勾选“桥接模式”确定即可,如图所示;

4.最后打开ubuntu,看看是不是已经可以上网了。
以上就再Vmware中,ubuntu上网的设置方法,小编的Vmware版本是11.0.0.54843,ubuntu版本是14.04.1 LTS,其他版本设置上网方法也差不多
问题方案:
Vmware 配置Ubuntu网络NAT模式,原先可以正常上网。今天打开来后,发现桌面网络连接是灰色的,连接不上网络了。
输入命令行ifconfig之后,发现ip设置信息都没了:
最终发现是系统服务 nat服务跟dhcp服务 没有开启。
解决方案:
打开系统服务Win+R 运行 services.msc ,找到 VMware NAT Service 和VMnetDHCP 启动这两个服务,并设为自动。
(三) ubuntu16.04命令行模式和图形界面的切换
http://jingyan.baidu.com/article/22a299b5cf32a79e19376a1d.html
在ubuntu16.04系统中,默认启动是以图形化界面启动的,所以当我们开启电脑时我们进入的是“普通用户”的“图形化界面模式”。
最简单的切换方法,利用快捷键来切换:
从图形化界面切换到命令行模式,我们可以通过按ALT+CTRL+F1、—–、F6,为什么是F1、—–、F6,因为在Linux中一般有F1到F6多个命令行字符终端,也就是说我们可以同时打开最多6个命令行界面。
这里ubuntu16.04就可以切换这多个界面,这是按ALT+CTRL+F2的界面,命令行有提示tty2。
当然图形化界面也为我们提供了命令行终端,如果你不习惯纯命令模式,你也可以使用命令符终端,快捷键ALT+CTRL+T即可调出终端,在这里我们同样可以进行命令行模式编辑。
还有一种就是使用虚拟终端,点击左下角ubuntu图标,搜索“xterm”,找到“xterm”应用程序,双击打开就可以弹出一个类似于命令行模式的虚拟终端。
从命令行模式切换回图形化界面模式,我们可以通过按ALT+CTRL+F7,其他键无效哦,别误以为F7以后的都可以返回哦。
切换系统登陆时的模式,如果想改成命令符模式启动,研究了很久,提供的都是更改系统配置,打开终端,输入命令:sudo gedit /etc/default/grub,即用gedit打开这个路径下的grub文件。
http://blog.csdn.net/wo__shi_sha_bi/article/details/
在VMware中安装Ubuntu16.04桌面版,想登陆后直接进入命令行界面,运行如下命令:
方法一(推荐,亲测可行):
开机后进入命令行界面:sudo systemctl set-default multi-user.target
开机后进入图形界面:sudo systemctl set-default graphical.target
http://atztogo.github.io/phonopy/virtualmachine.html
Boot the virtual machine and login to the ubuntu linux with the user name and password.
The terminal emulator is opened by ‘Alt’ + ‘Ctrl’ + ‘T’ or from the top-left corner seraching ‘terminal’. What has to do first is update the system by:
Some packages are to be installed for convenience:
‘vim’, ‘zsh’, ‘screen’, ‘aptitude’ may be also useful. Then install phonopy following Download and install.
(四)apt-get命令工作原理及软件源的选择
http://blog.csdn.net/npy_lp/article/details/
在Ubuntu操作系统中,使用apt-get命令安装所需的开发软件非常方便,但也有不少时候由于链接不上软件源而不能正常安装,于是很多人都会想到使用sudo apt-get update命令来更新软件源,而恰恰这时屋漏偏逢连夜雨,更新命令也不能正常工作,出现大量“Failed to fetch”的错误。
其实,解决这个问题十分简单,只要设置妥当DNS服务器即可,如电信网络的设置如下所示。
xiaoqiu@ubuntu:/software/phonopy-1.11.2\( sudo vi /etc/resolv.conf</span></p><p><span style="font-size:16px;">xiaoqiu@ubuntu:~/software/phonopy-1.11.2\) cat /etc/resolv.conf
# Dynamic resolv.conf(5) file for glibc resolver(3) generated by resolvconf(8)
# DO NOT EDIT THIS FILE BY HAND – YOUR CHANGES WILL BE OVERWRITTEN
nameserver 127.0.1.1
search localdomain
http://www.cnblogs.com/kulin/archive/2012/07/31/2616490.html
APT-GET工作原理简介

/etc/apt/sources.list
deb http://mirrors.163.com/ubuntu/ precise main restricted universe multiverse网易的
/var/lib/apt/lists
说apt是倾向于下载的一个管理工具,其安装过程主要是由dpkg来完成。
xiaoqiu@ubuntu:/software/phonopy-1.11.2$ cat /etc/apt/sources.list
# deb cdrom:[Ubuntu 13.04 Raring Ringtail - Release amd64 ()]/ raring main restricted
# See http://help.ubuntu.com/community/UpgradeNotes for how to upgrade to
# newer versions of the distribution.
deb http://ftp.sjtu.edu.cn/ubuntu/ raring main restricted 【上海交通】
deb-src http://ftp.sjtu.edu.cn/ubuntu/ raring main restricted
Major bug fix updates produced after the final release of the
distribution.
deb http://ftp.sjtu.edu.cn/ubuntu/ raring-updates main restricted
deb-src http://ftp.sjtu.edu.cn/ubuntu/ raring-updates main restricted
N.B. software from this repository is ENTIRELY UNSUPPORTED by the Ubuntu
team. Also, please note that software in universe WILL NOT receive any
review or updates from the Ubuntu security team.
deb http://ftp.sjtu.edu.cn/ubuntu/ raring universe
deb-src http://ftp.sjtu.edu.cn/ubuntu/ raring universe
deb http://ftp.sjtu.edu.cn/ubuntu/ raring-updates universe
deb-src http://ftp.sjtu.edu.cn/ubuntu/ raring-updates universe
N.B. software from this repository is ENTIRELY UNSUPPORTED by the Ubuntu
team, and may not be under a free licence. Please satisfy yourself as to
your rights to use the software. Also, please note that software in
multiverse WILL NOT receive any review or updates from the Ubuntu
security team.
deb http://ftp.sjtu.edu.cn/ubuntu/ raring multiverse
deb-src http://ftp.sjtu.edu.cn/ubuntu/ raring multiverse
deb http://ftp.sjtu.edu.cn/ubuntu/ raring-updates multiverse
deb-src http://ftp.sjtu.edu.cn/ubuntu/ raring-updates multiverse
N.B. software from this repository may not have been tested as
extensively as that contained in the main release, although it includes
newer versions of some applications which may provide useful features.
Also, please note that software in backports WILL NOT receive any review
or updates from the Ubuntu security team.
deb http://ftp.sjtu.edu.cn/ubuntu/ raring-backports main restricted universe multiverse
deb-src http://ftp.sjtu.edu.cn/ubuntu/ raring-backports main restricted universe multiverse
deb http://ftp.sjtu.edu.cn/ubuntu/ raring-security main restricted
deb-src http://ftp.sjtu.edu.cn/ubuntu/ raring-security main restricted
deb http://ftp.sjtu.edu.cn/ubuntu/ raring-security universe
deb-src http://ftp.sjtu.edu.cn/ubuntu/ raring-security universe
deb http://ftp.sjtu.edu.cn/ubuntu/ raring-security multiverse
deb-src http://ftp.sjtu.edu.cn/ubuntu/ raring-security multiverse
Uncomment the following two lines to add software from Canonical‘s
’partner‘ repository.
This software is not part of Ubuntu, but is offered by Canonical and the
respective vendors as a service to Ubuntu users.
# deb http://archive.canonical.com/ubuntu raring partner
# deb-src http://archive.canonical.com/ubuntu raring partner
This software is not part of Ubuntu, but is offered by third-party
developers who want to ship their latest software.
deb http://extras.ubuntu.com/ubuntu raring main
deb-src http://extras.ubuntu.com/ubuntu raring main
xiaoqiu@ubuntu:/software/phonopy-1.11.2\( </span><strong><span style="color:#ff0000;font-size:16px;">ls /var/lib/apt/lists</span></strong></p><p><span style="font-size:16px;">archive.ubuntu.com_ubuntu_dists_raring_main_binary-amd64_Packages</span></p><p><span style="font-size:16px;">archive.ubuntu.com_ubuntu_dists_raring_main_i18n_Translation-en</span></p><p><span style="font-size:16px;">archive.ubuntu.com_ubuntu_dists_raring_Release</span></p><p><span style="font-size:16px;">archive.ubuntu.com_ubuntu_dists_raring_Release.gpg</span></p><p><span style="font-size:16px;">archive.ubuntu.com_ubuntu_dists_raring_restricted_binary-amd64_Packages</span></p><p><span style="font-size:16px;">archive.ubuntu.com_ubuntu_dists_raring_restricted_i18n_Translation-en</span></p><p><span style="font-size:16px;">lock</span></p><p><span style="font-size:16px;">partial</span></p><p><span style="font-size:16px;">Ubuntu%2013.04%20%5fRaring%20Ringtail%5f%20-%20Release%20amd64%20(20130424)_dists_raring_main_binary-amd64_Packages</span></p><p><span style="font-size:16px;">Ubuntu%2013.04%20%5fRaring%20Ringtail%5f%20-%20Release%20amd64%20(20130424)_dists_raring_main_binary-i386_Packages</span></p><p><span style="font-size:16px;">Ubuntu%2013.04%20%5fRaring%20Ringtail%5f%20-%20Release%20amd64%20(20130424)_dists_raring_Release</span></p><p><span style="font-size:16px;">Ubuntu%2013.04%20%5fRaring%20Ringtail%5f%20-%20Release%20amd64%20(20130424)_dists_raring_Release.gpg</span></p><p><span style="font-size:16px;">Ubuntu%2013.04%20%5fRaring%20Ringtail%5f%20-%20Release%20amd64%20(20130424)_dists_raring_restricted_binary-amd64_Packages</span></p><p><span style="font-size:16px;">Ubuntu%2013.04%20%5fRaring%20Ringtail%5f%20-%20Release%20amd64%20(20130424)_dists_raring_restricted_binary-i386_Packages</span></p><p><span style="color:#333333;font-family:'microsoft yahei', 微软雅黑, arial, 宋体, sans-serif;line-height:28px;text-align:justify;background-color:#ffffff;"><br /></span><br /></p><p><span style="font-size:16px;">http://www.linuxidc.com/Linux/2014-04/100476.htm</span></p><p><span style="font-size:16px;"> <br /></span></p><p style="color:#333333;font-family:tahoma, 宋体;font-size:14px;line-height:17.92px;text-align:justify;background-color:#fafafc;"><span style="color:#ff0000;font-size:16px;">先说一说图形界面修改源,将默认的源修改成一个比较快的源。</span></p><p style="color:#333333;font-family:tahoma, 宋体;font-size:14px;line-height:17.92px;text-align:justify;background-color:#fafafc;"><span style="font-size:16px;">图形界面就可以修改,打开Ubuntu软件中心,如下图,点击顶部面板的“编辑”然后就可看到“软件源”选项了:</span></p><p><br /></p><p><span style="color:#333333;font-family:tahoma, 宋体;line-height:17.92px;text-align:justify;font-size:16px;background-color:#fafafc;">点击之后填出软件源编辑窗口,如图按钮,选择“其他站点”</span><br /></p><p><span style="color:#333333;font-family:tahoma, 宋体;font-size:14px;line-height:17.92px;text-align:justify;background-color:#fafafc;"><br /></span></p><p><span style="color:#333333;font-family:tahoma, 宋体;font-size:14px;line-height:17.92px;text-align:justify;background-color:#fafafc;"><span style="color:#333333;font-family:tahoma, 宋体;line-height:17.92px;text-align:justify;font-size:16px;background-color:#fafafc;">可以选择**服务器,也可以直接在左边选择一个你觉得快的源,我比较喜欢163.com</span><br /></span></p><p><br /></p><p style="color:#333333;font-family:tahoma, 宋体;font-size:14px;line-height:17.92px;text-align:justify;background-color:#fafafc;"><span style="font-size:16px;">如图选择服务器,弹出授权,输入你的系统密码就可以了。</span></p><p style="color:#333333;font-family:tahoma, 宋体;font-size:14px;line-height:17.92px;text-align:justify;background-color:#fafafc;"><span style="color:#ff0000;font-size:16px;">在终端修改和替换源的方法</span></p><p style="color:#333333;font-family:tahoma, 宋体;font-size:14px;line-height:17.92px;text-align:justify;background-color:#fafafc;"><span style="font-size:16px;">打开终端,输入命令:</span></p><p style="color:#333333;font-family:tahoma, 宋体;font-size:14px;line-height:17.92px;text-align:justify;background-color:#fafafc;"><span style="font-size:16px;">sudo gedit /etc/apt/sources.list</span></p><p><span style="color:#333333;font-family:tahoma, 宋体;font-size:14px;line-height:17.92px;text-align:justify;background-color:#fafafc;"><span style="color:#333333;font-family:tahoma, 宋体;font-size:14px;line-height:17.92px;text-align:justify;background-color:#fafafc;"><br /></span></span></p><p><span style="color:#333333;font-family:tahoma, 宋体;font-size:14px;line-height:17.92px;text-align:justify;background-color:#fafafc;"><span style="color:#333333;font-family:tahoma, 宋体;font-size:14px;line-height:17.92px;text-align:justify;background-color:#fafafc;"></span></span></p><p style="color:#333333;font-family:tahoma, 宋体;font-size:14px;line-height:17.92px;text-align:justify;background-color:#fafafc;"><span style="font-size:16px;">在终端必须小心点,在这之前最后备份一下,如图输入密码之后会填出窗口:</span></p><p style="color:#333333;font-family:tahoma, 宋体;font-size:14px;line-height:17.92px;text-align:justify;background-color:#fafafc;"><span style="font-size:16px;">你需要在网上搜索一下关于适合你的Ubuntu版本的源,直接添加都后也可以。</span></p><p style="color:#333333;font-family:tahoma, 宋体;font-size:14px;line-height:17.92px;text-align:justify;background-color:#fafafc;"><span style="font-size:16px;">然后更新:</span></p><p style="color:#333333;font-family:tahoma, 宋体;font-size:14px;line-height:17.92px;text-align:justify;background-color:#fafafc;"><span style="color:#ff0000;font-size:16px;">sudo get-apt update</span></p><p style="color:#333333;font-family:tahoma, 宋体;font-size:14px;line-height:17.92px;text-align:justify;background-color:#fafafc;"><span style="font-size:16px;">如果还是不明白可以看这篇文章:给Ubuntu 13.04换源 软件源、更新源 </span><span style="font-size:16px;">http://www.linuxidc.com/Linux/2013-05/83902.htm</span></p><p style="color:#333333;font-family:tahoma, 宋体;font-size:14px;line-height:17.92px;text-align:justify;background-color:#fafafc;"><span style="color:#ff0000;font-size:16px;">更多Ubuntu相关信息见</span><span style="color:#0000ff;font-size:16px;">Ubuntu</span><span style="color:#ff0000;font-size:16px;"> 专题页面 </span><span style="color:#0000ff;"><span style="color:#0000ff;font-size:16px;">http://www.linuxidc.com/topicnews.aspx?tid=2</span></span></p><p><span style="color:#333333;font-family:tahoma, 宋体;font-size:14px;line-height:17.92px;text-align:justify;background-color:#fafafc;"><span style="color:#333333;font-family:tahoma, 宋体;font-size:14px;line-height:17.92px;text-align:justify;background-color:#fafafc;"><br /></span></span></p><p><strong><span style="color:#333333;font-family:tahoma, 宋体;font-size:14px;line-height:17.92px;text-align:justify;background-color:#fafafc;"><span style="color:#333333;font-family:tahoma, 宋体;font-size:14px;line-height:17.92px;text-align:justify;background-color:#fafafc;"><br /></span></span></strong></p><p><strong><span style="color:#333333;font-family:tahoma, 宋体;font-size:14px;line-height:17.92px;text-align:justify;background-color:#fafafc;"><span style="color:#333333;font-family:tahoma, 宋体;line-height:17.92px;text-align:justify;font-size:16px;background-color:#fafafc;">2016 </span></span></strong></p><p><strong></strong></p><p><span style="color:#333333;font-family:tahoma, 宋体;font-size:14px;line-height:17.92px;text-align:justify;background-color:#fafafc;"><span style="color:#333333;font-family:tahoma, 宋体;font-size:14px;line-height:17.92px;text-align:justify;background-color:#fafafc;"></span></span><br /></p><p><span style="color:#333333;font-family:tahoma, 宋体;font-size:14px;line-height:17.92px;text-align:justify;background-color:#fafafc;"><span style="color:#333333;font-family:tahoma, 宋体;line-height:17.92px;text-align:justify;font-size:16px;background-color:#fafafc;">https://zhidao.baidu.com/question/1819713700539916588.html<br /></span></span></p><p><span style="color:#333333;font-family:tahoma, 宋体;font-size:14px;line-height:17.92px;text-align:justify;background-color:#fafafc;"><span style="color:#333333;font-family:tahoma, 宋体;font-size:14px;line-height:17.92px;text-align:justify;background-color:#fafafc;"></span></span></p><p><span style="font-size:16px;"> Ubuntu里的许多应用程序软件包,是放在网络里的服务器上</span><strong><span style="color:#ff0000;text-decoration:underline;font-size:16px;">,这些服务器网站,就称作“源”,从源里可以很方便地获取软件包,</span></strong><br style="content:" /><br style="content:" /><span style="font-size:16px;"> 下面的方法选一种即可,我们来看这个练习;<br style="content:" /><br style="content:" /> 1、简单设置源<br style="content:" /><br style="content:" /> 1)点击</span><span style="color:#ff0000;font-size:16px;">上面板条的系统菜单“System-系统管理-软件源”命令,出来一个面板;</span><br style="content:" /><br style="content:" /><span style="font-size:16px;"> <br style="content:" /><br style="content:" /> 2)先出来一个密码输入框,输入自己密码后,点绿色“OK”按钮确定,进入源面板;<br style="content:" /><br style="content:" /> <br style="content:" /><br style="content:" /> 3)进入源面板后,把几个勾都打上,点击下面的下拉列表,选择 server for 中国(china),即中国的源;<br style="content:" /><br style="content:" /> <br style="content:" /><br style="content:" /> 4)然后点右下角的“Close”,出来一个提示对话框,点“Reload”,然后出来刷新对话框;<br style="content:" /><br style="content:" /> ;<br style="content:" /><br style="content:" /> 5)接下来下载软件包信息,耐心等待完成后,自动关闭对话框,这样就简单设置好了源;<br style="content:" /> <br style="content:" /><br style="content:" /></span></p><p><span style="font-size:16px;"> 这种方法比较简单,但是速度可能不是很快,可以试试下面的两种方法;</span></p><p><br /></p><p><br style="content:" /><br style="content:" /><span style="font-size:16px;"> 2、使用其他源<br style="content:" /><br style="content:" /> 1)进入源面板后,打勾五项,然后点下拉列表,选择里面的 Other 其他,出来一个其他源列表;<br style="content:" /><br style="content:" /> <br style="content:" /><br style="content:" /> </span><span style="color:#ff0000;font-size:16px;">2)在列表里点开“中国”,选择一个,然后点右下角的“Choose Server”</span><span style="font-size:16px;">,<br style="content:" /><br style="content:" /> 返回后,点右下角的“Close”关闭,在出来的对话框点“Reload”,等待完成即可;<br style="content:" /><br style="content:" /> </span><strong><span style="color:#ff0000;font-size:16px;">3、自动选择源</span></strong><br style="content:" /><br style="content:" /><span style="font-size:16px;"> 1)在第二种方法里,面板右上角有一个“Chose Best Server”,选择最快源;<br style="content:" /><br style="content:" /> <br style="content:" /><br style="content:" /> 2)点击这个按钮,出来一个自动测速对话框,系统会检测所有源,然后选中一个最快的;<br style="content:" /><br style="content:" /> <br style="content:" /><br style="content:" /> 3)选择完成后,在列表里会选中一个源,一般是中国源里的,点右下角的“Chose Server”按钮返回;<br style="content:" /><br style="content:" /> <br style="content:" /><br style="content:" /> 4)然后点右下角的“Close”关闭,出来提示点“Reload”更新;<br style="content:" /><br style="content:" /></span><span style="color:#ff0000;font-size:16px;"> 4、使用第三方源</span><br style="content:" /><br style="content:" /><span style="font-size:16px;"> 1)第三方源是其他源服务器,速度要快些,但可能会失效,你可以到 Ubuntu 中文 wiki里查找一下,<br style="content:" /><br style="content:" /> 进去找到相应的版本(比如8.04),在里面选一组 就可以了;<br style="content:" /><br style="content:" /> </span><span style="font-size:16px;">http://wiki.ubuntu.org.cn/index.php?title=Qref/Source&variant=zh-cn</span><br style="content:" /><br style="content:" /><span style="font-size:16px;"> 2)在第一个面板里,把上面的勾都去掉,再点一下中间的列表框,选择“Server for 中国”即中国的服务器;<br style="content:" /><br style="content:" /> <br style="content:" /><br style="content:" /> 3)再点上边的第二个标签“Third-Party software”第三方软件,进入一个列表面板,<br style="content:" /><br style="content:" /> 先把里面的两个方框的勾点掉;<br style="content:" /><br style="content:" /> <br style="content:" /><br style="content:" /> 5)然后点下面左边的“+Add..”添加按钮,出来一个对话框,把找到的一组 网址复制粘贴一条进去,<br style="content:" /><br style="content:" /> 注意细致,每次复制一条,点“+Add Source”按钮确定,同样再复制下一条;<br style="content:" /><br style="content:" /> <br style="content:" /><br style="content:" />deb </span><span style="font-size:16px;">http://archive.ubuntu.org.cn/ubuntu-cn/</span><span style="font-size:16px;"> hardy main restricted universe multiverse<br style="content:" /><br style="content:" /> 这是 ubuntu-cn 源,里面包括 main、restricted 等,Ubuntu欧洲官方源服务器(8.04)是这另一组:<br style="content:" /><br style="content:" />deb </span><span style="font-size:16px;">http://archive.ubuntu.com/ubuntu/</span><span style="font-size:16px;"> hardy main restricted universe multiverse<br style="content:" />deb </span><span style="font-size:16px;">http://archive.ubuntu.com/ubuntu/</span><span style="font-size:16px;"> hardy-security main restricted universe multiverse<br style="content:" />deb </span><span style="font-size:16px;">http://archive.ubuntu.com/ubuntu/</span><span style="font-size:16px;"> hardy-updates main restricted universe multiverse<br style="content:" />deb </span><span style="font-size:16px;">http://archive.ubuntu.com/ubuntu/</span><span style="font-size:16px;"> hardy-proposed main restricted universe multiverse<br style="content:" />deb </span><span style="font-size:16px;">http://archive.ubuntu.com/ubuntu/</span><span style="font-size:16px;"> hardy-backports main restricted universe multiverse<br style="content:" />deb-src </span><span style="font-size:16px;">http://archive.ubuntu.com/ubuntu/</span><span style="font-size:16px;"> hardy main restricted universe multiverse<br style="content:" />deb-src </span><span style="font-size:16px;">http://archive.ubuntu.com/ubuntu/</span><span style="font-size:16px;"> hardy-security main restricted universe multiverse<br style="content:" />deb-src </span><span style="font-size:16px;">http://archive.ubuntu.com/ubuntu/</span><span style="font-size:16px;"> hardy-updates main restricted universe multiverse<br style="content:" />deb-src </span><span style="font-size:16px;">http://archive.ubuntu.com/ubuntu/</span><span style="font-size:16px;"> hardy-proposed main restricted universe multiverse<br style="content:" />deb-src </span><span style="font-size:16px;">http://archive.ubuntu.com/ubuntu/</span><span style="font-size:16px;"> hardy-backports main restricted universe multiverse<br style="content:" /><br style="content:" /> 6)把一组源全部添加进去后,点右下角的“close”关闭按钮,出来一个更新提示,<br style="content:" /><br style="content:" /> 点“Reload”按钮重新载人;<br style="content:" /><br style="content:" /> <br style="content:" /><br style="content:" /> 2)点“Reload”按钮后,出来一个下载进度面板,等下载结束后即可自动关闭,<br style="content:" /><br style="content:" /> 如果下载过程中出现错误提示,可能是源不正确,可以检查一下,或者换另一组较快的源;<br style="content:" /><br style="content:" /> <br style="content:" /><br style="content:" /> 3)源设置好以后,下一步就可以下载各个语言包、软件包、升级包等等;<br style="content:" /><br style="content:" /> 5、终端设置源列表<br style="content:" /><br style="content:" /> 1)点左上角的菜单“应用程序-附件-终端”进入终端,输入下面的命令:<br style="content:" /><br style="content:" />sudo cp /etc/apt/sources.list /etc/apt/sources.list_backup<br style="content:" /><br style="content:" /> 这句是备份命令,输完后按一下回车键,先提示输入自己的密码,密码不显示,盲打输入后按回车键;<br style="content:" /><br style="content:" /> <br style="content:" /><br style="content:" /> 2)再输入下面的命令,输完后按一下回车键,出来一个文本编辑器窗口;<br style="content:" /><br style="content:" />sudo gedit /etc/apt/sources.list<br style="content:" /><br style="content:" /> 3)在出来的文档窗口里,先删除所有内容,再复制一组源进去,保存关闭;<br style="content:" /><br style="content:" /> <br style="content:" /><br style="content:" /> 4)返回到终端窗口,再执行下面命令更新源;<br style="content:" /><br style="content:" /></span><span style="color:#ff0000;font-size:16px;">sudo apt-get update</span></p><p><span style="color:#333333;font-family:tahoma, 宋体;font-size:14px;line-height:17.92px;text-align:justify;background-color:#fafafc;"><span style="color:#333333;font-family:tahoma, 宋体;font-size:14px;line-height:17.92px;text-align:justify;background-color:#fafafc;"><br /></span></span><br /></p><p><strong><span style="font-size:16px;"> </span><span style="font-size:16px;">http://blog.csdn.net/newyher/article/details/52205809</span></strong></p><p><strong><span style="font-size:16px;"> </span></strong><br /></p><p><span style="font-size:16px;">sources.list作用的总结</span></p><p style="padding:0px;box-sizing:border-box;font-family:'microsoft yahei';font-size:14px;line-height:26px;background-color:#ffffff;margin-top:0px;margin-bottom:1.1em;"><span style="font-size:16px;">Ubuntu中软件更新的源服务器地址存储再/etc/apt/soures.list中。文件中的内容如下: <br style="box-sizing:border-box;" />deb </span><span style="font-size:16px;">http://archive.ubuntu.com/ubuntu/</span><span style="font-size:16px;"> trusty main restricted universe multiverse <br style="box-sizing:border-box;" />deb </span><span style="font-size:16px;">http://archive.ubuntu.com/ubuntu/</span><span style="font-size:16px;"> trusty-security main restricted universe multiverse <br style="box-sizing:border-box;" />deb </span><span style="font-size:16px;">http://archive.ubuntu.com/ubuntu/</span><span style="font-size:16px;"> trusty-updates main restricted universe multiverse <br style="box-sizing:border-box;" />deb </span><span style="font-size:16px;">http://archive.ubuntu.com/ubuntu/</span><span style="font-size:16px;"> trusty-proposed main restricted universe multiverse <br style="box-sizing:border-box;" />deb </span><span style="font-size:16px;">http://archive.ubuntu.com/ubuntu/</span><span style="font-size:16px;"> trusty-backports main restricted universe multiverse <br style="box-sizing:border-box;" />deb-src </span><span style="font-size:16px;">http://archive.ubuntu.com/ubuntu/</span><span style="font-size:16px;"> trusty main restricted universe multiverse <br style="box-sizing:border-box;" />deb-src </span><span style="font-size:16px;">http://archive.ubuntu.com/ubuntu/</span><span style="font-size:16px;"> trusty-security main restricted universe multiverse <br style="box-sizing:border-box;" />deb-src </span><span style="font-size:16px;">http://archive.ubuntu.com/ubuntu/</span><span style="font-size:16px;"> trusty-updates main restricted universe multiverse <br style="box-sizing:border-box;" />deb-src </span><span style="font-size:16px;">http://archive.ubuntu.com/ubuntu/</span><span style="font-size:16px;"> trusty-proposed main restricted universe multiverse <br style="box-sizing:border-box;" />deb-src </span><span style="font-size:16px;">http://archive.ubuntu.com/ubuntu/</span><span style="font-size:16px;"> trusty-backports main restricted universe multiverse <br style="box-sizing:border-box;" />上面是ubuntu官方的软件源。具体含义如下,</span></p><p style="padding:0px;box-sizing:border-box;font-family:'microsoft yahei';font-size:14px;line-height:26px;background-color:#ffffff;margin-top:0px;margin-bottom:1.1em;"><strong style="box-sizing:border-box;"><span style="font-size:16px;">每一行的开头是deb和deb-src,表示直接通过.deb文件或者源文件的方式来进行安装;</span></strong><span style="font-size:16px;"> <br style="box-sizing:border-box;" /></span><strong style="box-sizing:border-box;"><span style="font-size:16px;">第二字段,即deb和deb-src字段后是一段URL,这是软件源的地址</span></strong><span style="font-size:16px;"> <br style="box-sizing:border-box;" /></span><strong style="box-sizing:border-box;"><span style="font-size:16px;">第三字段,即URL后的字段,是再URL路径中的dists目录下对应的文件夹,如图所示</span><img src="http://img.blog.csdn.net/20160814183742674" alt="这里写图片描述" style="border:none;box-sizing:border-box;max-width:100%;" /></strong><span style="font-size:16px;"> <br style="box-sizing:border-box;" /></span><strong style="box-sizing:border-box;"><span style="font-size:16px;">第四~七字段都是第三字段对应的目录下的子目录</span><img src="http://img.blog.csdn.net/20160814184349883" alt="这里写图片描述" style="border:none;box-sizing:border-box;max-width:100%;" /></strong></p><p style="padding:0px;box-sizing:border-box;font-family:'microsoft yahei';font-size:14px;line-height:26px;background-color:#ffffff;margin-top:0px;margin-bottom:1.1em;"><span style="font-size:16px;">但是由于ubuntu的官方软件源下载速度慢而且有些第三方软件的安装包过于陈旧,已不能满足用户的需求。因此需要添加第三方软件更新源。本文以163的软件源为例讲述更新软件源的方法。</span></p><p><span style="font-size:16px;">更新sources.list</span></p><p style="padding:0px;box-sizing:border-box;font-family:'microsoft yahei';font-size:14px;line-height:26px;background-color:#ffffff;margin-top:0px;margin-bottom:1.1em;"><span style="font-size:16px;">在网上能够很方便的查到163的ubuntu的软件源的方法,sudo gedit /etc/apt/source.list,再打开的文件中添加如下内容: <br style="box-sizing:border-box;" />deb </span><span style="font-size:16px;">http://mirrors.163.com/ubuntu/</span><span style="font-size:16px;"> raring main restricted universe multiverse <br style="box-sizing:border-box;" />deb </span><span style="font-size:16px;">http://mirrors.163.com/ubuntu/</span><span style="font-size:16px;"> raring-security main restricted universe multiverse <br style="box-sizing:border-box;" />deb </span><span style="font-size:16px;">http://mirrors.163.com/ubuntu/</span><span style="font-size:16px;"> raring-updates main restricted universe multiverse <br style="box-sizing:border-box;" />deb </span><span style="font-size:16px;">http://mirrors.163.com/ubuntu/</span><span style="font-size:16px;"> raring-proposed main restricted universe multiverse <br style="box-sizing:border-box;" />deb </span><span style="font-size:16px;">http://mirrors.163.com/ubuntu/</span><span style="font-size:16px;"> raring-backports main restricted universe multiverse <br style="box-sizing:border-box;" />deb-src </span><span style="font-size:16px;">http://mirrors.163.com/ubuntu/</span><span style="font-size:16px;"> raring main restricted universe multiverse <br style="box-sizing:border-box;" />deb-src </span><span style="font-size:16px;">http://mirrors.163.com/ubuntu/</span><span style="font-size:16px;"> raring-security main restricted universe multiverse <br style="box-sizing:border-box;" />deb-src </span><span style="font-size:16px;">http://mirrors.163.com/ubuntu/</span><span style="font-size:16px;"> raring-updates main restricted universe multiverse <br style="box-sizing:border-box;" />deb-src </span><span style="font-size:16px;">http://mirrors.163.com/ubuntu/</span><span style="font-size:16px;"> raring-proposed main restricted universe multiverse <br style="box-sizing:border-box;" />deb-src </span><span style="font-size:16px;">http://mirrors.163.com/ubuntu/</span><span style="font-size:16px;"> raring-backports main restricted universe multiverse <br style="box-sizing:border-box;" />保存退出后运行命令:sudo apt-get update。 <br style="box-sizing:border-box;" />但是,这样修改后会在更新软件时会出现404 not found的错误,这是由于对于ubuntu各个版本的软件位置是不一样的,因此</span><span style="color:#ff0000;font-size:16px;">,需要根据ubuntu的版本号来选择对应的软件源路径。</span></p><p><span style="font-size:16px;">选择对应版本的软件源</span></p><p style="padding:0px;box-sizing:border-box;font-family:'microsoft yahei';font-size:14px;line-height:26px;background-color:#ffffff;margin-top:0px;margin-bottom:1.1em;"><span style="font-size:16px;">ubuntu各版本的名称如下</span></p><div style="box-sizing:border-box;width:946.4px;border-spacing:0px;border:1px solid #eeeeee;font-family:'microsoft yahei';font-size:14px;line-height:26px;background-color:#ffffff;"><tbody><tr style="box-sizing:border-box;"><th style="box-sizing:border-box;padding:8px;line-height:20px;vertical-align:top;border:1px solid #eeeeee;"><span style="font-size:16px;">版本号</span></th><th style="box-sizing:border-box;padding:8px;line-height:20px;vertical-align:top;border:1px solid #eeeeee;"><span style="font-size:16px;">代号</span></th><th style="box-sizing:border-box;padding:8px;line-height:20px;vertical-align:top;border:1px solid #eeeeee;"><span style="font-size:16px;">发布时间</span></th></tr></tbody><tbody style="box-sizing:border-box;"><tr style="box-sizing:border-box;"><td style="box-sizing:border-box;padding:8px;line-height:20px;vertical-align:top;border:1px solid #eeeeee;"><span style="font-size:16px;">15.04</span></td><td style="box-sizing:border-box;padding:8px;line-height:20px;vertical-align:top;border:1px solid #eeeeee;"><span style="font-size:16px;">Vivid Vervet</span></td><td style="box-sizing:border-box;padding:8px;line-height:20px;vertical-align:top;border:1px solid #eeeeee;"><span style="font-size:16px;">2015/4</span></td></tr><tr style="box-sizing:border-box;"><td style="box-sizing:border-box;padding:8px;line-height:20px;vertical-align:top;border:1px solid #eeeeee;"><span style="font-size:16px;">14.10</span></td><td style="box-sizing:border-box;padding:8px;line-height:20px;vertical-align:top;border:1px solid #eeeeee;"><span style="font-size:16px;">Utopic Unicorn</span></td><td style="box-sizing:border-box;padding:8px;line-height:20px;vertical-align:top;border:1px solid #eeeeee;"><span style="font-size:16px;">2014/10/23</span></td></tr><tr style="box-sizing:border-box;"><td style="box-sizing:border-box;padding:8px;line-height:20px;vertical-align:top;border:1px solid #eeeeee;"><span style="font-size:16px;">14.04 LTS</span></td><td style="box-sizing:border-box;padding:8px;line-height:20px;vertical-align:top;border:1px solid #eeeeee;"><span style="font-size:16px;">Trusty Tahr</span></td><td style="box-sizing:border-box;padding:8px;line-height:20px;vertical-align:top;border:1px solid #eeeeee;"><span style="font-size:16px;">2014/04/18</span></td></tr><tr style="box-sizing:border-box;"><td style="box-sizing:border-box;padding:8px;line-height:20px;vertical-align:top;border:1px solid #eeeeee;"><span style="font-size:16px;">13.10</span></td><td style="box-sizing:border-box;padding:8px;line-height:20px;vertical-align:top;border:1px solid #eeeeee;"><span style="font-size:16px;">Saucy Salamander</span></td><td style="box-sizing:border-box;padding:8px;line-height:20px;vertical-align:top;border:1px solid #eeeeee;"><span style="font-size:16px;">2013/10/17</span></td></tr><tr style="box-sizing:border-box;"><td style="box-sizing:border-box;padding:8px;line-height:20px;vertical-align:top;border:1px solid #eeeeee;"><span style="font-size:16px;">13.04</span></td><td style="box-sizing:border-box;padding:8px;line-height:20px;vertical-align:top;border:1px solid #eeeeee;"><span style="font-size:16px;">Raring Ringtail</span></td><td style="box-sizing:border-box;padding:8px;line-height:20px;vertical-align:top;border:1px solid #eeeeee;"><span style="font-size:16px;">2013/04/25</span></td></tr><tr style="box-sizing:border-box;"><td style="box-sizing:border-box;padding:8px;line-height:20px;vertical-align:top;border:1px solid #eeeeee;"><span style="font-size:16px;">12.10</span></td><td style="box-sizing:border-box;padding:8px;line-height:20px;vertical-align:top;border:1px solid #eeeeee;"><span style="font-size:16px;">Quantal Quetzal</span></td><td style="box-sizing:border-box;padding:8px;line-height:20px;vertical-align:top;border:1px solid #eeeeee;"><span style="font-size:16px;">2012/10/18</span></td></tr><tr style="box-sizing:border-box;"><td style="box-sizing:border-box;padding:8px;line-height:20px;vertical-align:top;border:1px solid #eeeeee;"><span style="font-size:16px;">12.04 LTS</span></td><td style="box-sizing:border-box;padding:8px;line-height:20px;vertical-align:top;border:1px solid #eeeeee;"><span style="font-size:16px;">Precise Pangolin</span></td><td style="box-sizing:border-box;padding:8px;line-height:20px;vertical-align:top;border:1px solid #eeeeee;"><span style="font-size:16px;">2012/04/26</span></td></tr><tr style="box-sizing:border-box;"><td style="box-sizing:border-box;padding:8px;line-height:20px;vertical-align:top;border:1px solid #eeeeee;"><span style="font-size:16px;">11.10</span></td><td style="box-sizing:border-box;padding:8px;line-height:20px;vertical-align:top;border:1px solid #eeeeee;"><span style="font-size:16px;">Oneiric Ocelot</span></td><td style="box-sizing:border-box;padding:8px;line-height:20px;vertical-align:top;border:1px solid #eeeeee;"><span style="font-size:16px;">2011/10/13</span></td></tr></tbody></div><p style="padding:0px;box-sizing:border-box;font-family:'microsoft yahei';font-size:14px;line-height:26px;background-color:#ffffff;margin-top:0px;margin-bottom:1.1em;"><span style="font-size:16px;">由于我的ubuntu版本是14.04所以需要将上面的内容修改为: <br style="box-sizing:border-box;" />deb </span><span style="font-size:16px;">http://tel.mirrors.163.com/ubuntu/</span><span style="font-size:16px;"> </span><strong style="box-sizing:border-box;"><span style="font-size:16px;">trusty</span></strong><span style="font-size:16px;"> main restricted universe multiverse <br style="box-sizing:border-box;" />deb </span><span style="font-size:16px;">http://tel.mirrors.163.com/ubuntu/</span><span style="font-size:16px;"> </span><strong style="box-sizing:border-box;"><span style="font-size:16px;">trusty-security</span></strong><span style="font-size:16px;"> main restricted universe multiverse <br style="box-sizing:border-box;" />deb </span><span style="font-size:16px;">http://tel.mirrors.163.com/ubuntu/</span><span style="font-size:16px;"> </span><strong style="box-sizing:border-box;"><span style="font-size:16px;">trusty-updates</span></strong><span style="font-size:16px;"> main restricted universe multiverse <br style="box-sizing:border-box;" />deb </span><span style="font-size:16px;">http://tel.mirrors.163.com/ubuntu/</span><span style="font-size:16px;"> </span><strong style="box-sizing:border-box;"><span style="font-size:16px;">trusty-proposed</span></strong><span style="font-size:16px;"> main restricted universe multiverse <br style="box-sizing:border-box;" />deb </span><span style="font-size:16px;">http://tel.mirrors.163.com/ubuntu/</span><span style="font-size:16px;"> </span><strong style="box-sizing:border-box;"><span style="font-size:16px;">trusty-backports</span></strong><span style="font-size:16px;"> main restricted universe multiverse <br style="box-sizing:border-box;" />deb-src </span><span style="font-size:16px;">http://tel.mirrors.163.com/ubuntu/</span><span style="font-size:16px;"> </span><strong style="box-sizing:border-box;"><span style="font-size:16px;">trusty</span></strong><span style="font-size:16px;"> main restricted universe multiverse <br style="box-sizing:border-box;" />deb-src </span><span style="font-size:16px;">http://tel.mirrors.163.com/ubuntu/</span><span style="font-size:16px;"> </span><strong style="box-sizing:border-box;"><span style="font-size:16px;">trusty-security</span></strong><span style="font-size:16px;"> main restricted universe multiverse <br style="box-sizing:border-box;" />deb-src </span><span style="font-size:16px;">http://tel.mirrors.163.com/ubuntu/</span><span style="font-size:16px;"> </span><strong style="box-sizing:border-box;"><span style="font-size:16px;">trusty-updates</span></strong><span style="font-size:16px;"> main restricted universe multiverse <br style="box-sizing:border-box;" />deb-src </span><span style="font-size:16px;">http://tel.mirrors.163.com/ubuntu/</span><span style="font-size:16px;"> </span><strong style="box-sizing:border-box;"><span style="font-size:16px;">trusty-proposed</span></strong><span style="font-size:16px;"> main restricted universe multiverse <br style="box-sizing:border-box;" />deb-src </span><span style="font-size:16px;">http://tel.mirrors.163.com/ubuntu/</span><span style="font-size:16px;"> </span><strong style="box-sizing:border-box;"><span style="font-size:16px;">trusty-backports</span></strong><span style="font-size:16px;"> main restricted universe multiverse <br style="box-sizing:border-box;" />然后再次保存,sudo apt-get update</span></p><p><span style="font-size:16px;">总结</span></p><ol style="box-sizing:border-box;font-family:'microsoft yahei';font-size:14px;line-height:26px;background-color:#ffffff;"><li style="box-sizing:border-box;"><p><span style="font-size:16px;">保存sources.list,sudo cp /etc/apt/sources.list <br style="box-sizing:border-box;" />/etc/apt/sources.list-backup;</span></p></li><li style="box-sizing:border-box;"><p><span style="font-size:16px;">打开sources.list,sudo gedit /etc/apt/sources.list;</span></p></li><li style="box-sizing:border-box;"><p><span style="font-size:16px;">将需要更新的软件源复制到文档中;</span></p></li><li style="box-sizing:border-box;"><p><span style="font-size:16px;">根据ubuntu的版本将每行的第三个字段换成对应版本的名称;</span></p></li><li style="box-sizing:border-box;"><p><span style="font-size:16px;">保存文档,并退出;</span></p></li><li style="box-sizing:border-box;"><p><span style="font-size:16px;">刷新软件源,sudo apt-get update</span></p></li></ol><p><br /></p><p style="padding:0px;box-sizing:border-box;font-family:'microsoft yahei';font-size:14px;line-height:26px;background-color:#ffffff;margin-top:0px;margin-bottom:1.1em;"><br /></p><p>2016年国内开源镜像站点汇总<br /></p><p>http://www.cnblogs.com/chenjiahe/p/5806462.html</p><p style="margin:10px auto;padding:0px;font-family:verdana, arial, helvetica, sans-serif;font-size:14px;line-height:16.8px;background-color:#ffffff;">一、站点版<br style="margin:0px;padding:0px;" />(一)、企业站<br style="margin:0px;padding:0px;" /><span style="color:#ff0000;">1.搜狐:</span><span style="color:#ff0000;">http://mirrors.sohu.com/</span><br style="margin:0px;padding:0px;" /><strong><span style="color:#ff0000;">2.网易:</span></strong><strong><span style="margin:0px;padding:0px;color:#ff0000;">http://mirrors.163.com/</span></strong><br style="margin:0px;padding:0px;" /><strong><span style="color:#ff0000;">3.阿里云:</span></strong><strong><span style="margin:0px;padding:0px;color:#ff0000;">http://mirrors.aliyun.com/</span></strong><br style="margin:0px;padding:0px;" />4.腾讯:http://android-mirror.bugly..com:8080/(仅针对APP开发的软件,限流,不推荐)<br style="margin:0px;padding:0px;" /><br style="margin:0px;padding:0px;" />(二)、教育站<br style="margin:0px;padding:0px;" />1.上海交通大学:http://ftp.sjtu.edu.cn/html/resources.xml(部分移动运营商出口状况不佳,无法访问)<br style="margin:0px;padding:0px;" />2.华中科技大学:http://mirror.hust.edu.cn/(当前已用容量估计:4.83T)<br style="margin:0px;padding:0px;" />3.清华大学:http://mirrors.tuna.tsinghua.edu.cn/(当前已用容量估计:9.8T)<br style="margin:0px;padding:0px;" />4.北京理工大学:http://mirror.bit.edu.cn/web/<br style="margin:0px;padding:0px;" />5.兰州大学:http://mirror.lzu.edu.cn/<br style="margin:0px;padding:0px;" />6.中国科技大学:http://mirrors.ustc.edu.cn/(当前已用容量估计:21.32T)<br style="margin:0px;padding:0px;" />7.大连东软信息学院:http://mirrors.neusoft.edu.cn/(当前已用容量估计:2.5T)<br style="margin:0px;padding:0px;" />8.东北大学:http://mirror.neu.edu.cn/<br style="margin:0px;padding:0px;" />9.大连理工大学:http://mirror.dlut.edu.cn/<br style="margin:0px;padding:0px;" />10.哈尔滨工业大学:http://run.hit.edu.cn/html/(部分联通运营商出口状况不佳,无法访问)<br style="margin:0px;padding:0px;" />11.北京交通大学:http://mirror.bjtu.edu.cn/cn/<br style="margin:0px;padding:0px;" />12.天津大学:http://mirror.tju.edu.cn(无法访问,ping超时)<br style="margin:0px;padding:0px;" />13.中国地质大学:http://mirrors.cug.edu.cn/(当前已用容量估计:2.3T)<br style="margin:0px;padding:0px;" />14.浙江大学:http://mirrors.zju.edu.cn/<br style="margin:0px;padding:0px;" />15.厦门大学:http://mirrors.xmu.edu.cn/<br style="margin:0px;padding:0px;" />16.中山大学:http://mirror.sysu.edu.cn/<br style="margin:0px;padding:0px;" />17.重庆大学:http://mirrors.cqu.edu.cn/(当前已用容量估计:3.93T)<br style="margin:0px;padding:0px;" />18.北京化工大学:http://ubuntu.buct.edu.cn/(Android SDK镜像仅供校内使用,当前已用容量估计:1.72T)<br style="margin:0px;padding:0px;" />19.南阳理工学院:http://mirror.nyist.edu.cn/<br style="margin:0px;padding:0px;" />20.中国科学院:http://www.opencas.org/mirrors/<br style="margin:0px;padding:0px;" />21.电子科技大学:http://ubuntu.uestc.edu.cn/(无法访问,ping超时)<br style="margin:0px;padding:0px;" />22.电子科技大学星辰工作室:http://mirrors.stuhome.net/(当前已用容量估计:1.08T)<br style="margin:0px;padding:0px;" />23.西北农林科技大学:http://mirrors.nwsuaf.edu.cn/(只做CentOS镜像,当前已用容量估计:140GB)<br style="margin:0px;padding:0px;" /><br style="margin:0px;padding:0px;" />(三)、其他<br style="margin:0px;padding:0px;" />1.首都在线科技股份有限公司(英文名Capital Online Data Service):http://mirrors.yun-idc.com/<br style="margin:0px;padding:0px;" />2.中国电信天翼云:http://mirrors.ctyun.cn/<br style="margin:0px;padding:0px;" />3.noc.im:http://mirrors.noc.im/(当前已用容量估计:3.74T)<br style="margin:0px;padding:0px;" />4.常州贝特康姆软件技术有限公司:http://centos.bitcomm.cn/(只做CentOS镜像,当前已用容量估计:140GB)<br style="margin:0px;padding:0px;" />5.公云PubYun(母公司为贝特康姆):http://mirrors.pubyun.com/<br style="margin:0px;padding:0px;" />6.Linux运维派:http://mirrors.skyshe.cn/(使用阿里云服务器,界面使用浙江大学的模板,首页维护,内容可访问)<br style="margin:0px;padding:0px;" />7.中国互联网络信息中心:http://mirrors.cnnic.cn/(只做Apache镜像,当前已用容量估计:120GB)<br style="margin:0px;padding:0px;" />8.Fayea工作室:http://apache.fayea.com/(只做Apache镜像,当前已用容量估计:120GB)<br style="margin:0px;padding:0px;" /><br style="margin:0px;padding:0px;" />二、软件版<br style="margin:0px;padding:0px;" /><br style="margin:0px;padding:0px;" />(一)、操作系统类<br style="margin:0px;padding:0px;" />1.Ubuntu<br style="margin:0px;padding:0px;" />阿里云:http://mirrors.aliyun.com/ubuntu-releases/<br style="margin:0px;padding:0px;" />网易:http://mirrors.163.com/ubuntu-releases/<br style="margin:0px;padding:0px;" />搜狐:http://mirrors.sohu.com/ubuntu-releases/(搜狐在12年之后似乎不同步了)<br style="margin:0px;padding:0px;" />首都在线科技股份有限公司:http://mirrors.yun-idc.com/ubuntu-releases/<br style="margin:0px;padding:0px;" /><br style="margin:0px;padding:0px;" />2.centos<br style="margin:0px;padding:0px;" />网易:http://mirrors.163.com/centos/<br style="margin:0px;padding:0px;" />搜狐:http://mirrors.sohu.com/centos/<br style="margin:0px;padding:0px;" />阿里云:http://mirrors.aliyun.com/centos/<br style="margin:0px;padding:0px;" /><br style="margin:0px;padding:0px;" />(二)、服务器类<br style="margin:0px;padding:0px;" />1.tomcat、Apache<br style="margin:0px;padding:0px;" />中国互联网络信息中心:http://mirrors.cnnic.cn/apache/<br style="margin:0px;padding:0px;" />华中科技大学:http://mirrors.hust.edu.cn/apache/<br style="margin:0px;padding:0px;" />北京理工大学:http://mirror.bit.edu.cn/apache/<br style="margin:0px;padding:0px;" /><br style="margin:0px;padding:0px;" />2.MySQL<br style="margin:0px;padding:0px;" />北京理工大学:http://mirror.bit.edu.cn/mysql/Downloads/<br style="margin:0px;padding:0px;" />中国电信天翼云:http://mirrors.ctyun.cn/Mysql/<br style="margin:0px;padding:0px;" /><br style="margin:0px;padding:0px;" />3.PostgreSQL<br style="margin:0px;padding:0px;" />浙江大学:http://mirrors.zju.edu.cn/postgresql/<br style="margin:0px;padding:0px;" /><br style="margin:0px;padding:0px;" />4.MariaDB<br style="margin:0px;padding:0px;" />中国电信天翼云:http://mirrors.ctyun.cn/MariaDB/<br style="margin:0px;padding:0px;" /><br style="margin:0px;padding:0px;" />5.VideoLAN<br style="margin:0px;padding:0px;" />大连东软信息学院:http://mirrors.neusoft.edu.cn/videolan/<br style="margin:0px;padding:0px;" />中国科技大学:http://mirrors.ustc.edu.cn/videolan-ftp/<br style="margin:0px;padding:0px;" /><br style="margin:0px;padding:0px;" />(三)、开发工具类<br style="margin:0px;padding:0px;" />1.eclipse<br style="margin:0px;padding:0px;" />中国科技大学:http://mirrors.ustc.edu.cn/eclipse/<br style="margin:0px;padding:0px;" />中国科学院:http://mirrors.opencas.cn/eclipse/<br style="margin:0px;padding:0px;" />东北大学:http://ftp.neu.edu.cn/mirrors/eclipse/,http://mirror.neu.edu.cn/eclipse/<br style="margin:0px;padding:0px;" /><br style="margin:0px;padding:0px;" />2.安卓SDK<br style="margin:0px;padding:0px;" />中国科学院:http://mirrors.opencas.ac.cn/android/repository/<br style="margin:0px;padding:0px;" />南洋理工学院:http://mirror.nyist.edu.cn/android/repository/<br style="margin:0px;padding:0px;" />中国科学院:http://mirrors.opencas.cn/android/repository/<br style="margin:0px;padding:0px;" />腾讯:http://android-mirror.bugly..com:8080/android/repository/(限流,不推荐)<br style="margin:0px;padding:0px;" />大连东软信息学院:http://mirrors.neusoft.edu.cn/android/repository/(同步效果不如中科院的镜像,不推荐)<br style="margin:0px;padding:0px;" /><br style="margin:0px;padding:0px;" />3.Xcode<br style="margin:0px;padding:0px;" />腾讯:http://android-mirror.bugly..com:8080/Xcode/(从7.2之后不再更新,建议直接从官网下载)<br style="margin:0px;padding:0px;" /><br style="margin:0px;padding:0px;" />三、官方镜像列表状态地址<br style="margin:0px;padding:0px;" />CentOS:http://mirror-status.centos.org/#cn<br style="margin:0px;padding:0px;" />Archlinux:https://www.archlinux.org/mirrors/status/<br style="margin:0px;padding:0px;" />Ubuntu:https://launchpad.net/ubuntu/+cdmirrors<br style="margin:0px;padding:0px;" />Debian:http://mirror.debian.org/status.html<br style="margin:0px;padding:0px;" />Fedora Linux/Fedora EPEL:https://admin.fedoraproject.org/mirrormanager/mirrors<br style="margin:0px;padding:0px;" />Apache:http://www.apache.org/mirrors/#cn</p><p style="margin:10px auto;padding:0px;font-family:verdana, arial, helvetica, sans-serif;font-size:14px;line-height:16.8px;background-color:#ffffff;">Cygwin:https://www.cygwin.com/mirrors.html</p><p><br /></p><p><br /></p><p>(⑤)Ubuntu常用编辑器</p><p><br /></p><p style="padding:0px;font-family:arial;font-size:14px;line-height:26px;background-color:#ffffff;margin-top:0px;margin-bottom:0.21cm;"><span style="font-size:16px;"><strong><span lang="zxx"><span style="font-weight:normal;">常见的基于控制台的文本编辑器有以下几种:</span></span></strong></span></p><p style="padding:0px;font-family:arial;font-size:14px;line-height:26px;background-color:#ffffff;margin-top:0px;margin-bottom:0.21cm;"><span style="font-size:16px;"><span style="font-family:'dejavu serif', serif;"><span lang="en-US"><strong><span lang="zxx"><span style="font-weight:normal;">emacs </span></span></strong></span></span><span style="font-weight:bold;"><span lang="zxx"><span style="font-weight:normal;">综合性的</span></span><span style="font-family:'dejavu serif', serif;"><span lang="en-US"><span lang="zxx"><span style="font-weight:normal;">GNU emacs </span></span></span></span><span lang="zxx"><span style="font-weight:normal;">编辑环境</span></span></span></span></p><p style="padding:0px;font-family:arial;font-size:14px;line-height:26px;background-color:#ffffff;margin-top:0px;margin-bottom:0.21cm;"><span style="font-size:16px;"><span style="font-family:'dejavu serif', serif;"><span lang="en-US"><strong><span lang="zxx"><span style="font-weight:normal;">nano </span></span></strong></span></span><span style="font-weight:bold;"><span lang="zxx"><span style="font-weight:normal;">一个类似于经典的</span></span><span style="font-family:'dejavu serif', serif;"><span lang="en-US"><span lang="zxx"><span style="font-weight:normal;">pico</span></span></span></span><span lang="zxx"><span style="font-weight:normal;">的文本编辑器,内置了一个</span></span><span style="font-family:'dejavu serif', serif;"><span lang="en-US"><span lang="zxx"><span style="font-weight:normal;">pine</span></span></span></span><span lang="zxx"><span style="font-weight:normal;">邮件程序</span></span></span></span></p><p style="padding:0px;font-family:arial;font-size:14px;line-height:26px;background-color:#ffffff;margin-top:0px;margin-bottom:0.21cm;"><span style="font-size:16px;"><span style="font-family:'dejavu serif', serif;"><span lang="en-US"><span lang="zxx"><span style="font-weight:normal;color:#ff0000;">vim </span></span></span></span><span style="font-weight:bold;"><span lang="zxx"><span style="font-weight:normal;color:#ff0000;">一个改进的</span></span><span style="font-family:'dejavu serif', serif;"><span lang="en-US"><span lang="zxx"><span style="font-weight:normal;color:#ff0000;">vi</span></span></span></span><span lang="zxx"><span style="font-weight:normal;color:#ff0000;">文本编辑器</span></span></span></span></p><p style="padding:0px;font-family:arial;font-size:14px;line-height:26px;background-color:#ffffff;margin-top:0px;margin-bottom:0.21cm;"><span style="font-size:16px;"><strong><span lang="zxx"><span style="font-weight:normal;">注意并不是所有的文本编辑器都是基于控制台的,也就是说支持终端使用的。有一些文本编辑器被设计用来提供带有菜单栏,按钮,进度条等的图形界面。例如:</span></span></strong></span></p><p style="padding:0px;font-family:arial;font-size:14px;line-height:26px;background-color:#ffffff;margin-top:0px;margin-bottom:0.21cm;"><span style="font-size:16px;"><span style="font-family:'dejavu serif', serif;"><span lang="en-US"><span lang="zxx"><span style="font-weight:normal;color:#ff0000;">gedit </span></span></span></span><span style="font-weight:bold;"><span lang="zxx"><span style="font-weight:normal;color:#ff0000;">一个</span></span><span style="font-family:'dejavu serif', serif;"><span lang="en-US"><span lang="zxx"><span style="font-weight:normal;color:#ff0000;">GUI</span></span></span></span><span lang="zxx"><span style="font-weight:normal;color:#ff0000;">的文本编辑器,</span></span><span style="font-family:'dejavu serif', serif;"><span lang="en-US"><span lang="zxx"><span style="font-weight:normal;color:#ff0000;">Ubuntu</span></span></span></span><span lang="zxx"><span style="font-weight:normal;color:#ff0000;">默认安装</span></span></span></span></p><p style="padding:0px;font-family:arial;font-size:14px;line-height:26px;background-color:#ffffff;margin-top:0px;margin-bottom:0.21cm;"><span style="font-size:16px;"><span style="font-family:'dejavu serif', serif;"><span lang="en-US"><strong><span lang="zxx"><span style="font-weight:normal;">kate </span></span></strong></span></span><span style="font-weight:bold;"><span lang="zxx"><span style="font-weight:normal;">一个简单的</span></span><span style="font-family:'dejavu serif', serif;"><span lang="en-US"><span lang="zxx"><span style="font-weight:normal;">KDE</span></span></span></span><span lang="zxx"><span style="font-weight:normal;">文本编辑器</span></span></span></span></p><p style="padding:0px;font-family:arial;font-size:14px;line-height:26px;background-color:#ffffff;margin-top:0px;margin-bottom:0.21cm;"><span style="font-size:16px;"><span style="font-family:'dejavu serif', serif;"><span lang="en-US"><strong><span lang="zxx"><span style="font-weight:normal;">kedit </span></span></strong></span></span><span style="font-weight:bold;"><span lang="zxx"><span style="font-weight:normal;">另外一个简单的</span></span><span style="font-family:'dejavu serif', serif;"><span lang="en-US"><span lang="zxx"><span style="font-weight:normal;">KDE</span></span></span></span><span lang="zxx"><span style="font-weight:normal;">文本编辑器</span></span></span></span></p><p style="padding:0px;font-family:arial;font-size:14px;line-height:26px;background-color:#ffffff;margin-top:0px;margin-bottom:0.21cm;"><span style="font-size:16px;"><br /></span></p><p><span style="font-size:16px;"><span style="font-family:'dejavu serif', serif;"><span lang="en-US"><strong><span lang="zxx"><span style="font-weight:normal;">nano</span></span></strong></span></span><strong><span lang="zxx"><span style="font-weight:normal;">文本编辑器的用法</span></span></strong></span></p><p style="padding:0px;font-family:arial;font-size:14px;line-height:26px;background-color:#ffffff;margin-top:0px;margin-bottom:0.21cm;"><span style="font-size:16px;"><span style="font-family:'dejavu serif', serif;"><span lang="en-US"><strong><span lang="zxx"><span style="font-weight:normal;">nano</span></span></strong></span></span><span style="font-weight:bold;"><span lang="zxx"><span style="font-weight:normal;">编辑器最为简单和易用,而且基本上被所有的</span></span><span style="font-family:'dejavu serif', serif;"><span lang="en-US"><span lang="zxx"><span style="font-weight:normal;">Linux</span></span></span></span><span lang="zxx"><span style="font-weight:normal;">所安装。因此我们首先来讲解下它。开启一个</span></span><span style="font-family:'dejavu serif', serif;"><span lang="en-US"><span lang="zxx"><span style="font-weight:normal;">nano</span></span></span></span><span lang="zxx"><span style="font-weight:normal;">编辑器可使用如下命令:</span></span></span></span></p><p style="padding:0px;font-family:arial;font-size:14px;line-height:26px;background-color:#ffffff;margin-top:0px;margin-bottom:0.21cm;"><span style="font-size:16px;"><span style="font-family:'dejavu serif', serif;"><span lang="en-US"><strong><span lang="zxx"><span style="font-weight:normal;">nano file.txt</span></span></strong></span></span></span></p><p style="padding:0px;font-family:arial;font-size:14px;line-height:26px;background-color:#ffffff;margin-top:0px;margin-bottom:0.21cm;"><span style="font-size:16px;"><span style="font-family:'dejavu serif', serif;"><span lang="en-US"><strong><span lang="zxx"><span style="font-weight:normal;">nano</span></span></strong></span></span><span style="font-weight:bold;"><span lang="zxx"><span style="font-weight:normal;">编辑器非常简单,你可以轻松使用它而不需要任何额外知道。这里有一些基本的命令。(</span></span><span style="font-family:'dejavu serif', serif;"><span lang="en-US"><span lang="zxx"><span style="font-weight:normal;">^</span></span></span></span><span lang="zxx"><span style="font-weight:normal;">是控制键</span></span><span style="font-family:'dejavu serif', serif;"><span lang="en-US"><span lang="zxx"><span style="font-weight:normal;">Control</span></span></span></span><span lang="zxx"><span style="font-weight:normal;">)</span></span></span></span></p><p style="padding:0px;font-family:arial;font-size:14px;line-height:26px;background-color:#ffffff;margin-top:0px;margin-bottom:0.21cm;"><span style="font-size:16px;"><span style="font-weight:bold;"><span lang="zxx"><span style="font-weight:normal;">光标移动</span></span><span style="font-family:'dejavu serif', serif;"><span lang="en-US"><span lang="zxx"><span style="font-weight:normal;"> </span></span></span></span><span lang="zxx"><span style="font-weight:normal;">方向键(上</span></span><span style="font-family:'dejavu serif', serif;"><span lang="en-US"><span lang="zxx"><span style="font-weight:normal;">/</span></span></span></span><span lang="zxx"><span style="font-weight:normal;">下</span></span><span style="font-family:'dejavu serif', serif;"><span lang="en-US"><span lang="zxx"><span style="font-weight:normal;">/</span></span></span></span><span lang="zxx"><span style="font-weight:normal;">左</span></span><span style="font-family:'dejavu serif', serif;"><span lang="en-US"><span lang="zxx"><span style="font-weight:normal;">/</span></span></span></span><span lang="zxx"><span style="font-weight:normal;">右),</span></span><span style="font-family:'dejavu serif', serif;"><span lang="en-US"><span lang="zxx"><span style="font-weight:normal;">PageUp/Page Down</span></span></span></span><span lang="zxx"><span style="font-weight:normal;">,或者</span></span><span style="font-family:'dejavu serif', serif;"><span lang="en-US"><span lang="zxx"><span style="font-weight:normal;">^y</span></span></span></span><span lang="zxx"><span style="font-weight:normal;">和</span></span><span style="font-family:'dejavu serif', serif;"><span lang="en-US"><span lang="zxx"><span style="font-weight:normal;">^v</span></span></span></span><span lang="zxx"><span style="font-weight:normal;">。</span></span></span></span></p><p style="padding:0px;font-family:arial;font-size:14px;line-height:26px;background-color:#ffffff;margin-top:0px;margin-bottom:0.21cm;"><span style="font-size:16px;"><span style="font-weight:bold;"><span lang="zxx"><span style="font-weight:normal;">添加字符</span></span><span style="font-family:'dejavu serif', serif;"><span lang="en-US"><span lang="zxx"><span style="font-weight:normal;"> </span></span></span></span><span lang="zxx"><span style="font-weight:normal;">在光标处输入</span></span></span></span></p><p style="padding:0px;font-family:arial;font-size:14px;line-height:26px;background-color:#ffffff;margin-top:0px;margin-bottom:0.21cm;"><span style="font-size:16px;"><span style="font-weight:bold;"><span lang="zxx"><span style="font-weight:normal;">删除字符</span></span><span style="font-family:'dejavu serif', serif;"><span lang="en-US"><span lang="zxx"><span style="font-weight:normal;"> Delete</span></span></span></span><span lang="zxx"><span style="font-weight:normal;">键或者</span></span><span style="font-family:'dejavu serif', serif;"><span lang="en-US"><span lang="zxx"><span style="font-weight:normal;">Backspace</span></span></span></span><span lang="zxx"><span style="font-weight:normal;">键</span></span></span></span></p><p style="padding:0px;font-family:arial;font-size:14px;line-height:26px;background-color:#ffffff;margin-top:0px;margin-bottom:0.21cm;"><span style="font-size:16px;"><span style="font-weight:bold;"><span lang="zxx"><span style="font-weight:normal;">退出</span></span><span style="font-family:'dejavu serif', serif;"><span lang="en-US"><span lang="zxx"><span style="font-weight:normal;"> ^x</span></span></span></span><span lang="zxx"><span style="font-weight:normal;">(将会提示是否保存更改)</span></span></span></span></p><p style="padding:0px;font-family:arial;font-size:14px;line-height:26px;background-color:#ffffff;margin-top:0px;margin-bottom:0.21cm;"><span style="font-size:16px;"><span style="font-weight:bold;"><span lang="zxx"><span style="font-weight:normal;">帮助</span></span><span style="font-family:'dejavu serif', serif;"><span lang="en-US"><span lang="zxx"><span style="font-weight:normal;"> ^g</span></span></span></span></span></span></p><p><br /></p><p><br /></p><p><br /></p><div style="box-sizing:border-box;line-height:28.8px;color:#404040;font-family:'microsoft yahei', verdana, sans-serif, simsun;background-color:#ffffff;"><span style="box-sizing:border-box;font-weight:700;">4. </span>在Vim命令模式下,可以输入以下命令:</div><div style="box-sizing:border-box;line-height:28.8px;color:#404040;font-family:'microsoft yahei', verdana, sans-serif, simsun;background-color:#ffffff;"><strong><span style="color:#ff0000;">(1)光标移动命令</span></strong></div><div style="box-sizing:border-box;line-height:28.8px;color:#404040;font-family:'microsoft yahei', verdana, sans-serif, simsun;background-color:#ffffff;"><strong><span style="color:#ff0000;">h: 左</span></strong></div><div style="box-sizing:border-box;line-height:28.8px;color:#404040;font-family:'microsoft yahei', verdana, sans-serif, simsun;background-color:#ffffff;"><strong><span style="color:#ff0000;">l: 右</span></strong></div><div style="box-sizing:border-box;line-height:28.8px;color:#404040;font-family:'microsoft yahei', verdana, sans-serif, simsun;background-color:#ffffff;"><strong><span style="color:#ff0000;">k: 上</span></strong></div><div style="box-sizing:border-box;line-height:28.8px;color:#404040;font-family:'microsoft yahei', verdana, sans-serif, simsun;background-color:#ffffff;"><strong><span style="color:#ff0000;">j: 下</span></strong></div><div style="box-sizing:border-box;line-height:28.8px;color:#404040;font-family:'microsoft yahei', verdana, sans-serif, simsun;background-color:#ffffff;">向左光标键</div><div style="box-sizing:border-box;line-height:28.8px;color:#404040;font-family:'microsoft yahei', verdana, sans-serif, simsun;background-color:#ffffff;">向右光标键</div><div style="box-sizing:border-box;line-height:28.8px;color:#404040;font-family:'microsoft yahei', verdana, sans-serif, simsun;background-color:#ffffff;">向上光标键</div><div style="box-sizing:border-box;line-height:28.8px;color:#404040;font-family:'microsoft yahei', verdana, sans-serif, simsun;background-color:#ffffff;">向下光标键</div><div style="box-sizing:border-box;line-height:28.8px;color:#404040;font-family:'microsoft yahei', verdana, sans-serif, simsun;background-color:#ffffff;"><p style="box-sizing:border-box;margin-top:0px;line-height:28.8px;margin-bottom:25px;"><strong><span style="color:#ff0000;">(2)插入命令</span></strong></p></div><div style="box-sizing:border-box;line-height:28.8px;color:#404040;font-family:'microsoft yahei', verdana, sans-serif, simsun;background-color:#ffffff;"><strong><span style="color:#ff0000;">i:在光标处插入内容</span></strong></div><div style="box-sizing:border-box;line-height:28.8px;color:#404040;font-family:'microsoft yahei', verdana, sans-serif, simsun;background-color:#ffffff;">I:在第一行插入内容</div><div style="box-sizing:border-box;line-height:28.8px;color:#404040;font-family:'microsoft yahei', verdana, sans-serif, simsun;background-color:#ffffff;"><span style="color:#ff0000;">a:在光标后插入内容</span></div><div style="box-sizing:border-box;line-height:28.8px;color:#404040;font-family:'microsoft yahei', verdana, sans-serif, simsun;background-color:#ffffff;">A:在当前行的尾部插入内容</div><div style="box-sizing:border-box;line-height:28.8px;color:#404040;font-family:'microsoft yahei', verdana, sans-serif, simsun;background-color:#ffffff;">o:在当前行的下面插入新行</div><div style="box-sizing:border-box;line-height:28.8px;color:#404040;font-family:'microsoft yahei', verdana, sans-serif, simsun;background-color:#ffffff;">O:在当前行的上面插入新行</div><div style="box-sizing:border-box;line-height:28.8px;color:#404040;font-family:'microsoft yahei', verdana, sans-serif, simsun;background-color:#ffffff;">(3)删除命令</div><div style="box-sizing:border-box;line-height:28.8px;color:#404040;font-family:'microsoft yahei', verdana, sans-serif, simsun;background-color:#ffffff;">x:删除光标处的字符</div><div style="box-sizing:border-box;line-height:28.8px;color:#404040;font-family:'microsoft yahei', verdana, sans-serif, simsun;background-color:#ffffff;">X:删除光标前的一个字符</div><div style="box-sizing:border-box;line-height:28.8px;color:#404040;font-family:'microsoft yahei', verdana, sans-serif, simsun;background-color:#ffffff;">d0:删除从当前光标所在行的第一个字符到当前光标的前一个字符的一串字符</div><div style="box-sizing:border-box;line-height:28.8px;color:#404040;font-family:'microsoft yahei', verdana, sans-serif, simsun;background-color:#ffffff;">D:删除从当前光标所在的字符到当前光标所在行的最后一个字符的一串字符</div><div style="box-sizing:border-box;line-height:28.8px;color:#404040;font-family:'microsoft yahei', verdana, sans-serif, simsun;background-color:#ffffff;">dd:删除光标所在行的所有字符</div><div style="box-sizing:border-box;line-height:28.8px;color:#404040;font-family:'microsoft yahei', verdana, sans-serif, simsun;background-color:#ffffff;">dw:删除从光标处字符开始的一个单词</div><div style="box-sizing:border-box;line-height:28.8px;color:#404040;font-family:'microsoft yahei', verdana, sans-serif, simsun;background-color:#ffffff;">例如:a boy girl pig</div><div style="box-sizing:border-box;line-height:28.8px;color:#404040;font-family:'microsoft yahei', verdana, sans-serif, simsun;background-color:#ffffff;">如果光标在l处,dw后,结果是:a boy girpig</div><div style="box-sizing:border-box;line-height:28.8px;color:#404040;font-family:'microsoft yahei', verdana, sans-serif, simsun;background-color:#ffffff;">如果光标在l和p之间的空格处,dw后,结果是:a boy girlpig</div><div style="box-sizing:border-box;line-height:28.8px;color:#404040;font-family:'microsoft yahei', verdana, sans-serif, simsun;background-color:#ffffff;">如果光标在b处,dw后,结果是:a girl pig</div><div style="box-sizing:border-box;line-height:28.8px;color:#404040;font-family:'microsoft yahei', verdana, sans-serif, simsun;background-color:#ffffff;">#dd:删除从光标所在的行到其后的#-1行(#必须用数字代替)</div><div style="box-sizing:border-box;line-height:28.8px;color:#404040;font-family:'microsoft yahei', verdana, sans-serif, simsun;background-color:#ffffff;">#x:删除从光标所在的字符开始的#个字符(#必须用数字代替)</div><div style="box-sizing:border-box;line-height:28.8px;color:#404040;font-family:'microsoft yahei', verdana, sans-serif, simsun;background-color:#ffffff;">:n1,n2 d:删除n1行到n2行的内容</div><div style="box-sizing:border-box;line-height:28.8px;color:#404040;font-family:'microsoft yahei', verdana, sans-serif, simsun;background-color:#ffffff;">(4)复制命令</div><div style="box-sizing:border-box;line-height:28.8px;color:#404040;font-family:'microsoft yahei', verdana, sans-serif, simsun;background-color:#ffffff;">:n1,n2 t n3:把n1行到n2行的内容复制到第n3行的下一行</div><div style="box-sizing:border-box;line-height:28.8px;color:#404040;font-family:'microsoft yahei', verdana, sans-serif, simsun;background-color:#ffffff;">(5)移动命令</div><div style="box-sizing:border-box;line-height:28.8px;color:#404040;font-family:'microsoft yahei', verdana, sans-serif, simsun;background-color:#ffffff;">:n1,n2 m n3:把n1行到n2行的内容移动到第n3行的下一行</div><div style="box-sizing:border-box;line-height:28.8px;color:#404040;font-family:'microsoft yahei', verdana, sans-serif, simsun;background-color:#ffffff;">(6)修改/替换命令</div><div style="box-sizing:border-box;line-height:28.8px;color:#404040;font-family:'microsoft yahei', verdana, sans-serif, simsun;background-color:#ffffff;">r:输入一个字符替换光标处的一个字符</div><div style="box-sizing:border-box;line-height:28.8px;color:#404040;font-family:'microsoft yahei', verdana, sans-serif, simsun;background-color:#ffffff;">R:从光标处的字符开始替换,后面的字符一个一个被输入的字符覆盖</div><div style="box-sizing:border-box;line-height:28.8px;color:#404040;font-family:'microsoft yahei', verdana, sans-serif, simsun;background-color:#ffffff;">s:输入一串字符来替换光标处的字符</div><div style="box-sizing:border-box;line-height:28.8px;color:#404040;font-family:'microsoft yahei', verdana, sans-serif, simsun;background-color:#ffffff;">S:先清除光标所在的行,你可以在当前行输入一串字符</div><div style="box-sizing:border-box;line-height:28.8px;color:#404040;font-family:'microsoft yahei', verdana, sans-serif, simsun;background-color:#ffffff;">cc:先清除光标所在的行,你可以在当前行输入一串字符</div><div style="box-sizing:border-box;line-height:28.8px;color:#404040;font-family:'microsoft yahei', verdana, sans-serif, simsun;background-color:#ffffff;">cw:修改一个单词</div><div style="box-sizing:border-box;line-height:28.8px;color:#404040;font-family:'microsoft yahei', verdana, sans-serif, simsun;background-color:#ffffff;">例如:ab cdef ghijk</div><div style="box-sizing:border-box;line-height:28.8px;color:#404040;font-family:'microsoft yahei', verdana, sans-serif, simsun;background-color:#ffffff;">光标在d处,输入cw后,结果是:ab cde\) ghijk,
光标在d处,输入cw后,结果是:ab cdef ghij\(,此时输入pqghd后,结果是:ab cpqghd</p><p style="box-sizing:border-box;line-height:28.8px;color:#;font-family:'microsoft yahei', verdana, sans-serif, simsun;background-color:#ffffff;"><br /></p><p style="box-sizing:border-box;line-height:28.8px;color:#;font-family:'microsoft yahei', verdana, sans-serif, simsun;background-color:#ffffff;"><strong>(六)文件传输命令 scp</strong></p><p style="box-sizing:border-box;line-height:28.8px;color:#;font-family:'microsoft yahei', verdana, sans-serif, simsun;background-color:#ffffff;"><br /></p><p> scp 本地用户名@IP地址:文件名1 远程用户名@IP地址:文件名2</p><p> scp file username@ip:filepath</p><p><br /></p><p><br /></p><p>scp -r PHONe/ xiaoqiugood@192.168.8.4:~/</p><p><br /></p><p>scp -r -P 4444 xiaoqiugood@10.60.36.168: /home/xiaoqiugood/vasp/Pd-H /home/CALYPSO_1.2/Tests/ 从远程到本机</p><p> #成功事例,注意端口的写法:应为 -P 4444;-P 选择端口.注意-p已经被rcp使用.</p><p>scp -P 4444 xiaoqiugood@10.60.36.168:/home/xiaoqiugood/poscar-cif.* /home/ #成功事例,从远程到本机</p><p>scp -r -P4444 Tests/ xiaoqiugood@10.60.36.168:~/ 成功事例,注意端口的写法:应为 -P 4444;-P 选择端口.注意-p已经被rcp使用. 从本机到远程</p><p style="box-sizing:border-box;line-height:28.8px;color:#;font-family:'microsoft yahei', verdana, sans-serif, simsun;background-color:#ffffff;"><br /></p><p style="box-sizing:border-box;line-height:28.8px;color:#;font-family:'microsoft yahei', verdana, sans-serif, simsun;background-color:#ffffff;"><br /></p><p>在虚拟机中设置网络连接方式为NAT,并设置eth0的IP与169.254.75.183在同一地址段,如设为169.254.75.184,经检验可主机可单向ping通虚拟机,但这并不影响采用ssh相互传送文件如图2。</p><p>ifconfig eth0 192.168.44.128</p><p><br /></p><p><br /></p><p><br /></p><p>ifconfig命令-动态获取IP</p><p>注:ifconfig下令可使当前设置奏效,但重启后将失效;</p><p>①ifconfig命令</p><p>用ifconfig命令修改后重起服务配置不保存</p><p>给Eth0接口设置IP地址和子网掩码广播地址并激活:ifconfig eth0 192.168.1.155 netmask 255.255.255.0 broadcast 192.168.1.255 UP</p><p>更改Eth0口的MAC地址:ifconfig eth0 hw ehter 00:40:64:c8:03:04</p><p>一个网卡添加多个IP:ifoconfig eht0:1 192.168.1.156 ifconfig eth1:192.168.157</p><p>添加网关:route add default gw 192.168.1.1</p><p>动态获取IP:ifconfig eth0 -dynamic</p><p><br /></p><p><br /></p><p><br /></p><p><br /></p><p>虚拟机下slackware桥接方式上网-静态IP方式</p><p><br /></p><p>ifconfig eth0 down #</p><p>ifconfig eth0 192.168.1.101 broadcast 192.168.1.255 netmask 255.255.255.0 up #配置IP地址2,广播地址,子网掩码</p><p>route add default gw 192.168.1.1 #配置网关</p><p><br /></p><p><br /></p><p><br /></p><p><br /></p><p>IP中的广播地址是可以发送一个包让子网内所有的IP都接收的地址 </p><p>注1:不关机状态下,变换网络(从实验室到宿舍),当主机IPV4属性改设为动态IP时(动态IP恰好在之前静态IP的同一地址段),不影响虚拟机上网;当主机IPV4属性不修改为动态IP时,主机不能上网,但虚拟机仍然可以上网</p><p>注2:虚拟机悬挂,第二天重起动不会改变ifconfig 对eth0的设置</p><p>注2:主机动态IP(192.168.0.103),虚拟机直接重启后,分配该路由下地址:192.168.0.110</p><p><br /></p><p>上网时的设置….</p><p><br /></p><p>ifconfig eth0 down #</p><p>ifconfig eth0 169.254.69.133 broadcast 169.254.0.255 netmask 255.255.0.0 up</p><p>#配置IP地址2,广播地址,子网掩码</p><p>route add default gw 169.254.0.1 #配置网关</p><p><br /></p><p>在该地址下,修改虚拟机上网连接方式为NAT方式,则可以实现没有连接互联网时,虚拟机与主机的通信;通过虚拟连接3(169.254.69.131;相互之间可实现ping通)</p><p>关闭网卡:Ifconfig eth0 down</p><p>动态获取IP:Ifconfig etho -dynamic</p><p style="box-sizing:border-box;line-height:28.8px;color:#;font-family:'microsoft yahei', verdana, sans-serif, simsun;background-color:#ffffff;"><br /></p><p><br /></p><p><br /></p><p>成功案例:</p><p><br /></p><p><br /></p><p>xiaoqiu@ubuntu:~/work\) scp -r yexq@192.168.0.100:~/work/phonon/puhx/puh3-cmcm-150g ~/work
The authenticity of host ’192.168.0.100 (192.168.0.100)‘ can’t be established.
RSA key fingerprint is SHA256:8wLqVvXa5nh1mVkmjIrPYl231lqGFJ1Okr09fD87LPU.
Are you sure you want to continue connecting (yes/no)? yes
Warning: Permanently added ‘192.168.0.100’ (RSA) to the list of known hosts.
yexq@192.168.0.100‘s password:
CONTCAR_1500-04 100% 2063 2.0KB/s 00:00
POSCAR 100% 1243 1.2KB/s 00:00
disp.yaml 100% 15KB 14.5KB/s 00:01
SPOSCAR
<label style="font-size:13px; color:#850f0f">转载本文请联系原作者获取授权,同时请注明本文来自叶小球科学网博客。<br />链接地址:</label>https://wap.sciencenet.cn/blog-567091-1030525.html
讯享网
上一篇:考虑自旋轨道耦合后的电子结构计算及绘图
下一篇:关于固态金属氢,《Science》文章
版权声明:本文内容由互联网用户自发贡献,该文观点仅代表作者本人。本站仅提供信息存储空间服务,不拥有所有权,不承担相关法律责任。如发现本站有涉嫌侵权/违法违规的内容,请联系我们,一经查实,本站将立刻删除。
如需转载请保留出处:https://51itzy.com/kjqy/149267.html