
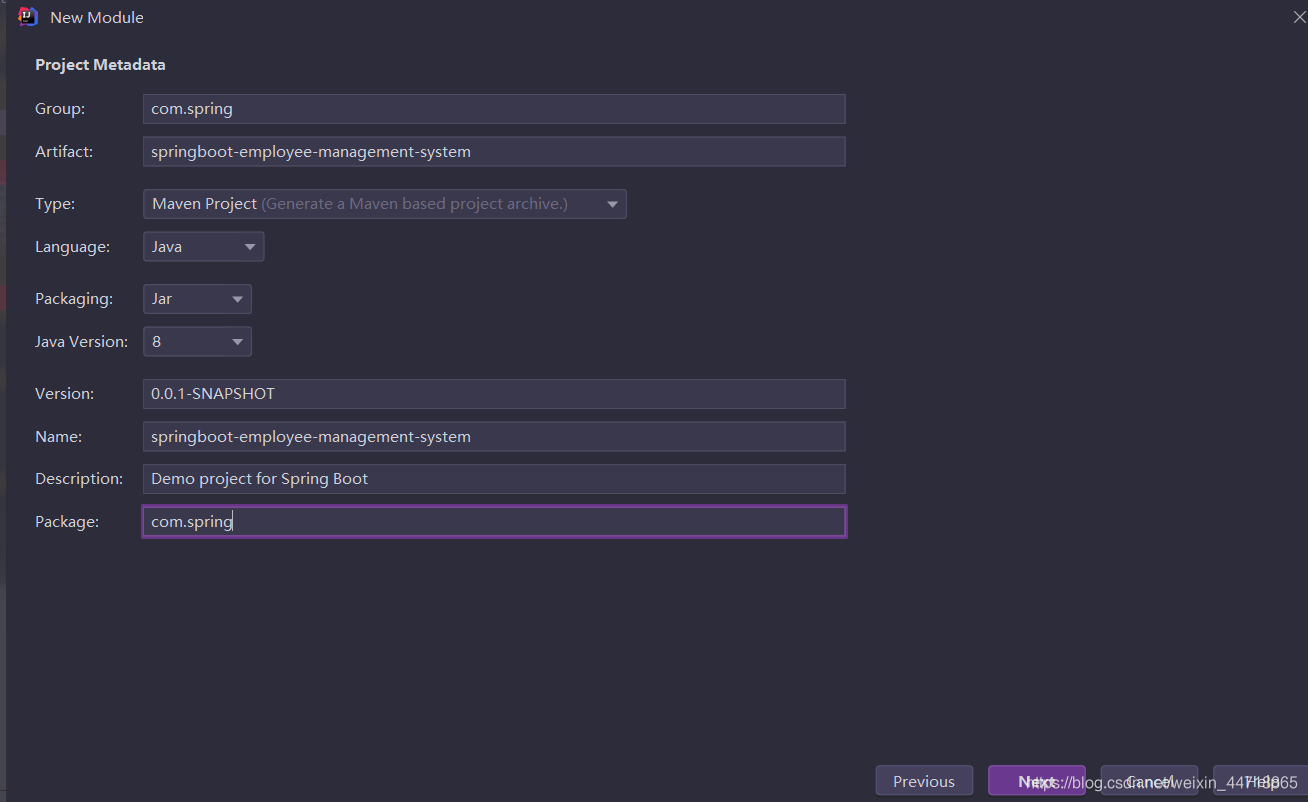
1、准备工作
- 新建springboot项目,命名为springboot-employee-management-system

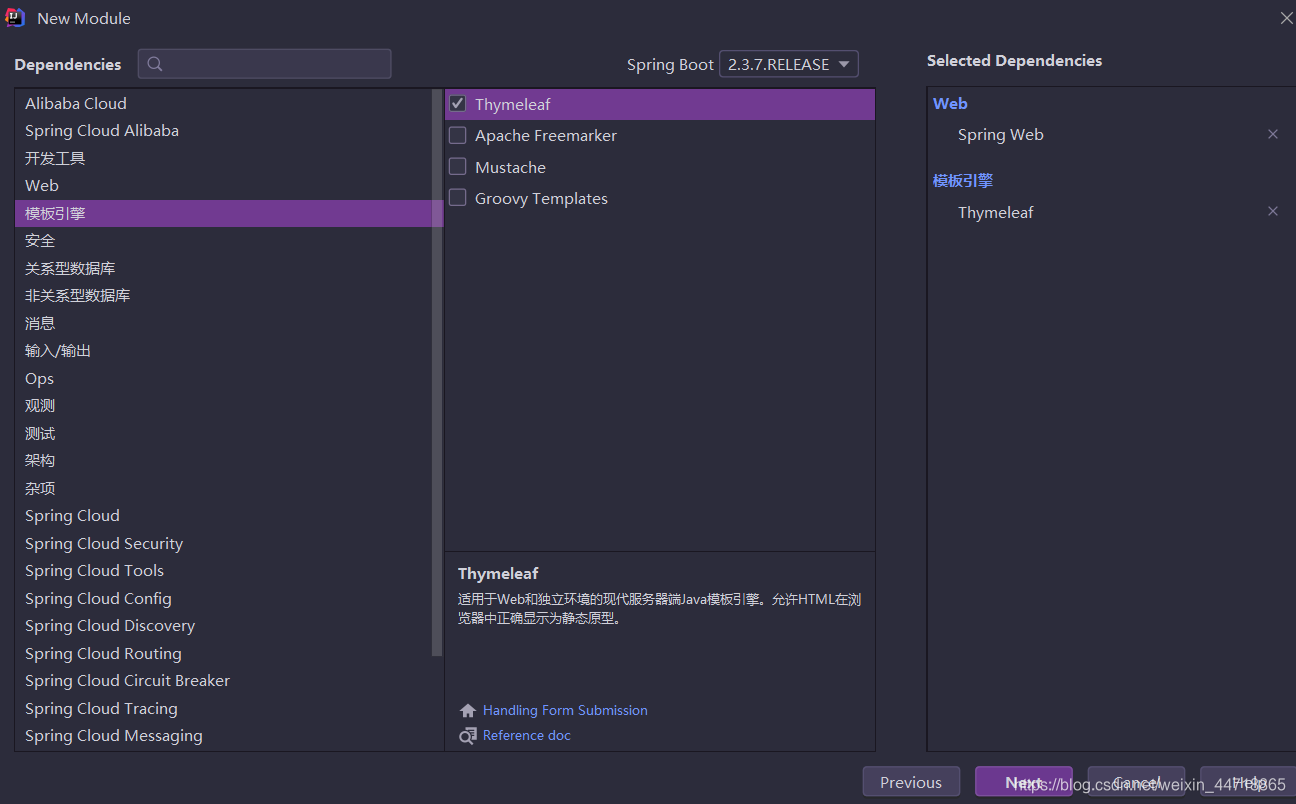
讯享网 - 选择需要的配置模块
- 创建controller层,写一个HelloController测试一下
@RestController public class HelloController {
    @GetMapping("/hello") public String hello() {
    return "hello world"; } }
讯享网
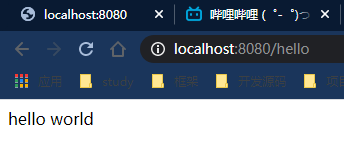
- 启动项目,测试结果
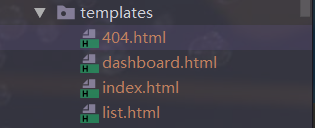
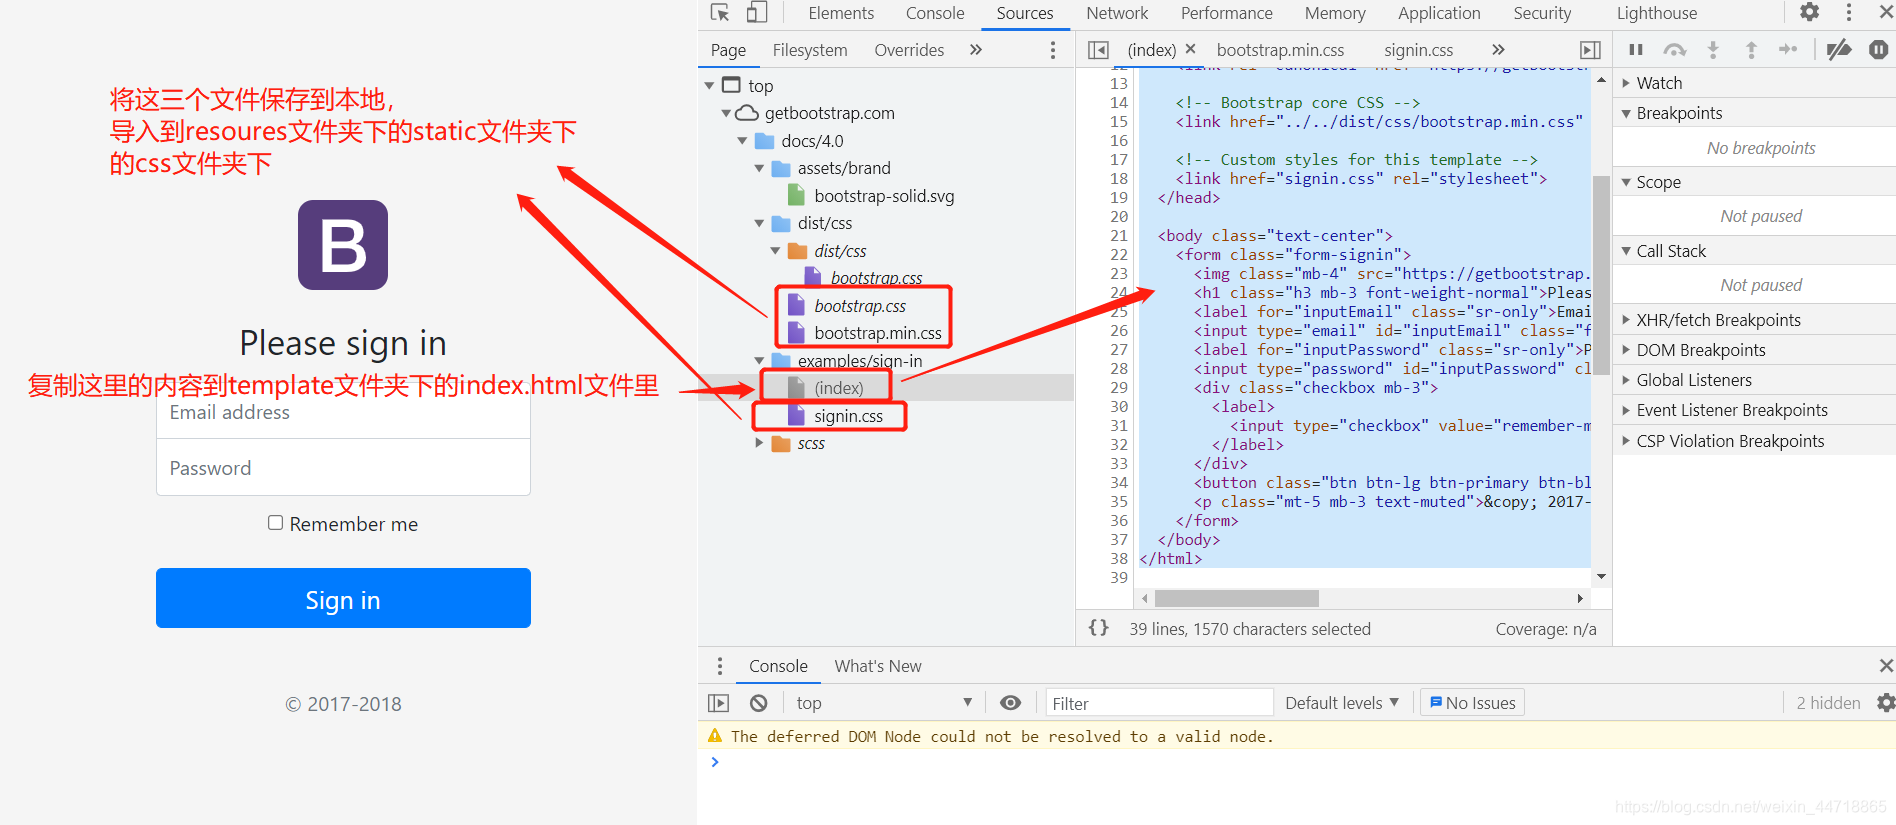
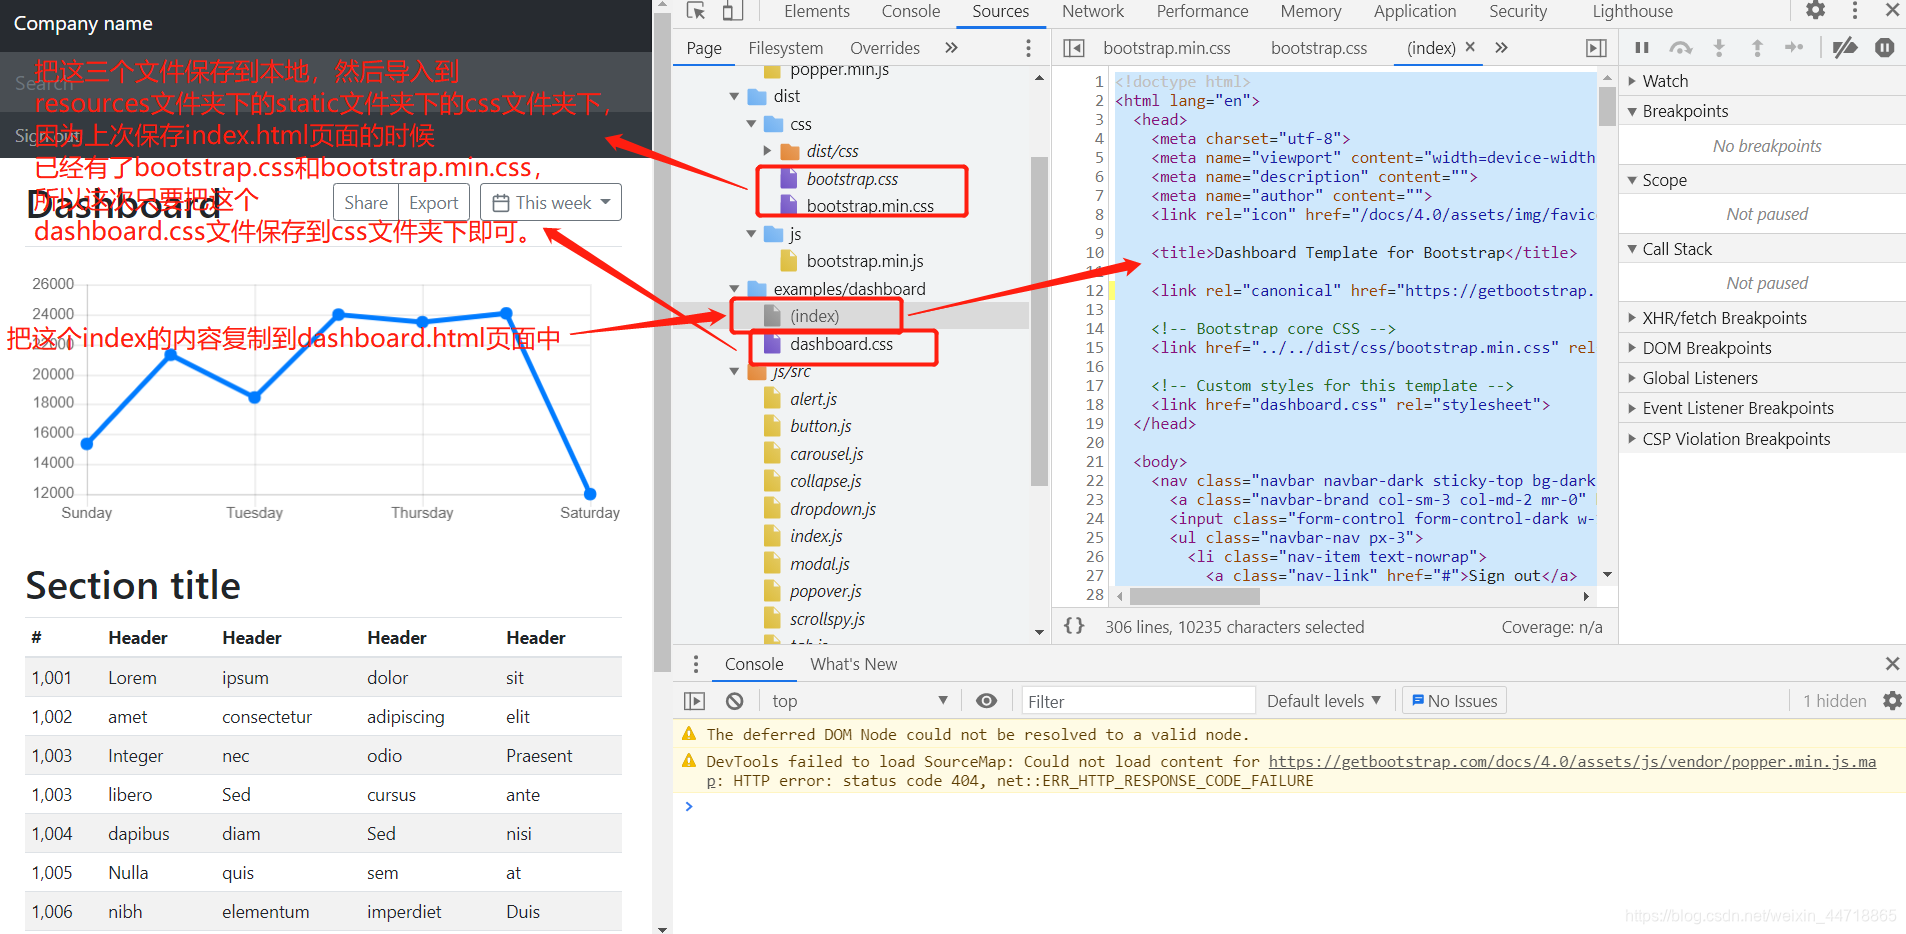
- 将静态资源导入进来
index.html页面:index.html页面
dashboard.html页面:dashboard.html页面
404.html页面直接进去复制index中的内容即可:404.html页面
list.html页面:暂时先拿dashboard.html页面的中的代码 - 导入lombok依赖(要有lombok插件,如果没有先到setting去下载)
讯享网<dependency> <groupId>org.projectlombok</groupId> <artifactId>lombok</artifactId> </dependency>
- 创建pojo层,创建Department 实体类和Employee 实体类
//部门表 @Data @AllArgsConstructor//有参构造器 @NoArgsConstructor//无参构造器 public class Department {
private Integer id; private String departmentName; } 讯享网//员工表 @Data @NoArgsConstructor public class Employee {
private Integer id; private String lastName; private String email; private Integer gender;//0:女 1:男 private Department department; private Date birth; public Employee(Integer id, String lastName, String email, Integer gender, Department department) {
this.id = id; this.lastName = lastName; this.email = email; this.gender = gender; this.department = department; // 默认的日期 this.birth = new Date(); } }
- 创建dao层,创建DepartmentDao 和EmployeeDao
//部门dao @Repository public class DepartmentDao {
    // 模拟数据库中的数据 private static Map<Integer, Department> departmentMap = null; static{
    departmentMap = new HashMap<Integer, Department>();//创建一个部门表 departmentMap.put(101, new Department(101, "教学部")); departmentMap.put(102, new Department(102, "市场部")); departmentMap.put(103, new Department(103, "教研部")); departmentMap.put(104, new Department(104, "运营部")); departmentMap.put(105, new Department(105, "后勤部")); } // 获得所有部门信息 public Collection<Department> getDepartments() {
    return departmentMap.values(); } // 通过id得到部门 public Department getDepartmentById(Integer id) {
return departmentMap.get(id); } } 讯享网//员工dao @Repository public class EmployeeDao {
// 模拟数据库中的数据 private static Map<Integer, Employee> employeeMap = null; // 员工有所属的部门 @Autowired private DepartmentDao departmentDao;//要将这个注入过来,dao层要添加注解应该添加@Repository,这个属性就可以使用注解@Autowired static {
employeeMap = new HashMap<Integer, Employee>();//创建一个员工表 employeeMap.put(1001, new Employee(1001, "A", "@.com", 0, new Department(101, "教学部"))); employeeMap.put(1002, new Employee(1002, "B", "@.com", 1, new Department(102, "市场部"))); employeeMap.put(1003, new Employee(1003, "C", "@.com", 0, new Department(103, "教研部"))); employeeMap.put(1004, new Employee(1004, "D", "@.com", 1, new Department(104, "运营部"))); employeeMap.put(1005, new Employee(1005, "E", "@.com", 0, new Department(105, "后勤部"))); } // 主键自增 private static Integer initId = 1006; // 增加一个员工 public void save(Employee employee) {
if (employee.getId() == null) {
employee.setId(initId++); }employee.setDepartment(departmentDao.getDepartmentById(employee.getDepartment().getId())); employeeMap.put(employee.getId(), employee); } // 查询全部员工信息 public Collection<Employee> getAll() {
return employeeMap.values(); } // 通过id查询员工 public Employee getEmployeeById(Integer id) {
return employeeMap.get(id); } // 删除员工通过id public void delete(Integer id) {
employeeMap.remove(id); } }
2、首页实现
- 写首页Controller
@Controller public class IndexController {
    @RequestMapping({
   "/", "index.html"}) public String index() {
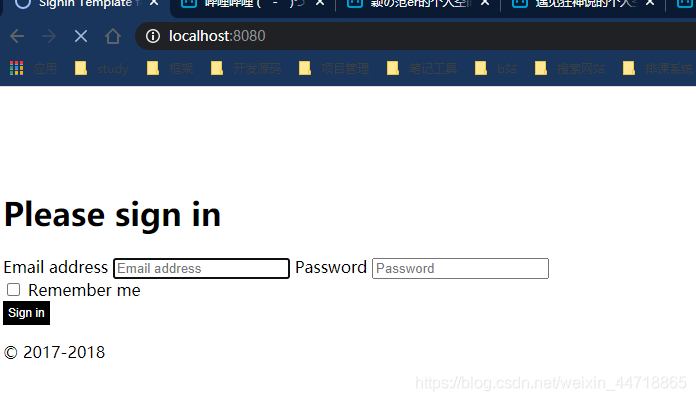
return "index"; } } - 启动项目并访问:http://localhost:8080/,可以看到如下页面
- 自己写配置类,创建config文件夹,创建MyMvcConfig配置类
讯享网@Configuration public class MyMvcConfig implements WebMvcConfigurer {
    // 添加视图控制器 @Override public void addViewControllers(ViewControllerRegistry registry) {
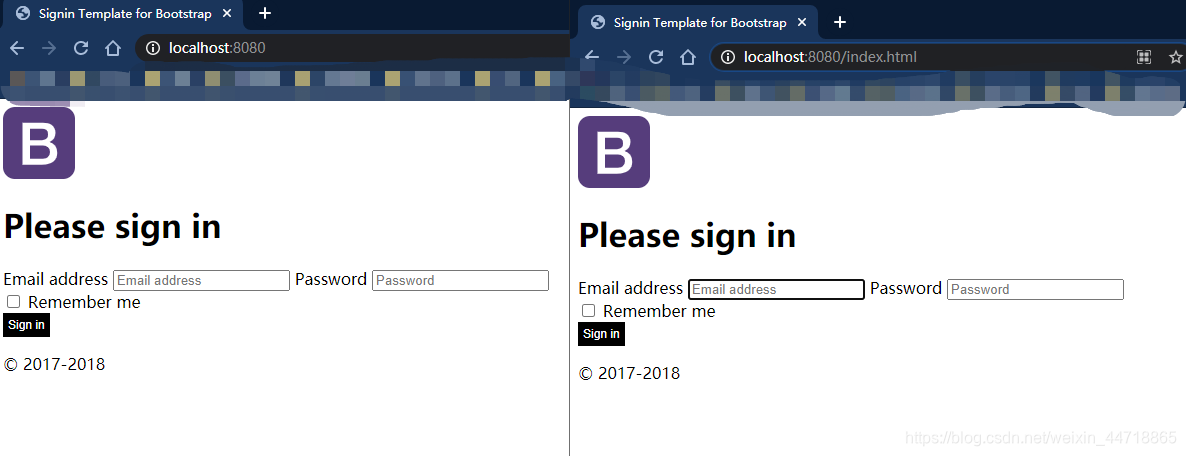
    registry.addViewController("/").setViewName("index"); registry.addViewController("/index.html").setViewName("index"); } }
- 把上面写的IndexController去掉重启项目,测试看结果
- 要使用thymeleaf,需要在html文件中导入命名空间的约束,方便提示
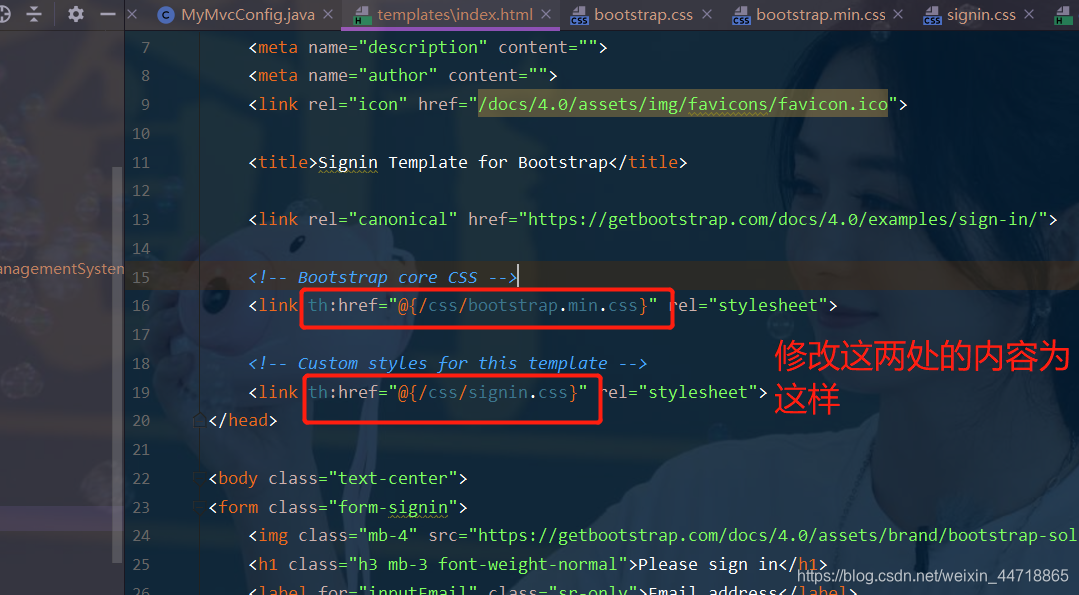
xmlns:th="http://www.thymeleaf.org" - 到index.html文件中修改两处地方的代码
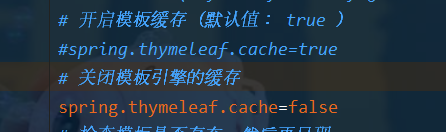
- 到properties配置文件中关闭模板引擎的缓存
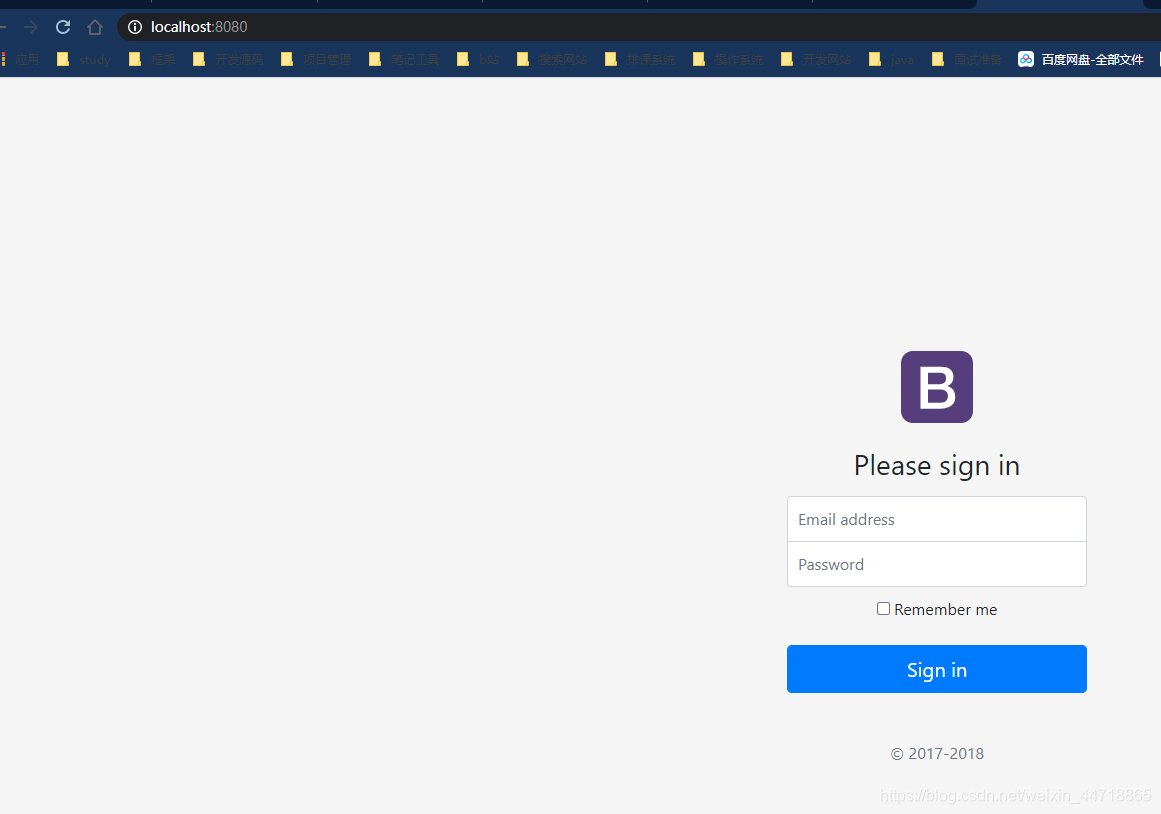
- 重新启动项目访问:http://localhsot:8080/,可看到页面出来了
- 去404.html页面修改代码
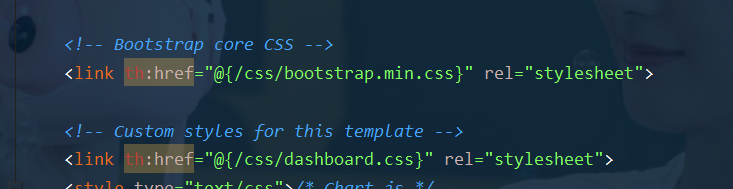
- 去dashboard.html页面修改代码
- 去list.html页面修改代码
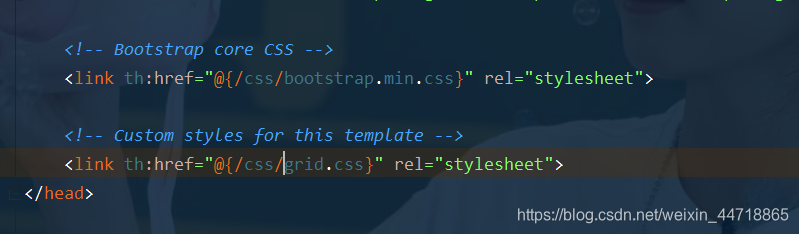
- 如果我在配置文件properties中添加下面代码
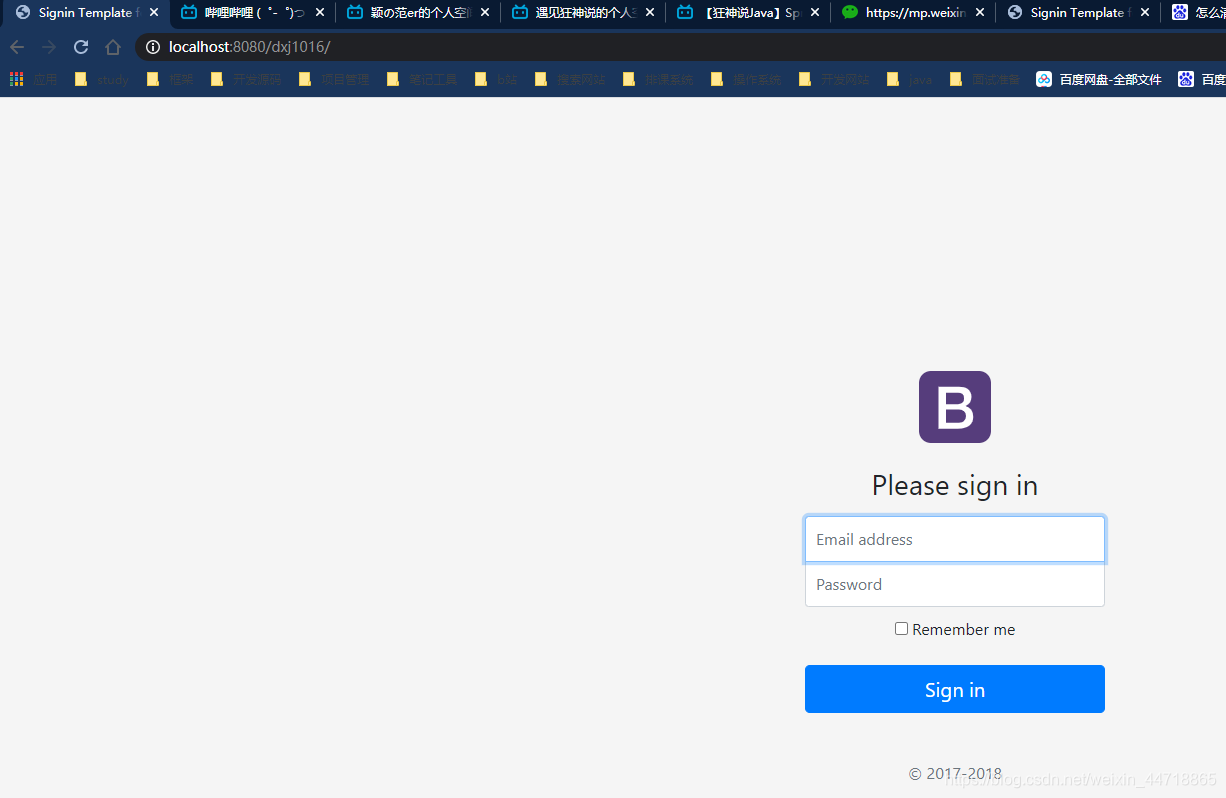
- 启动项目测试
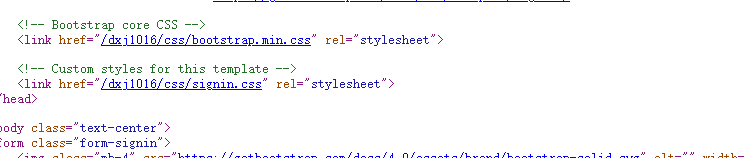
- 右键查看源码发现他会自动帮我们配置到前面的路径/dxj1016


3、页面国际化
springBoot国际化就是指页面可以按照中英文切换显示。实现步骤大致分为三步:1,配置国际化文件2.写国际化类添加组键中3.页面展示。大致原理就是LocaleResolver根据获取请求头中的信息,进行判断。
3.1、准备工作
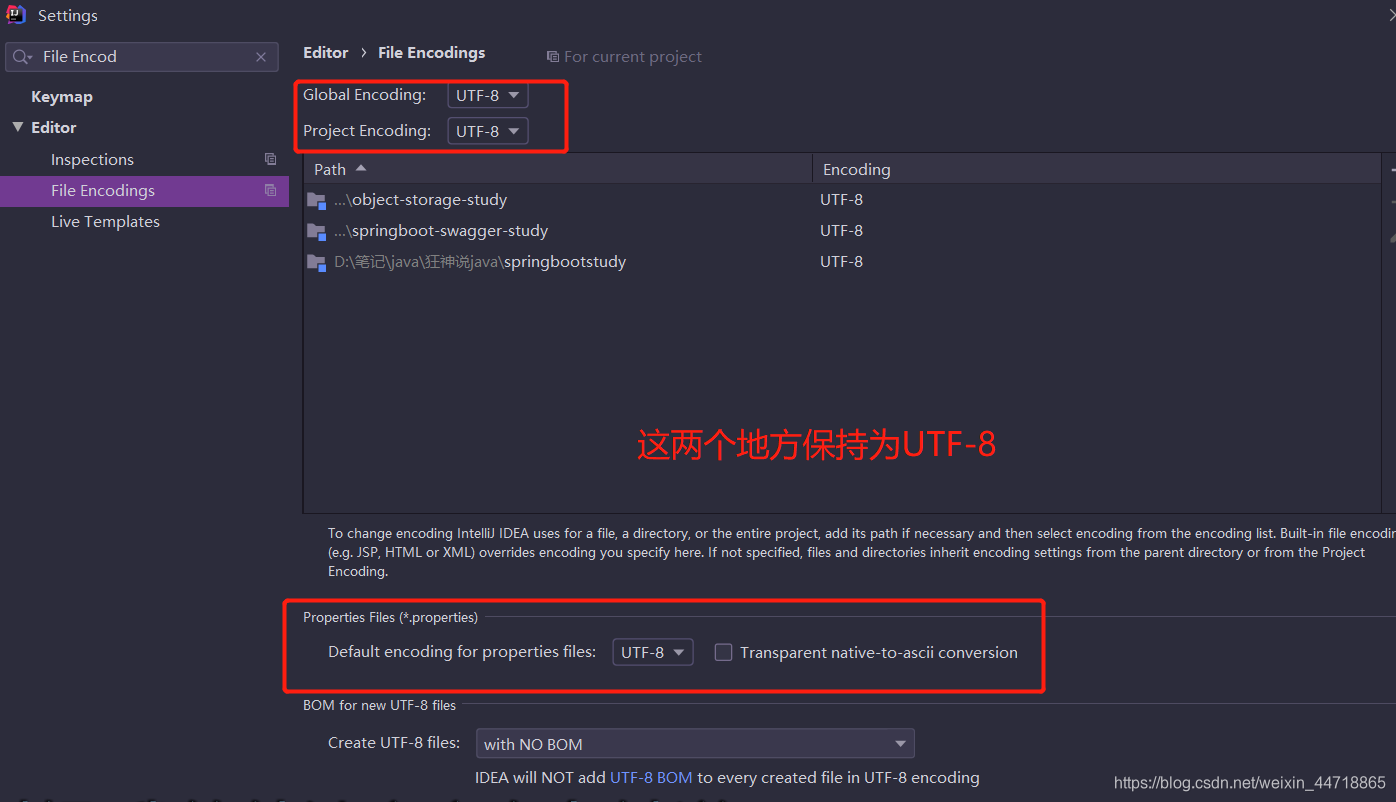
- 先在IDEA中统一设置properties的编码问题!不然页面可能乱码
- 编写国际化配置文件,抽取页面需要显示的国际化页面消息。我们可以去登录页面查看一下,哪些内容我们需要编写国际化的配置!
3.2、配置文件编写
- 我们在resources资源文件下新建一个i18n目录,存放国际化配置文件
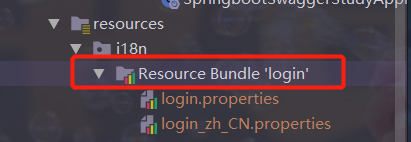
- 建立一个login.properties文件,还有一个login_zh_CN.properties;发现IDEA自动识别了我们要做国际化操作;文件夹变了!
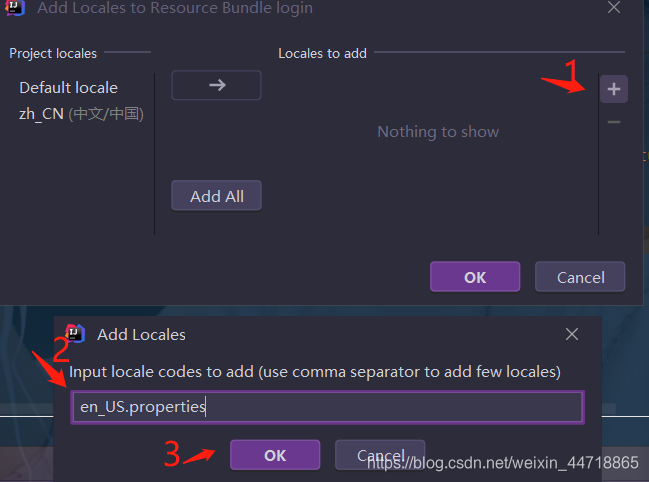
- 接下来通过右键Resource Bundle ‘login’–>New–>Add Property Files to Resource Bundle新建一个login_en_US.properties文件。
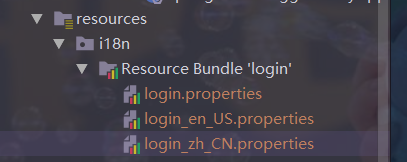
- 最后文件结构如下:
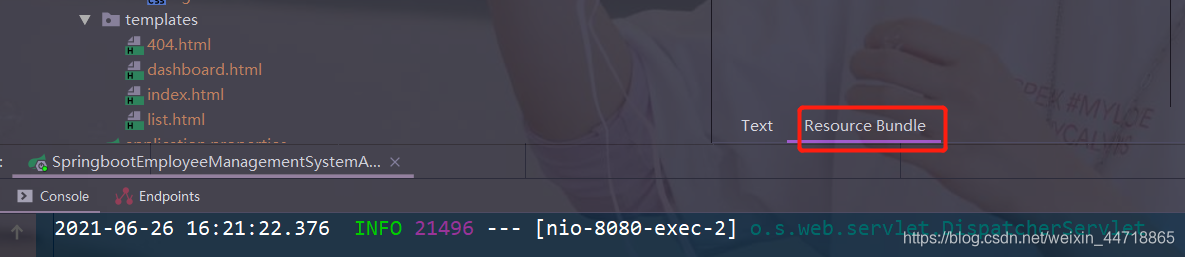
- 接下来,我们就来编写配置,我们可以看到idea下面有另外一个视图;
- 这个视图我们点击 + 号就可以直接添加属性了;我们新建一个login.tip,可以看到边上有三个文件框可以输入。添加一下首页的内容
- 然后依次添加其他页面内容即可!
- 然后去查看我们的配置文件;

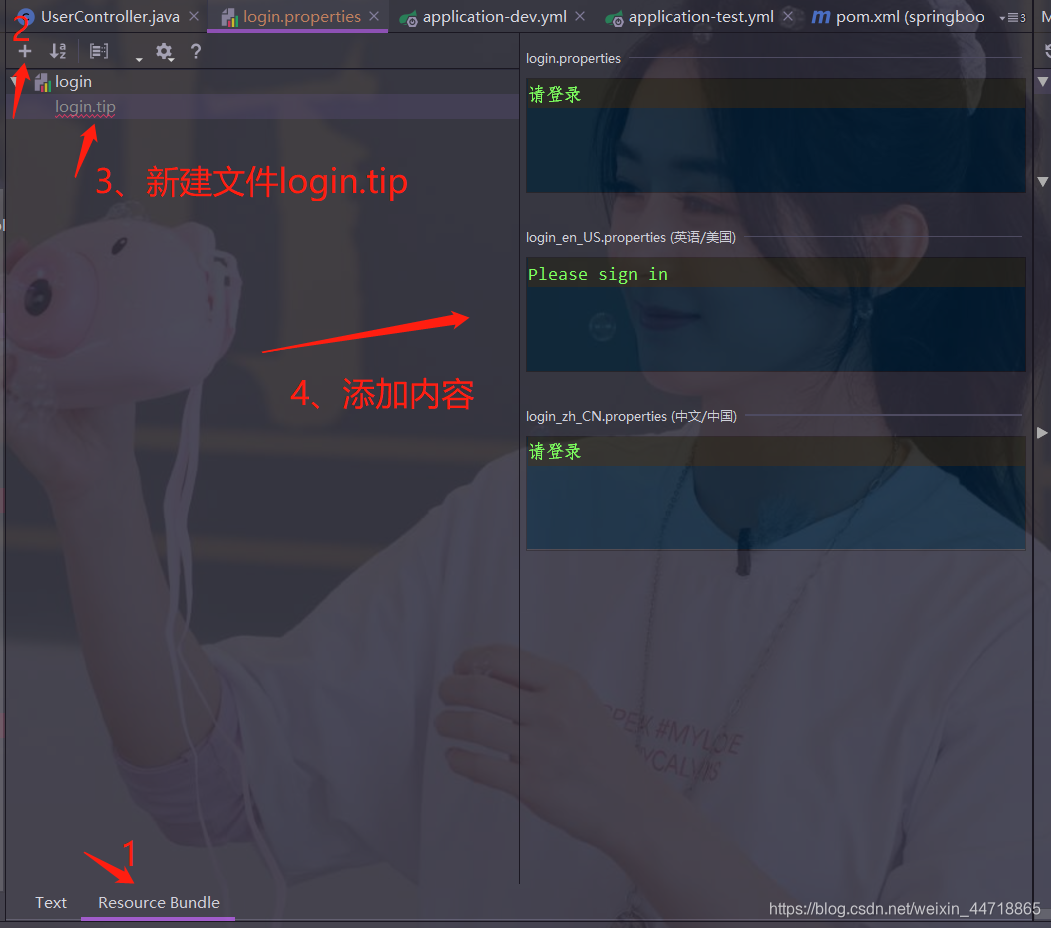
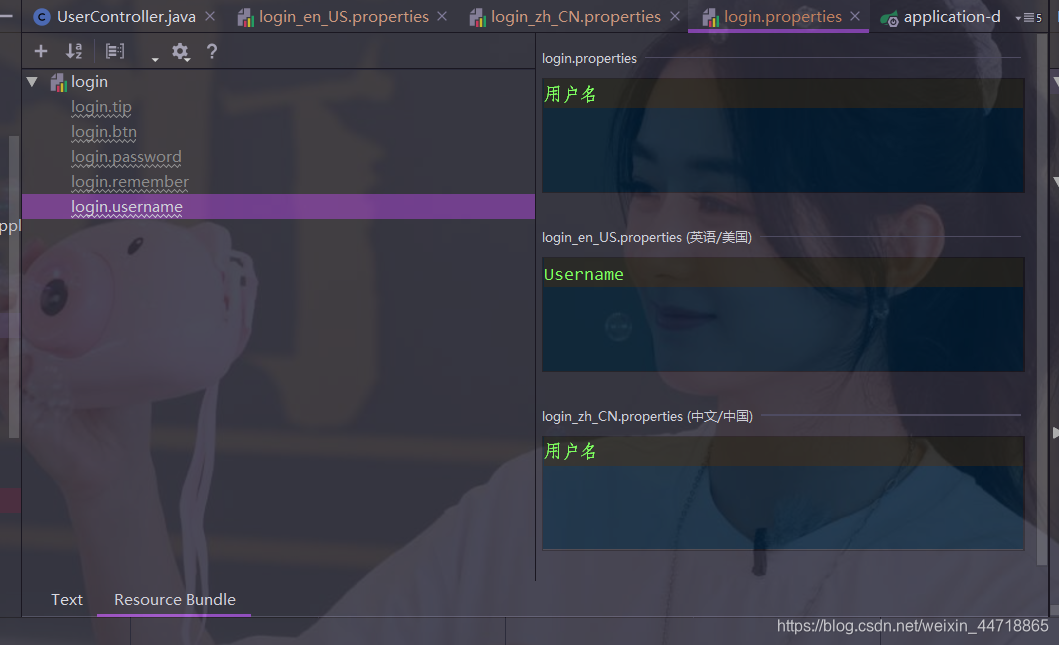
login.properties :默认
讯享网login.btn=登录 login.password=密码 login.remember=记住我 login.tip=请登录 login.username=用户名
英文:
login.btn=Sign in login.password=Password login.remember=Remember me login.tip=Please sign in login.username=Username 中文:
讯享网login.btn=登录 login.password=密码 login.remember=记住我 login.tip=请登录 login.username=用户名
OK,配置文件步骤搞定
3.3、配置文件生效探究
- 我们去看一下SpringBoot对国际化的自动配置!这里又涉及到一个类:MessageSourceAutoConfiguration
- 里面有一个方法,这里发现SpringBoot已经自动配置好了管理我们国际化资源文件的组件 ResourceBundleMessageSource;
// 获取 properties 传递过来的值进行判断 @Bean public MessageSource messageSource(MessageSourceProperties properties) {
    ResourceBundleMessageSource messageSource = new ResourceBundleMessageSource(); if (StringUtils.hasText(properties.getBasename())) {
    // 设置国际化文件的基础名(去掉语言国家代码的) messageSource.setBasenames( StringUtils.commaDelimitedListToStringArray( StringUtils.trimAllWhitespace(properties.getBasename()))); } if (properties.getEncoding() != null) {
    messageSource.setDefaultEncoding(properties.getEncoding().name()); } messageSource.setFallbackToSystemLocale(properties.isFallbackToSystemLocale()); Duration cacheDuration = properties.getCacheDuration(); if (cacheDuration != null) {
    messageSource.setCacheMillis(cacheDuration.toMillis()); } //这里是到properties中去找 messageSource.setAlwaysUseMessageFormat(properties.isAlwaysUseMessageFormat()); messageSource.setUseCodeAsDefaultMessage(properties.isUseCodeAsDefaultMessage()); return messageSource; }
我们真实的情况是放在了i18n目录下,所以我们要去application.properties文件中配置这个messages的路径;
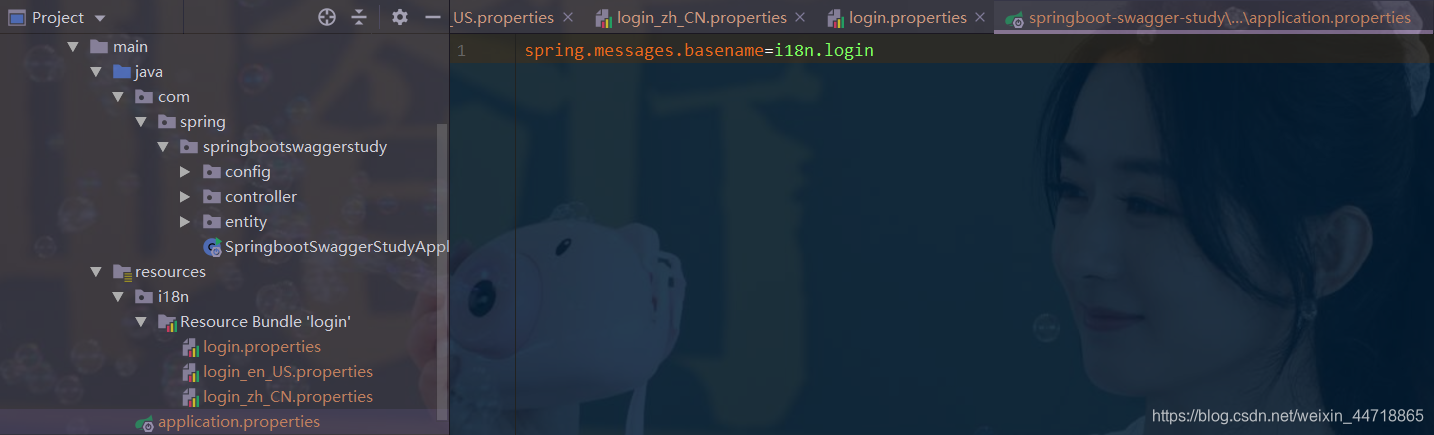
讯享网# 我们的配置文件的真实位置 spring.messages.basename=i18n.login
配置页面国际化值
去index.html页面获取国际化的值,查看Thymeleaf的文档,找到message取值操作为:#{…}。我们去页面测试下:
到index.html页面将页面上的属性都用thymeleaf格式。
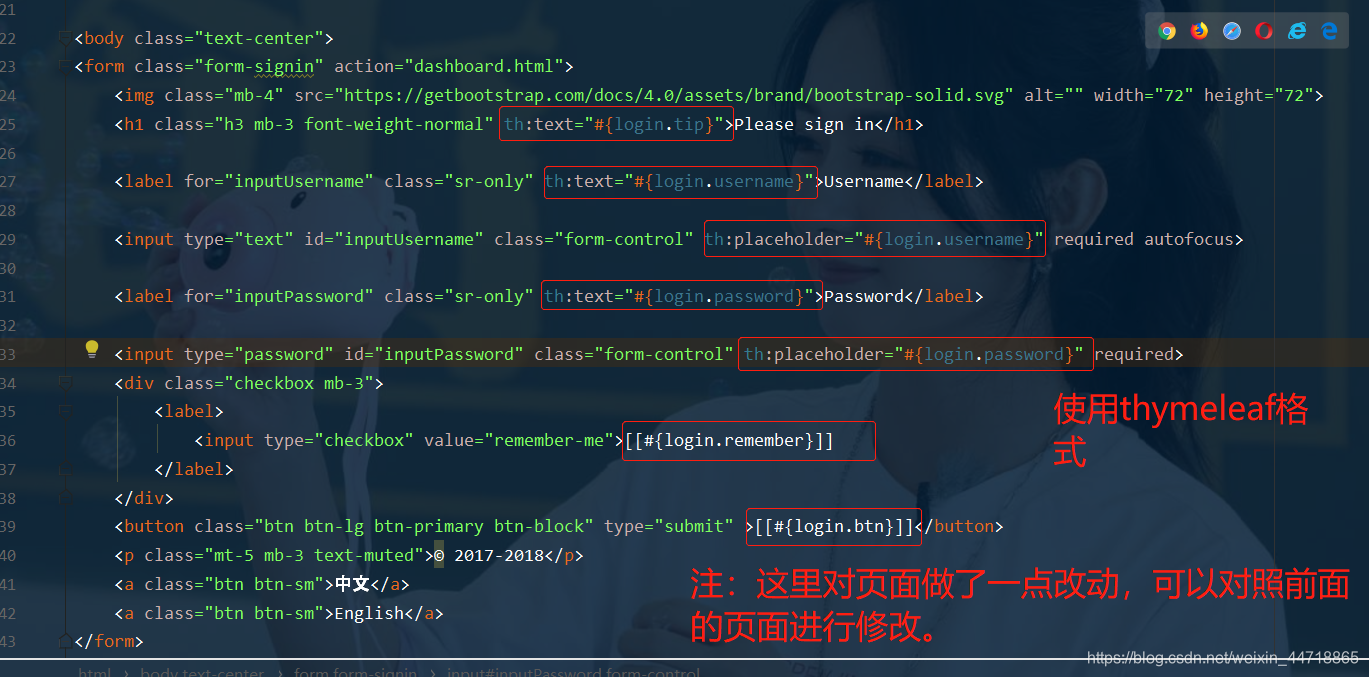
我们可以去启动项目,访问一下:http://localhost:8080/dxj1016;因为在前面有配置了路径dxj1016,如果没有配置那么就是访问:http://localhost:8080/,发现已经自动识别为中文的了!
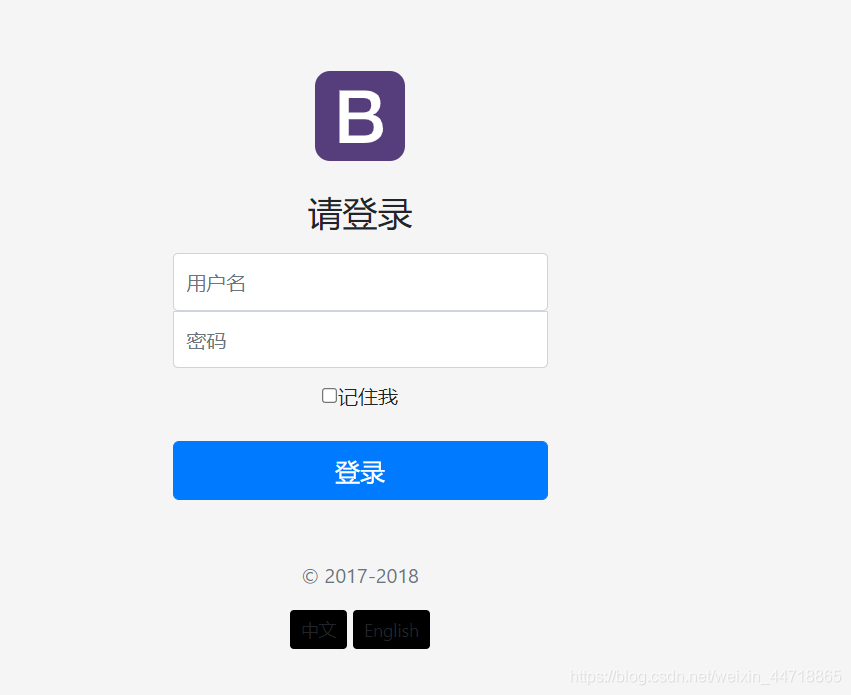

但是我们想要更好!可以根据按钮自动切换中文英文!
配置国际化解析
- 在Spring中有一个国际化的Locale (区域信息对象);里面有一个叫做LocaleResolver (获取区域信息对象)的解析器!
- 我们去我们webmvc自动配置文件,寻找一下!看到SpringBoot默认配置:
@Bean @ConditionalOnMissingBean @ConditionalOnProperty(prefix = "spring.mvc", name = "locale") public LocaleResolver localeResolver() {
    // 容器中没有就自己配,有的话就用用户配置的 if (this.mvcProperties.getLocaleResolver() == WebMvcProperties.LocaleResolver.FIXED) {
    return new FixedLocaleResolver(this.mvcProperties.getLocale()); } // 接收头国际化分解;如果用户没有配置,就使用这个 AcceptHeaderLocaleResolver localeResolver = new AcceptHeaderLocaleResolver(); localeResolver.setDefaultLocale(this.mvcProperties.getLocale()); return localeResolver; }
AcceptHeaderLocaleResolver 这个类中有一个方法
讯享网 public Locale resolveLocale(HttpServletRequest request) {
    Locale defaultLocale = this.getDefaultLocale(); // 默认的就是根据请求头带来的区域信息获取Locale进行国际化 if (defaultLocale != null && request.getHeader("Accept-Language") == null) {
    return defaultLocale; } else {
    Locale requestLocale = request.getLocale(); List<Locale> supportedLocales = this.getSupportedLocales(); if (!supportedLocales.isEmpty() && !supportedLocales.contains(requestLocale)) {
    Locale supportedLocale = this.findSupportedLocale(request, supportedLocales); if (supportedLocale != null) {
    return supportedLocale; } else {
    return defaultLocale != null ? defaultLocale : requestLocale; } } else {
    return requestLocale; } } }
- 那假如我们现在想点击链接让我们的国际化资源生效,就需要让我们自己的Locale生效!
- 我们去自己写一个自己的LocaleResolver,可以在链接上携带区域信息!
- 修改一下前端页面的跳转连接:
<!-- 这里传入参数不需要使用 ?使用 (key=value)--> <a class="btn btn-sm" th:href="@{/index.html(l='zh_CN')}">中文</a> <a class="btn btn-sm" th:href="@{/index.html(l='en_US')}">English</a> - 我们去写一个处理的组件类!
讯享网 package com.kuang.component; import org.springframework.util.StringUtils; import org.springframework.web.servlet.LocaleResolver; import javax.servlet.http.HttpServletRequest; import javax.servlet.http.HttpServletResponse; import java.util.Locale; //可以在链接上携带区域信息 public class MyLocaleResolver implements LocaleResolver {
    //解析请求 @Override public Locale resolveLocale(HttpServletRequest request) {
    //获取请求中的语言参数 String language = request.getParameter("l"); Locale locale = Locale.getDefault(); // 如果没有获取到就使用系统默认的 //如果请求链接不为空,携带了国际化的参数 if (!StringUtils.isEmpty(language)){
    //分割请求参数:zh_CN String[] split = language.split("_"); //国家,地区 locale = new Locale(split[0],split[1]); } return locale; } @Override public void setLocale(HttpServletRequest httpServletRequest, HttpServletResponse httpServletResponse, Locale locale) {
    } }
- 为了让我们的区域化信息能够生效,我们需要再配置一下这个组件!在我们自己的MyMvcConofig下添加bean;
//自定义的国际化就生效了 @Bean public LocaleResolver localeResolver(){
return new MyLocaleResolver(); } 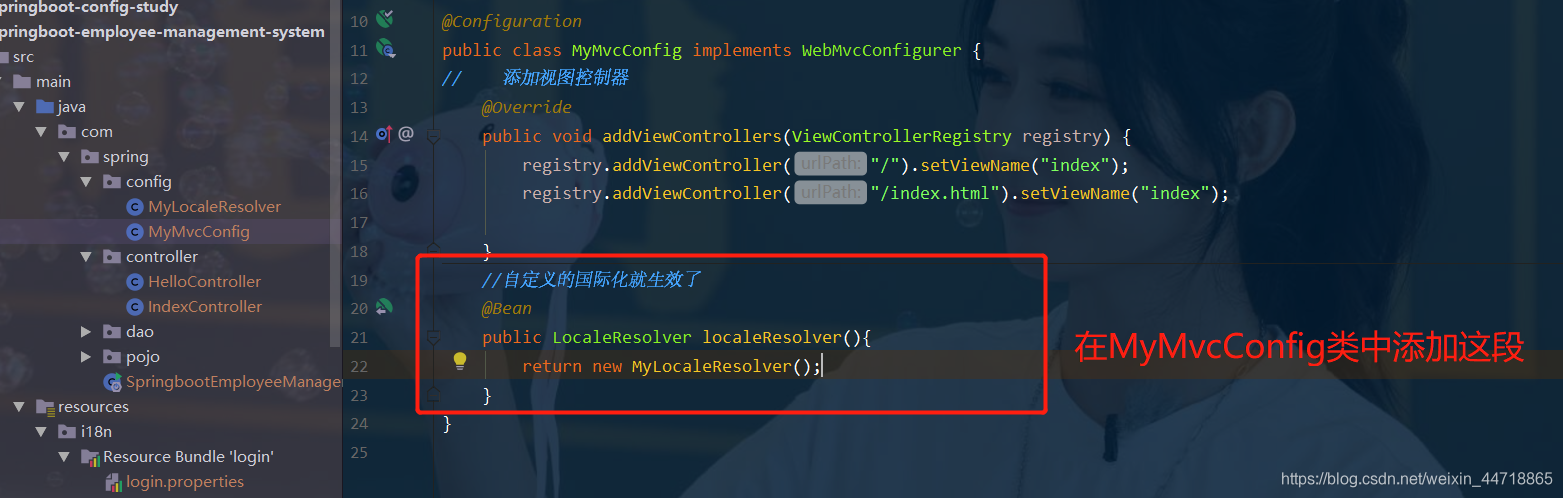
2. 重启项目
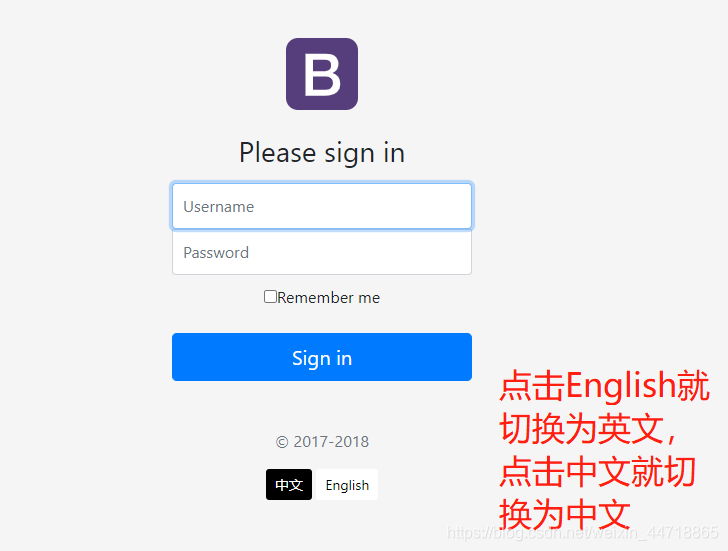
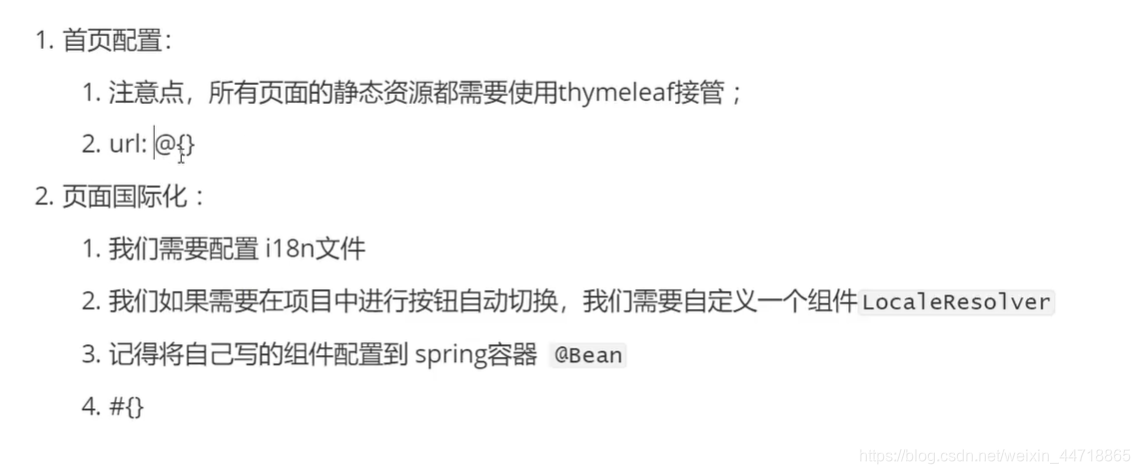
总结:
4、员工管理系统–登录功能实现
- 写个LoginController
讯享网@Controller public class LoginController {
    @RequestMapping("/user/login") @ResponseBody public String login() {
    return "OK"; } }
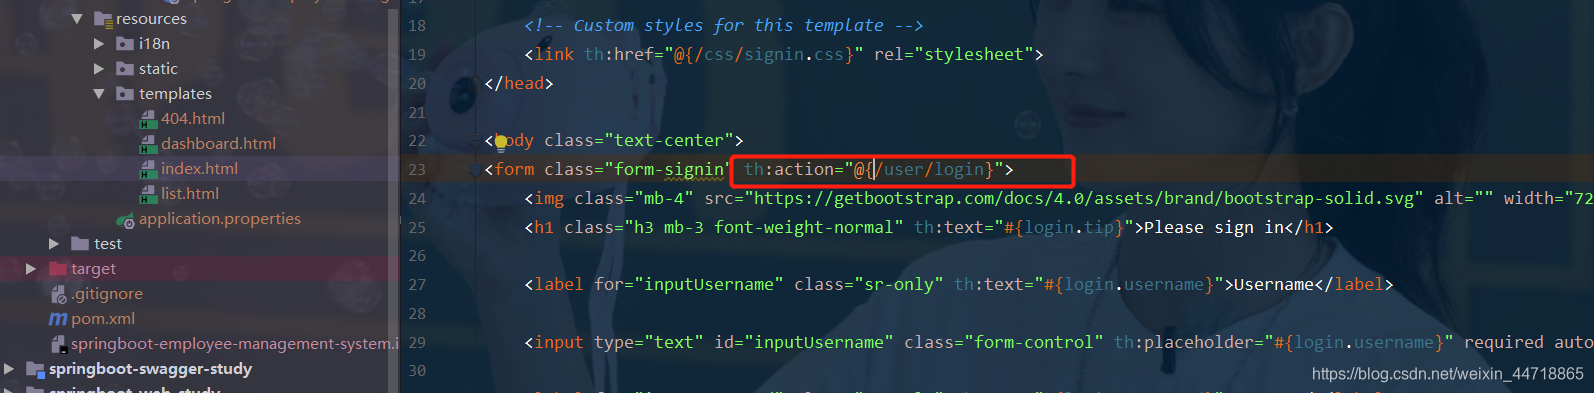
- 修改index.html页面
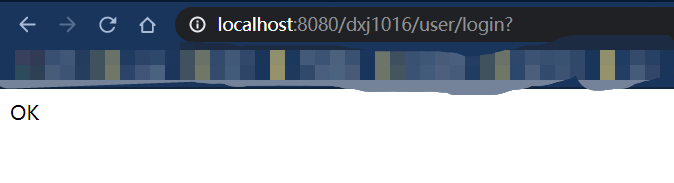
- 启动项目测试:
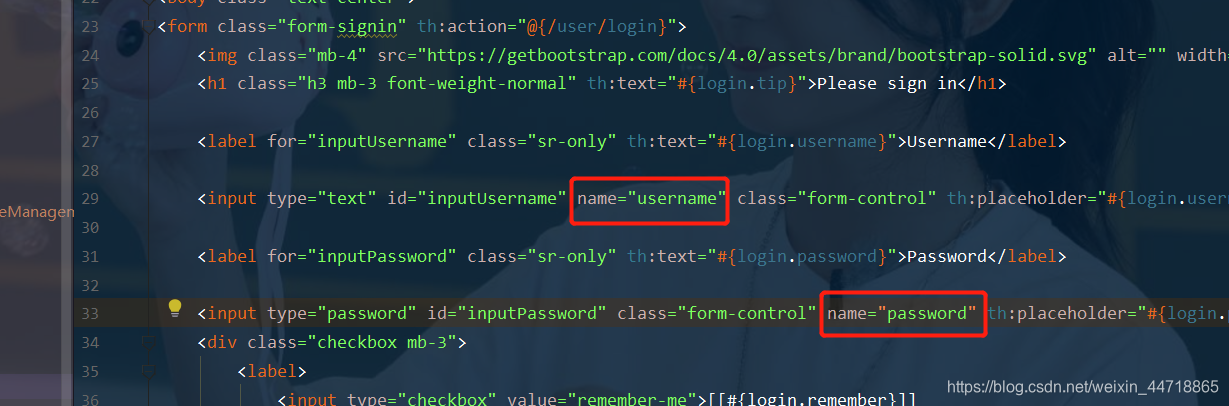
- 给index.html页面的添加name属性
- LoginController代码
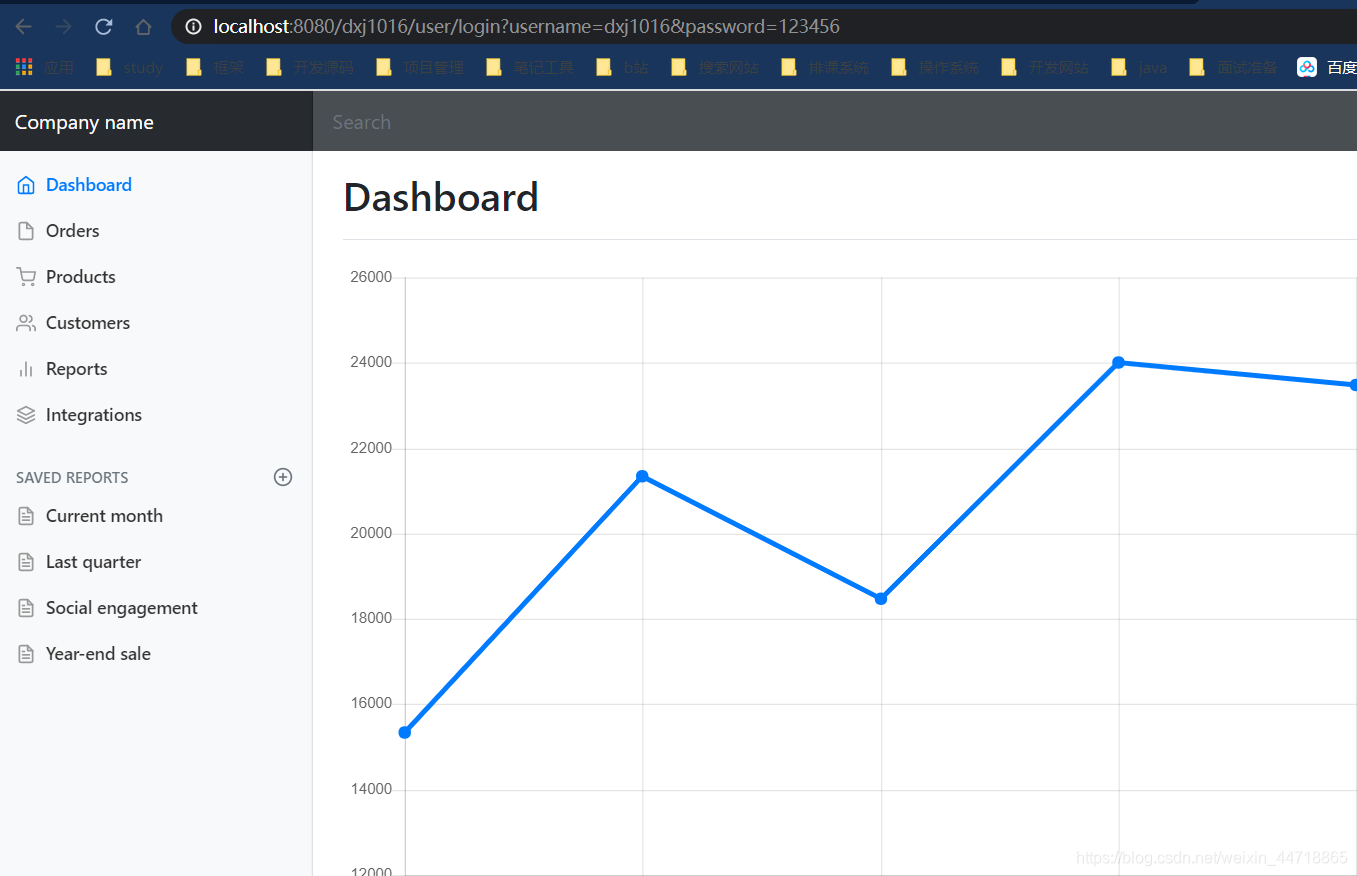
- 启动项目,测试:http://localhost:8080/dxj1016/,到了登录页面,输入的用户名不为空和密码是的话就会跳转到设置的dashboard页面
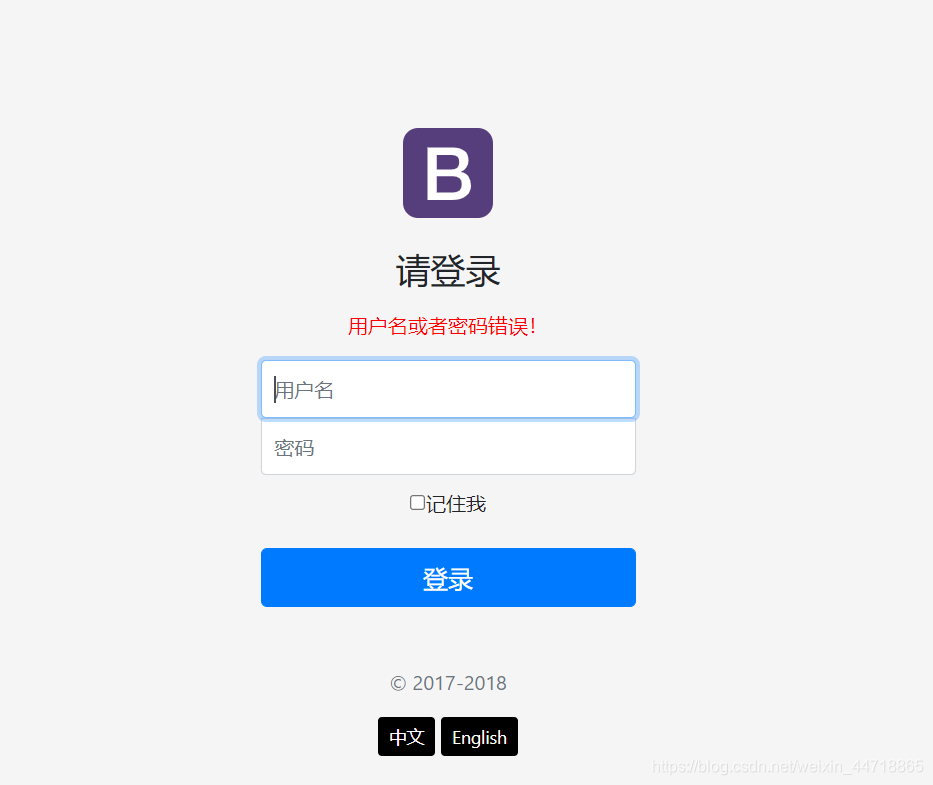
- 输入的密码错误或者用户名为空,他没有任何提示,在index.html页面加个提示信息。
- 启动测试,输入错误密码
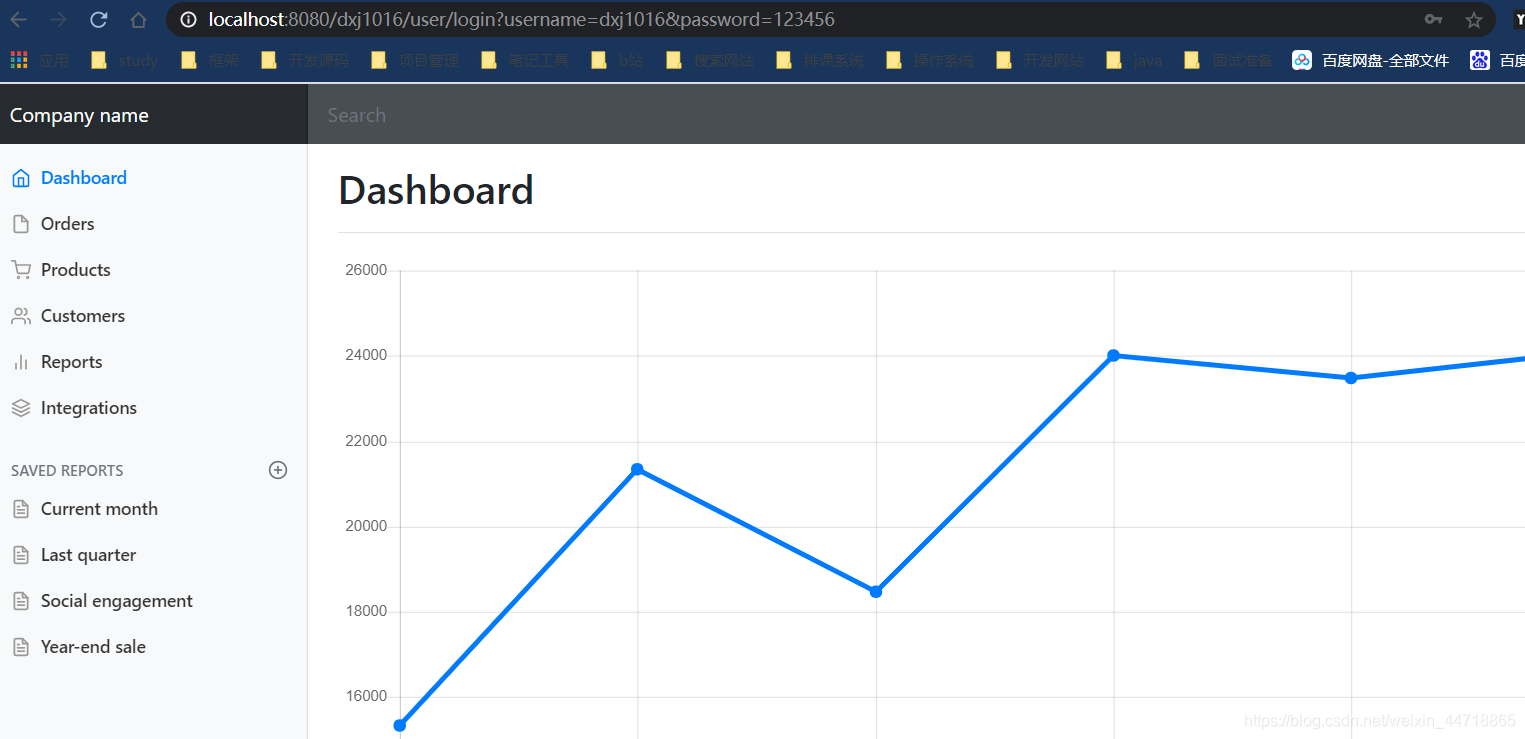
- 发现登录过来的url有点问题
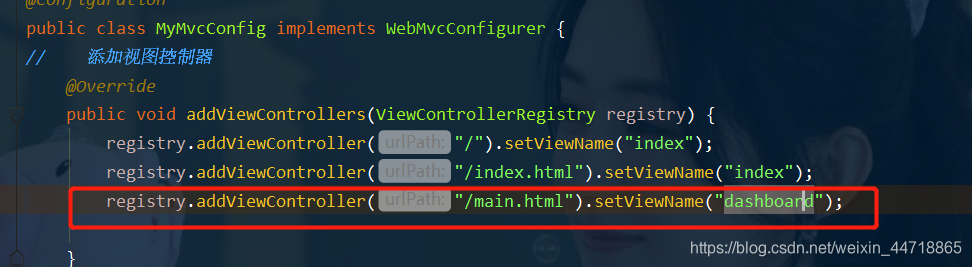
- 所以需要重定向这个url,在MyMvcConfig添加代码
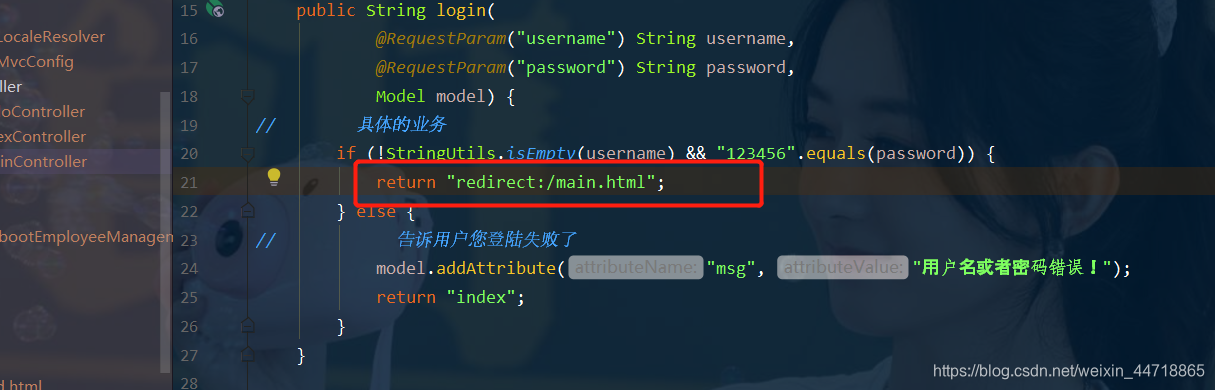
- 修改LoginController代码
- 启动项目测试登录之后,发现url改变了
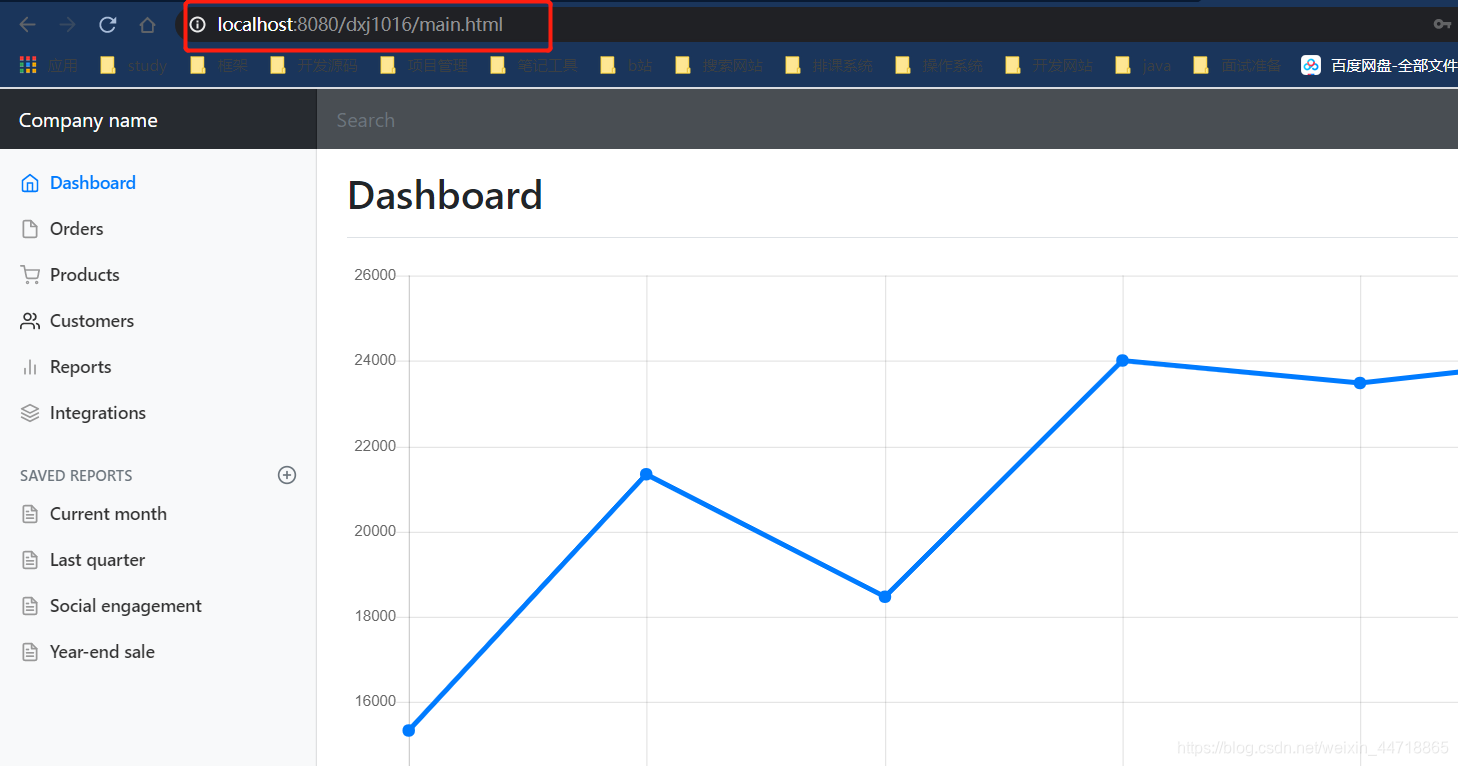
- 不管登录不登录,只要url上面使用/main.html路径都可以进去登录后的页面,所以需要使用到拦截器

5、登录拦截器
- 写拦截器类
public class LoginHandlerInterceptor implements HandlerInterceptor {
    @Override public boolean preHandle(HttpServletRequest request, HttpServletResponse response, Object handler) throws Exception {
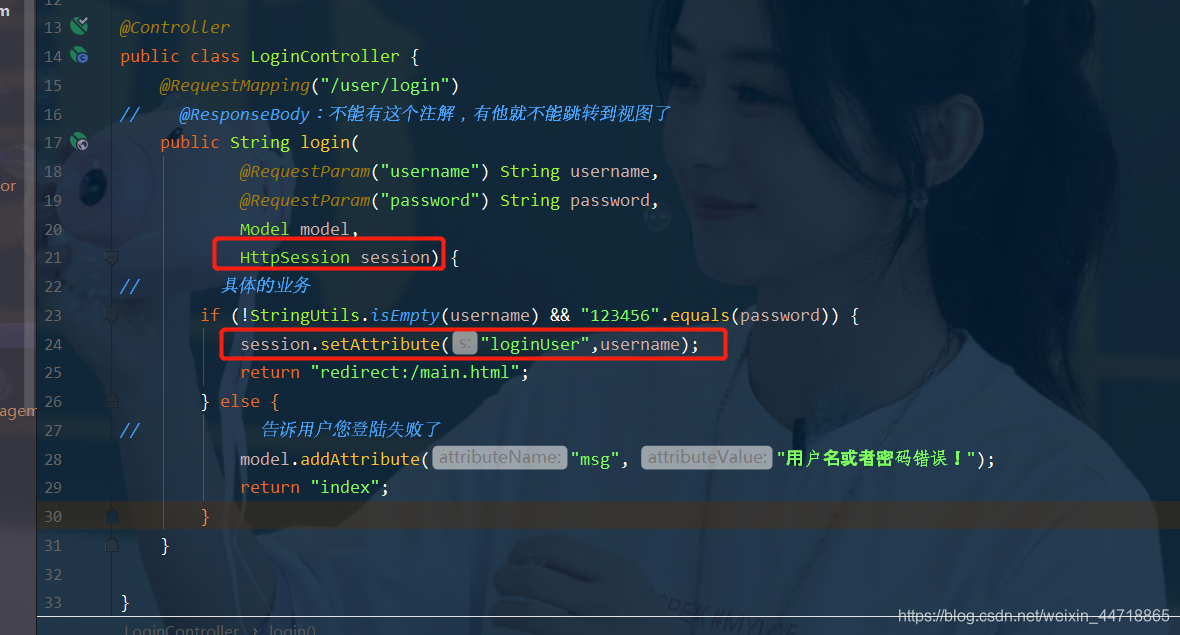
    // 登陆成功之后应该有用户的session; Object loginUser = request.getSession().getAttribute("loginUser"); if (loginUser == null) {
   //没有登录 request.setAttribute("msg", "没有权限,请先登录"); request.getRequestDispatcher("/index.html").forward(request, response); return false;//没有登录就是false } else {
return true; } } } - 修改LoginController
- 在配置类中注入拦截器类
讯享网 @Override public void addInterceptors(InterceptorRegistry registry) {
    registry.addInterceptor(new LoginHandlerInterceptor()) .addPathPatterns("/")//都拦截 .excludePathPatterns("/index.html","/","/user/login","/css/*");//除了这些目录下的东西其它的都拦截 } }
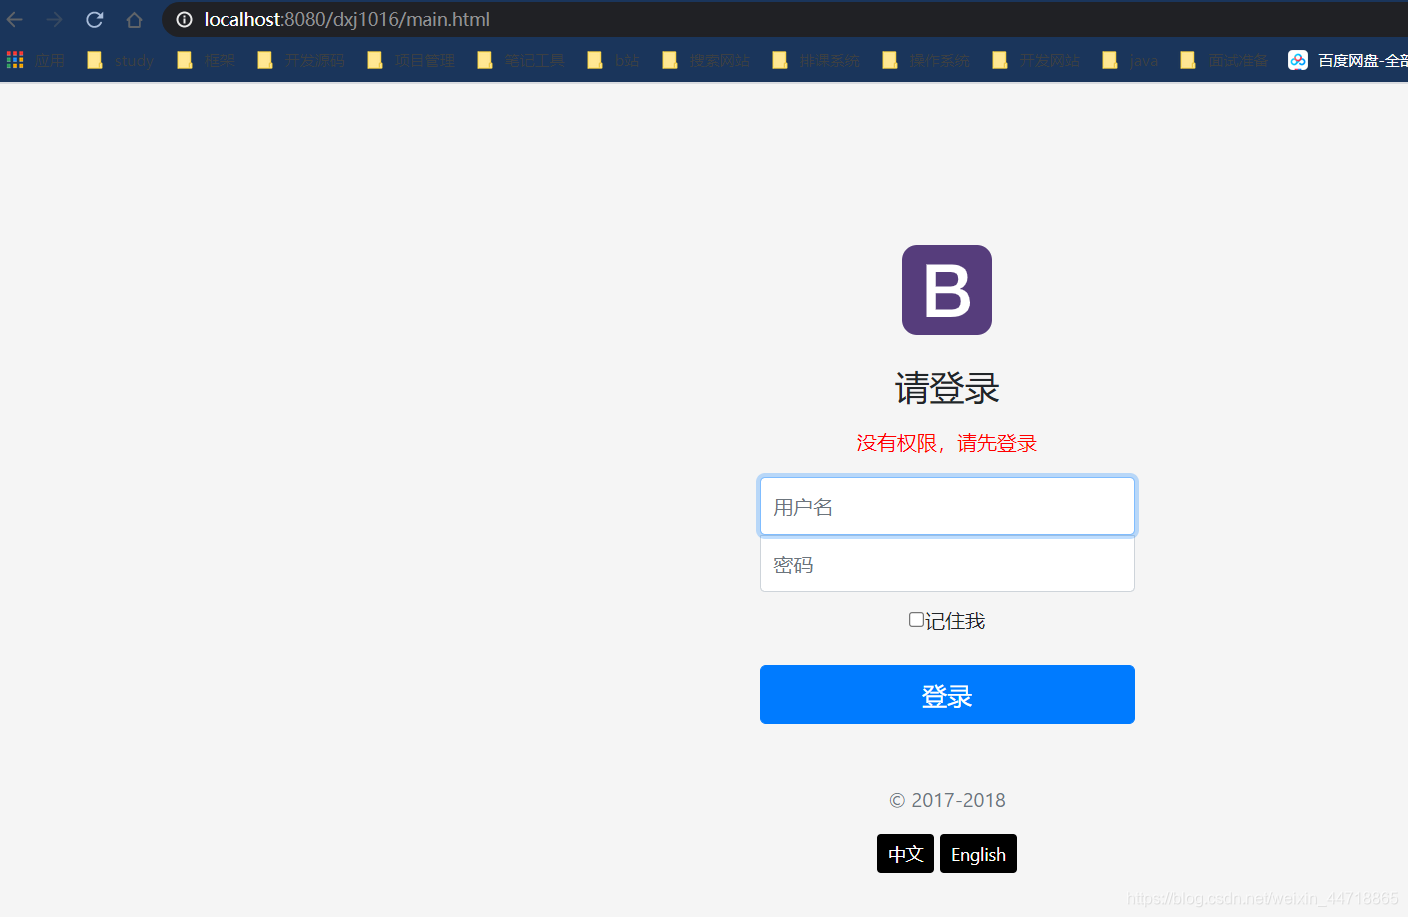
- 启动测试,直接访问的时候就会出现这个页面,要求先登录,而不是跟之前那样直接跳转到登录后的页面
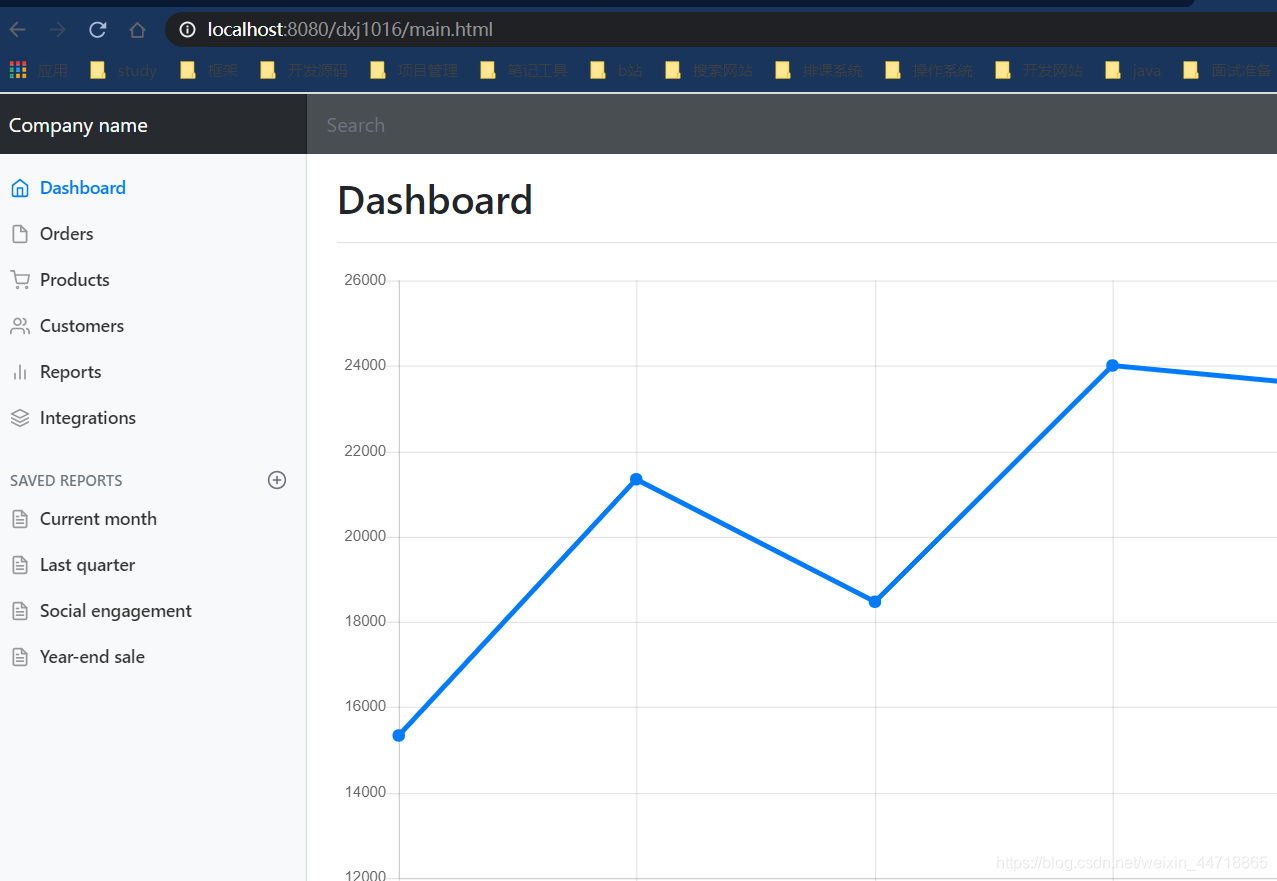
- 登录之后就会跳转到登录后的页面
- 登录了之后session存在所以再次用mian.html访问是可以访问的
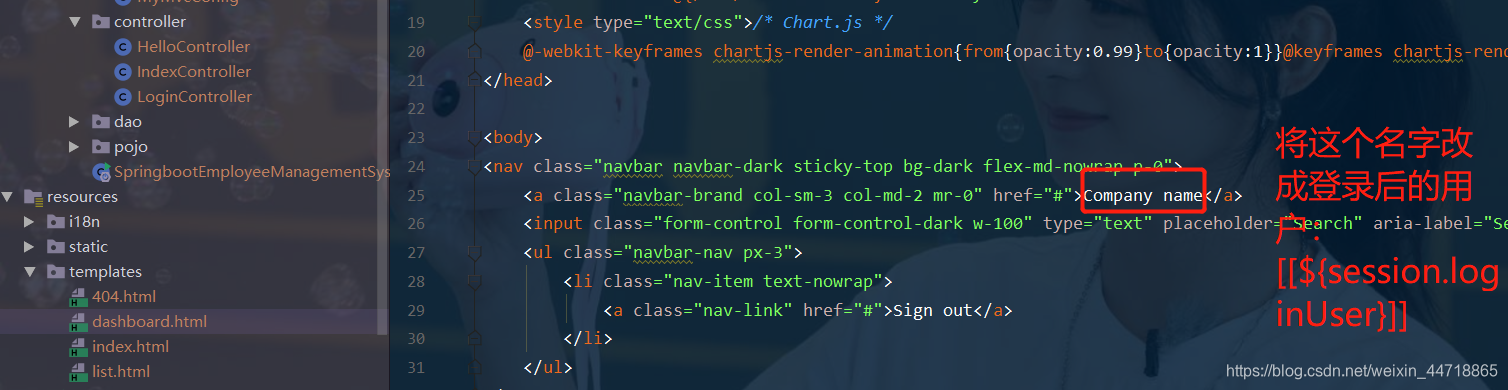
- 在dashboard.html页面修改公司名为我们登录用户的用户名:
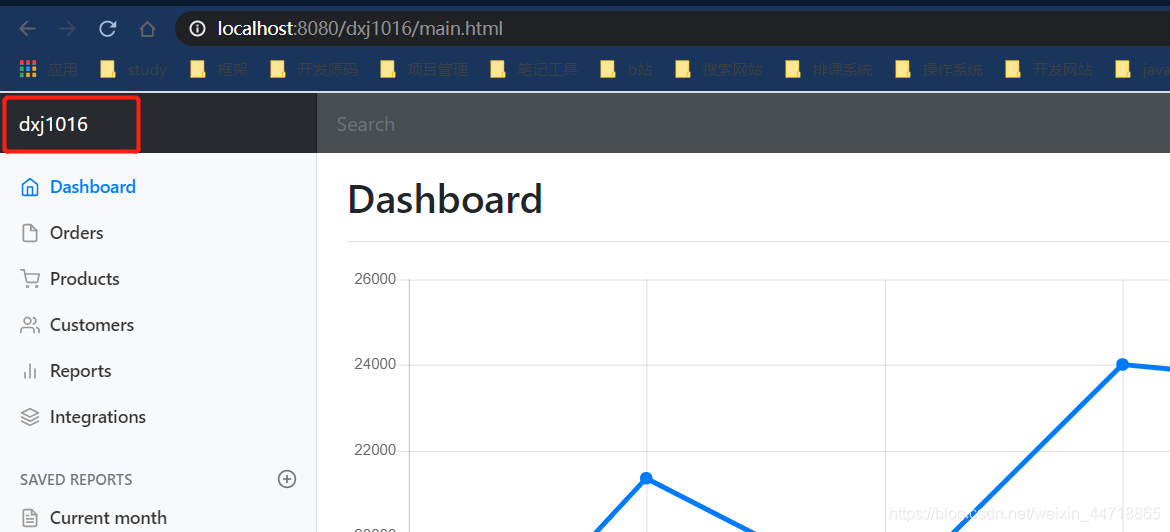
- 启动重新登录
6、展示员工列表
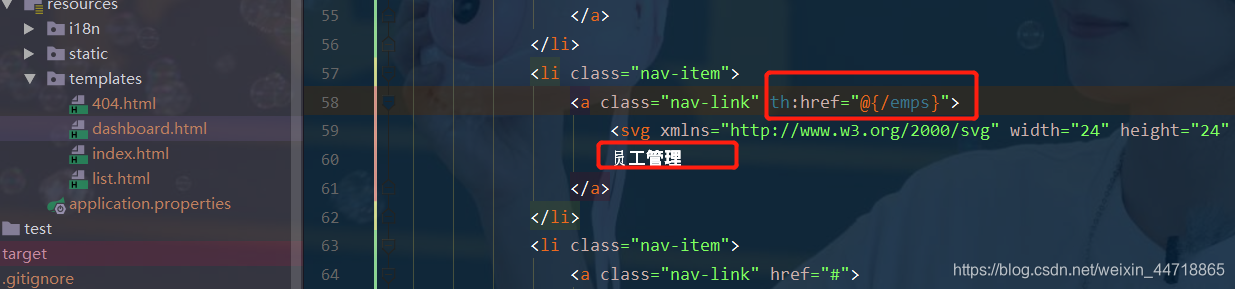
- 修改dashboard.html页面,点击员工管理,就可以跳转到对应的路径下去找controller层对应路径
- 添加一个EmployeeController层
@Controller public class EmployeeController {
    // @Autowired EmployeeDao employeeDao; @RequestMapping("/emps") public String list(Model model) {
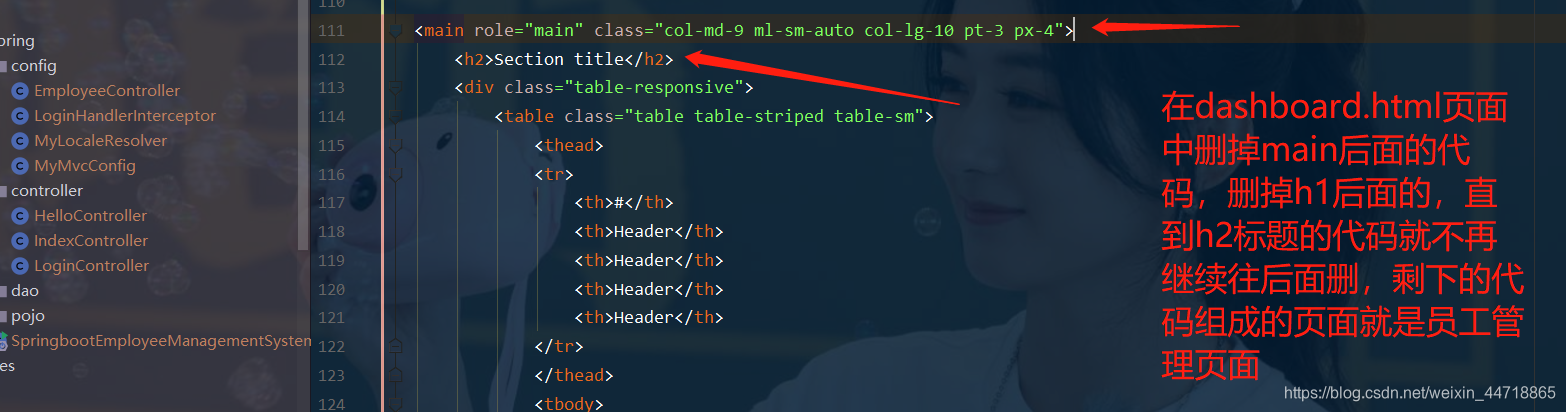
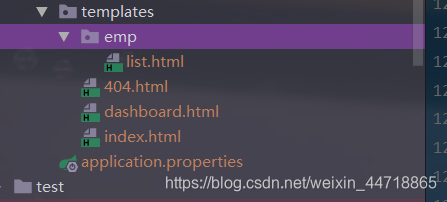
Collection<Employee> employees = employeeDao.getAll(); model.addAttribute("emps", employees); return "emp/list"; } } - 复制dashboard.html页面中的代码到list.html页面中,将lsit.html移动到emp文件夹下然后再根据下面的图片删掉没必要的代码,剩下的就是list.html页面的代码。
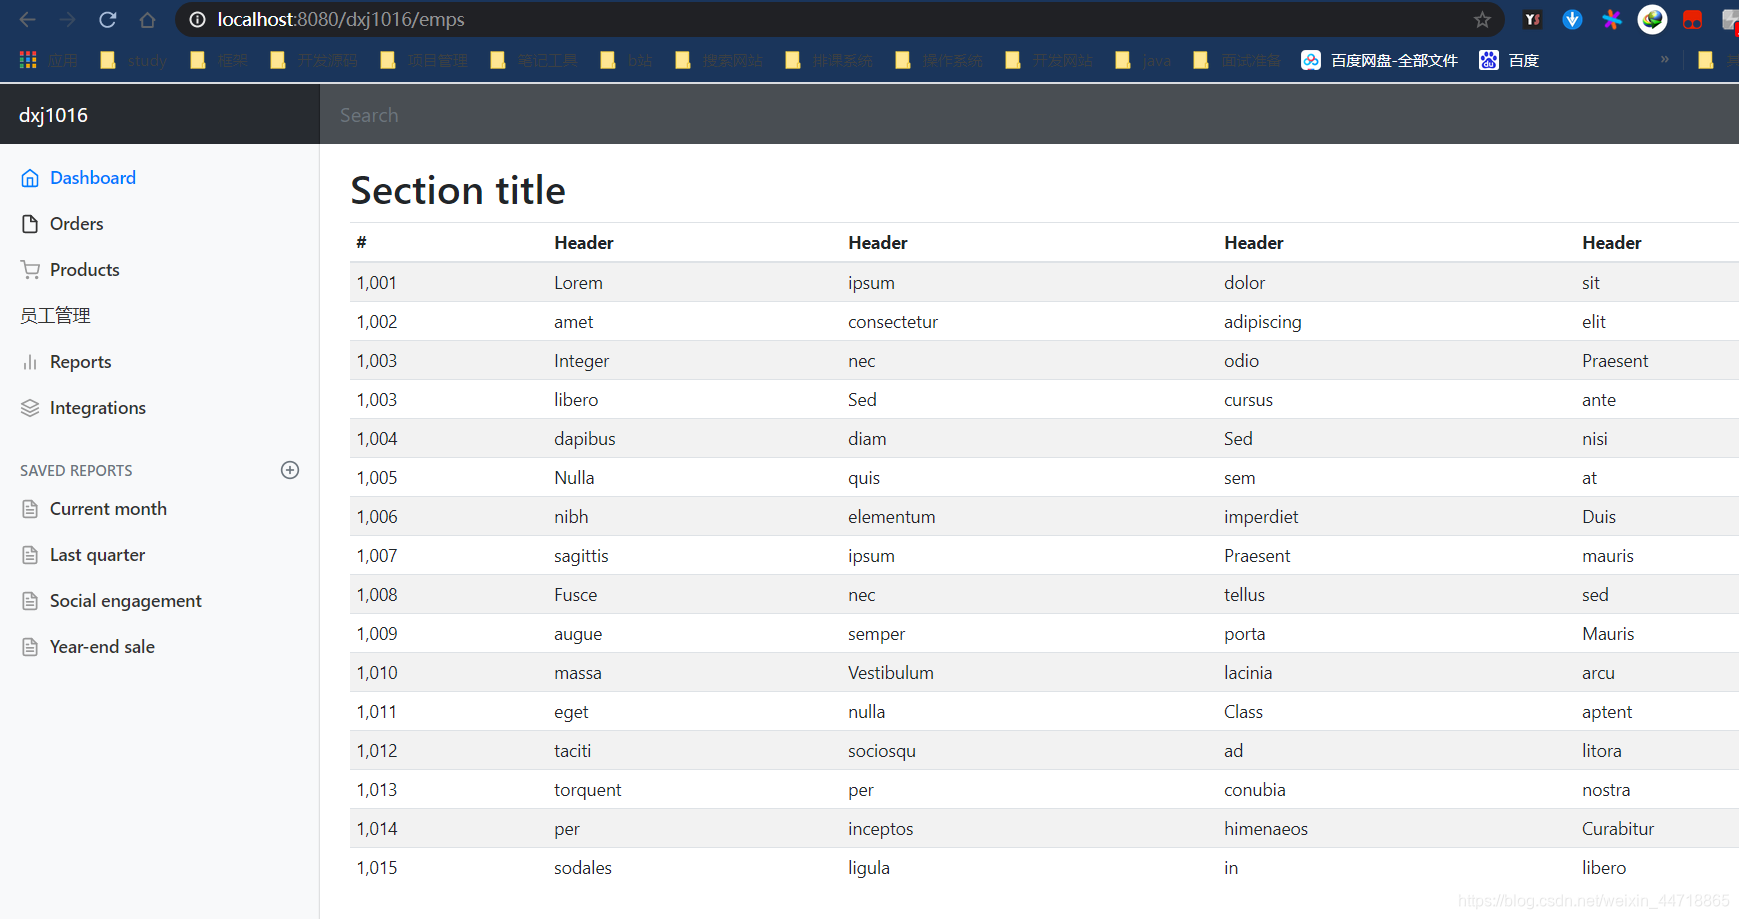
- 启动项目,登录进去之后点击员工管理看界面。
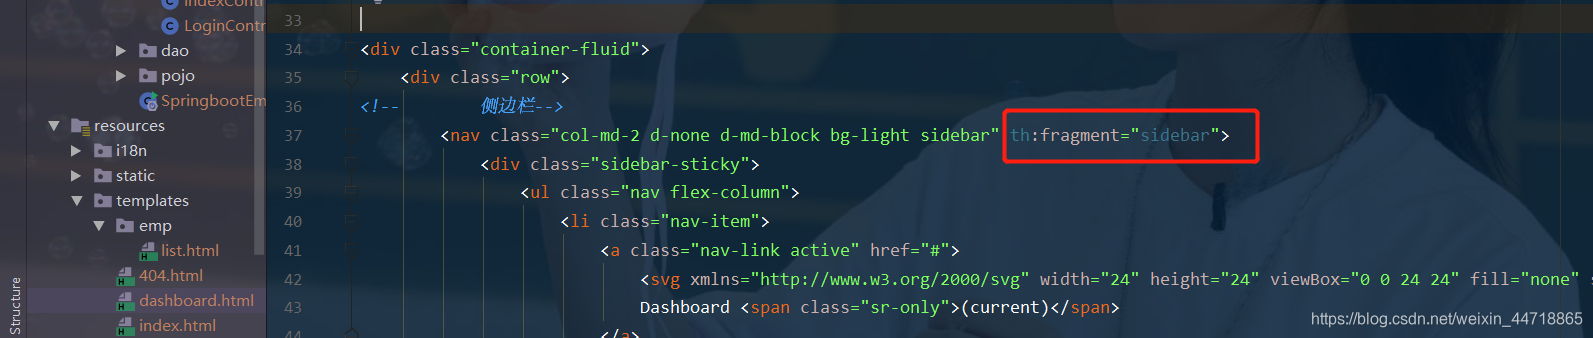
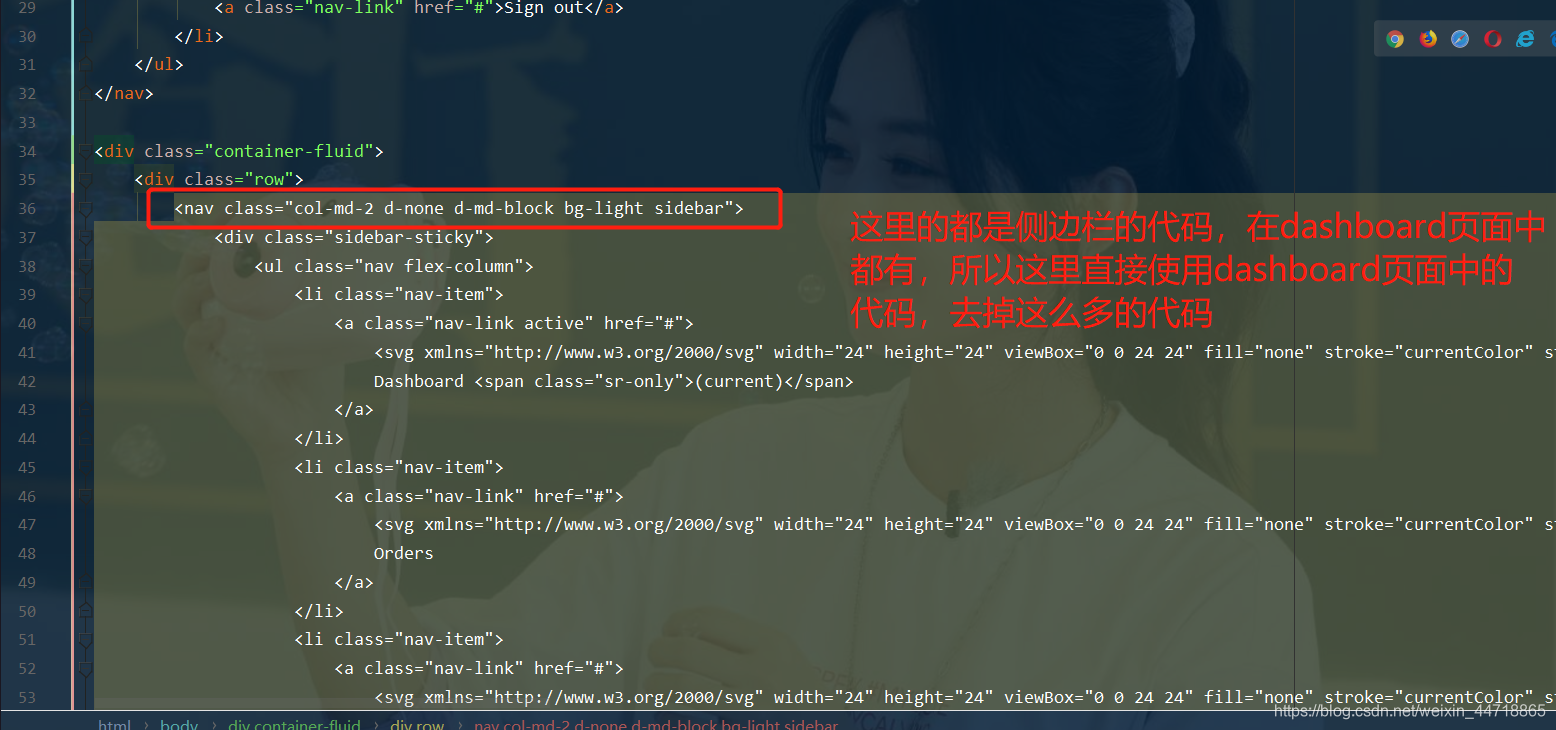
- dashboard页面和list页面有侧边栏和顶部都是一样的代码,那么怎么样直接使用dashboard页面中的代码来简化list页面的代码呢?
- 在dashboard侧边栏代码添加如下代码:
- 然后到list页面删除掉侧边栏的代码
- 修改list页面中的侧边栏代码为如下代码:
- 同样的方法在dashboard页面修改顶部代码
- 然后删掉list中的顶部代码替换成如下代码
- 启动项目测试看结果跟之前一样。


版权声明:本文内容由互联网用户自发贡献,该文观点仅代表作者本人。本站仅提供信息存储空间服务,不拥有所有权,不承担相关法律责任。如发现本站有涉嫌侵权/违法违规的内容,请联系我们,一经查实,本站将立刻删除。
如需转载请保留出处:https://51itzy.com/kjqy/114002.html