
rn版本0.72.4 andorid
消息推送打开app时和杀死进程时走的通道不同,当杀死进程走厂商通道,需要对每个安卓手机进行配置。
一、在线时配置(需要真机)
https://github.com/jpush/jpush-react-native
根据这个链接在项目中进行配置
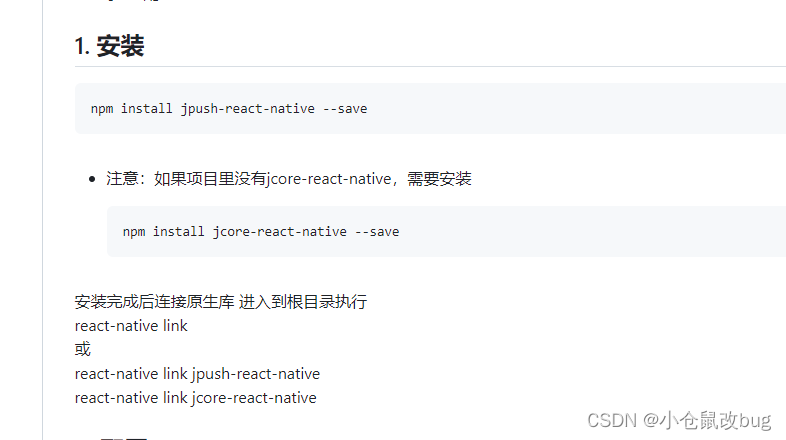
首先执行这两行命令,进行安装
npm install jcore-react-native --save
npm install jpush-react-native --save
rn在0.7版本不需要link
在android/app/build.gradle目录里面添加
android { defaultConfig { applicationId "yourApplicationId" //在此替换你的应用包名,只需要添加有注释//的三行 ... manifestPlaceholders = [ JPUSH_APPKEY: "yourAppKey", //在此替换你的APPKey JPUSH_CHANNEL: "yourChannel" //在此替换你的channel ] } }1、applicationId为包名,

即namespace
channel: default即可。

在同一个文件加上这两个
讯享网dependencies { ... implementation project(':jpush-react-native') // 添加 jpush 依赖 implementation project(':jcore-react-native') // 添加 jcore 依赖 }
然后在android/settings.gradle文件加上
include ':jpush-react-native' project(':jpush-react-native').projectDir = new File(rootProject.projectDir, '../node_modules/jpush-react-native/android') include ':jcore-react-native' project(':jcore-react-native').projectDir = new File(rootProject.projectDir, '../node_modules/jcore-react-native/android')然后在android/app/src/main/AndroidMainifest.xml文件加上
讯享网<meta-data android:name="JPUSH_CHANNEL" android:value="${JPUSH_CHANNEL}" /> <meta-data android:name="JPUSH_APPKEY" android:value="${JPUSH_APPKEY}" />

注意位置,与activity并列。
配置完成了,编写页面代码,
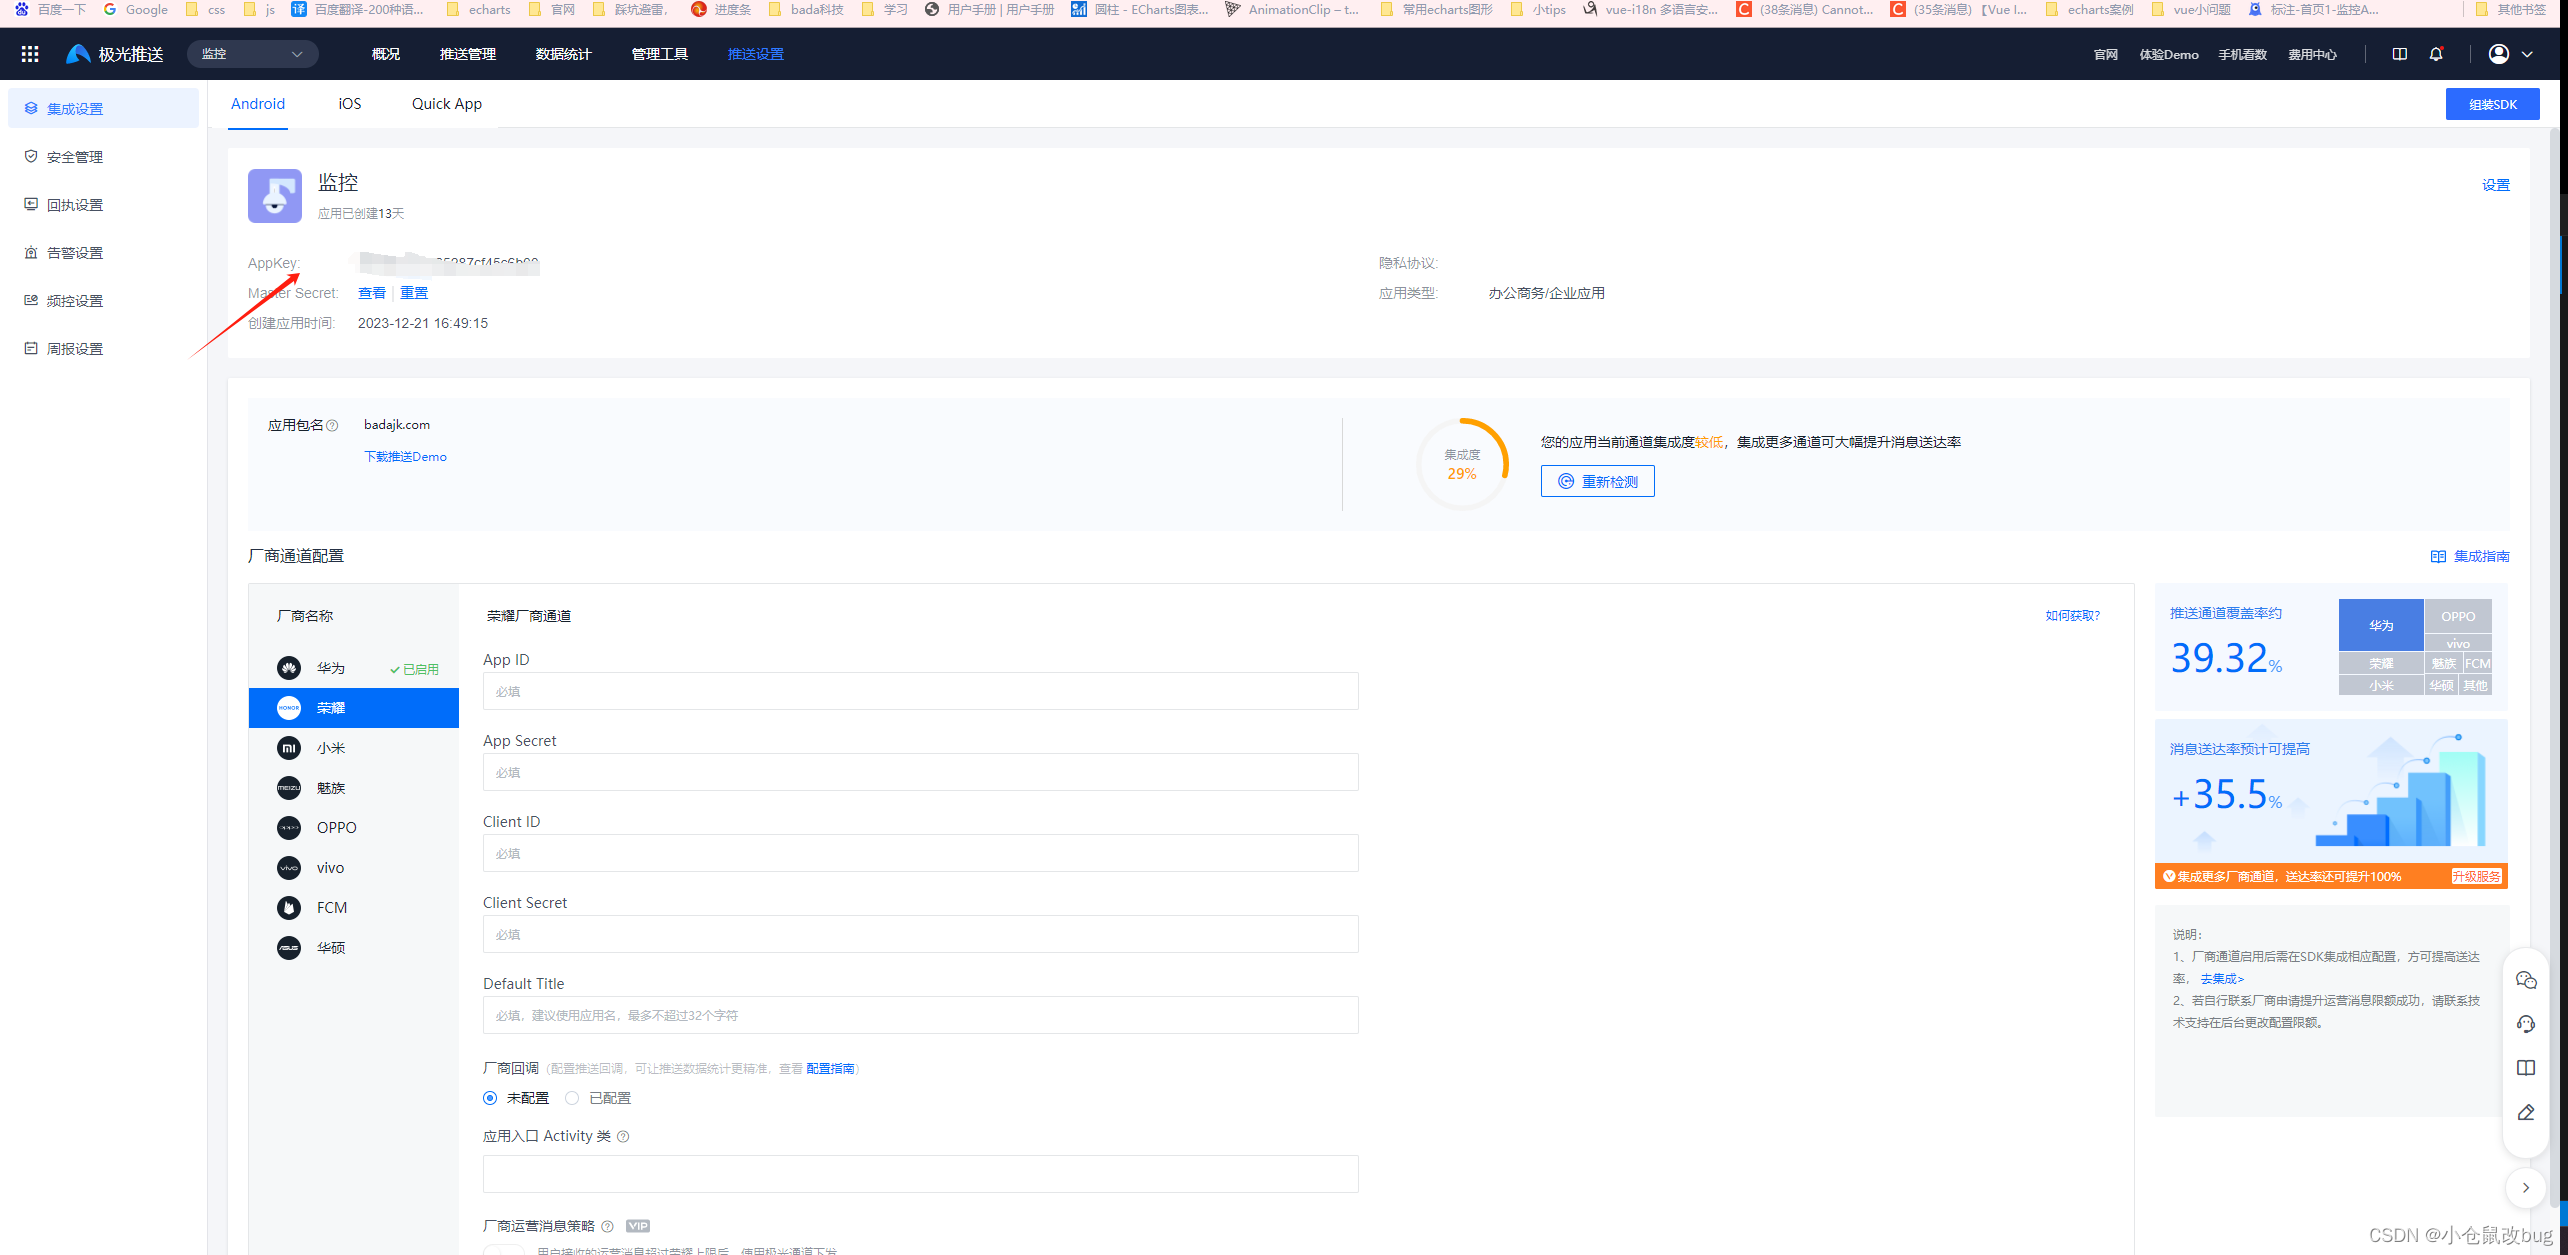
import React from 'react'; import {StyleSheet, Text, View, TouchableHighlight} from 'react-native'; import JPush from 'jpush-react-native'; const styles = StyleSheet.create({ container: { flex: 1, justifyContent: 'center', alignItems: 'center', backgroundColor: '#F5FCFF', }, setBtnStyle: { width: 320, justifyContent: 'center', alignItems: 'center', marginTop: 10, borderWidth: 1, borderColor: '#3e83d7', borderRadius: 8, backgroundColor: '#3e83d7', padding: 10 }, textStyle: { textAlign: 'center', fontSize: 25, color: '#ffffff' } }); class Button extends React.Component { render() { return <TouchableHighlight onPress={this.props.onPress} underlayColor='#e4083f' activeOpacity={0.5} > <View style={styles.setBtnStyle}> <Text style={styles.textStyle}> {this.props.title} </Text> </View> </TouchableHighlight> } } export default class App extends React.Component { constructor(props) { super(props); } componentDidMount() { JPush.init({"appKey":"8e5961b77c65287cf45c6b00","channel":"default","production":1}); //连接状态 this.connectListener = result => { console.log("connectListener:" + JSON.stringify(result)) }; JPush.addConnectEventListener(this.connectListener); //通知回调 this.notificationListener = result => { console.log("notificationListener:" + JSON.stringify(result)) }; JPush.addNotificationListener(this.notificationListener); //本地通知回调 this.localNotificationListener = result => { console.log("localNotificationListener:" + JSON.stringify(result)) }; JPush.addLocalNotificationListener(this.localNotificationListener); //自定义消息回调 // this.customMessageListener = result => { // console.log("customMessageListener:" + JSON.stringify(result)) // }; // JPush.addCustomMessagegListener(this.customMessageListener); //tag alias事件回调 this.tagAliasListener = result => { console.log("tagAliasListener:" + JSON.stringify(result)) }; JPush.addTagAliasListener(this.tagAliasListener); //手机号码事件回调 this.mobileNumberListener = result => { console.log("mobileNumberListener:" + JSON.stringify(result)) }; JPush.addMobileNumberListener(this.mobileNumberListener); } render() { return ( <View style={styles.container}> <Button title="setLoggerEnable" onPress={() => JPush.setLoggerEnable(true) }/> <Button title="getRegisterID" onPress={() => JPush.getRegistrationID(result => console.log("registerID:" + JSON.stringify(result)) )}/> {/*<Button title="addTags" onPress={() => JPush.addTags({sequence: 1, tags: ["1", "2", "3"]})}/> <Button title="updateTags" onPress={() => JPush.updateTags({sequence: 2, tags: ["4", "5", "6"]})}/> <Button title="deleteTag" onPress={() => JPush.deleteTag({sequence: 3, tags: ["4", "5", "6"]})}/> <Button title="deleteTags" onPress={() => JPush.deleteTags({sequence: 4})}/> <Button title="queryTag" onPress={() => JPush.queryTag({sequence: 4, tag: "1"})}/> <Button title="queryTags" onPress={() => JPush.queryTags({sequence: 5})}/> <Button title="setAlias" onPress={() => JPush.setAlias({sequence: 6,alias:"xxx"})}/> <Button title="deleteAlias" onPress={() => JPush.deleteAlias({sequence: 7})}/> <Button title="queryAlias" onPress={() => JPush.queryAlias({sequence: 8})}/> <Button title="setMobileNumber" onPress={() => JPush.setMobileNumber({mobileNumber: ""})}/> //仅ios <Button title="setBadge" onPress={() => JPush.setBadge({"badge":1,"appBadge":1})}/> <Button title="initCrashHandler" onPress={() => JPush.initCrashHandler()}/> <Button title="addLocalNotification" onPress={() => JPush.addLocalNotification({ messageID: "", title: "title123", content: "content123", extras: {"key123": "value123"} })}/> <Button title="removeLocalNotification" onPress={() => JPush.removeLocalNotification({messageID: ''})}/>*/} </View> ); } } 到此为止,安卓端在线消息推送配置成功。打开极光推送

发送消息,测试。消息发送成功。
二、厂商配置(华为手机)
目前我只配置了华为手机的。

文档中心
结合此文档进行配置。
1、重要---生成签名证书指纹
我是通过命令生成的签字证书指纹。
首先cd项目目录到andorid目录下执行命令(例如cd cd android/app)执行如下命令
1:keytool -genkey -alias monitor -keyalg RSA -storetype PKCS12 -validity -keysize 2500 -keystore monitor.keystore -v 2:keytool -importkeystore -srckeystore ./monitor.keystore -destkeystore ./monitor.jks -deststoretype JKS 3:keytool -list -v -keystore monitor.keystore
即可生成这两个文件

这个就是证书指纹
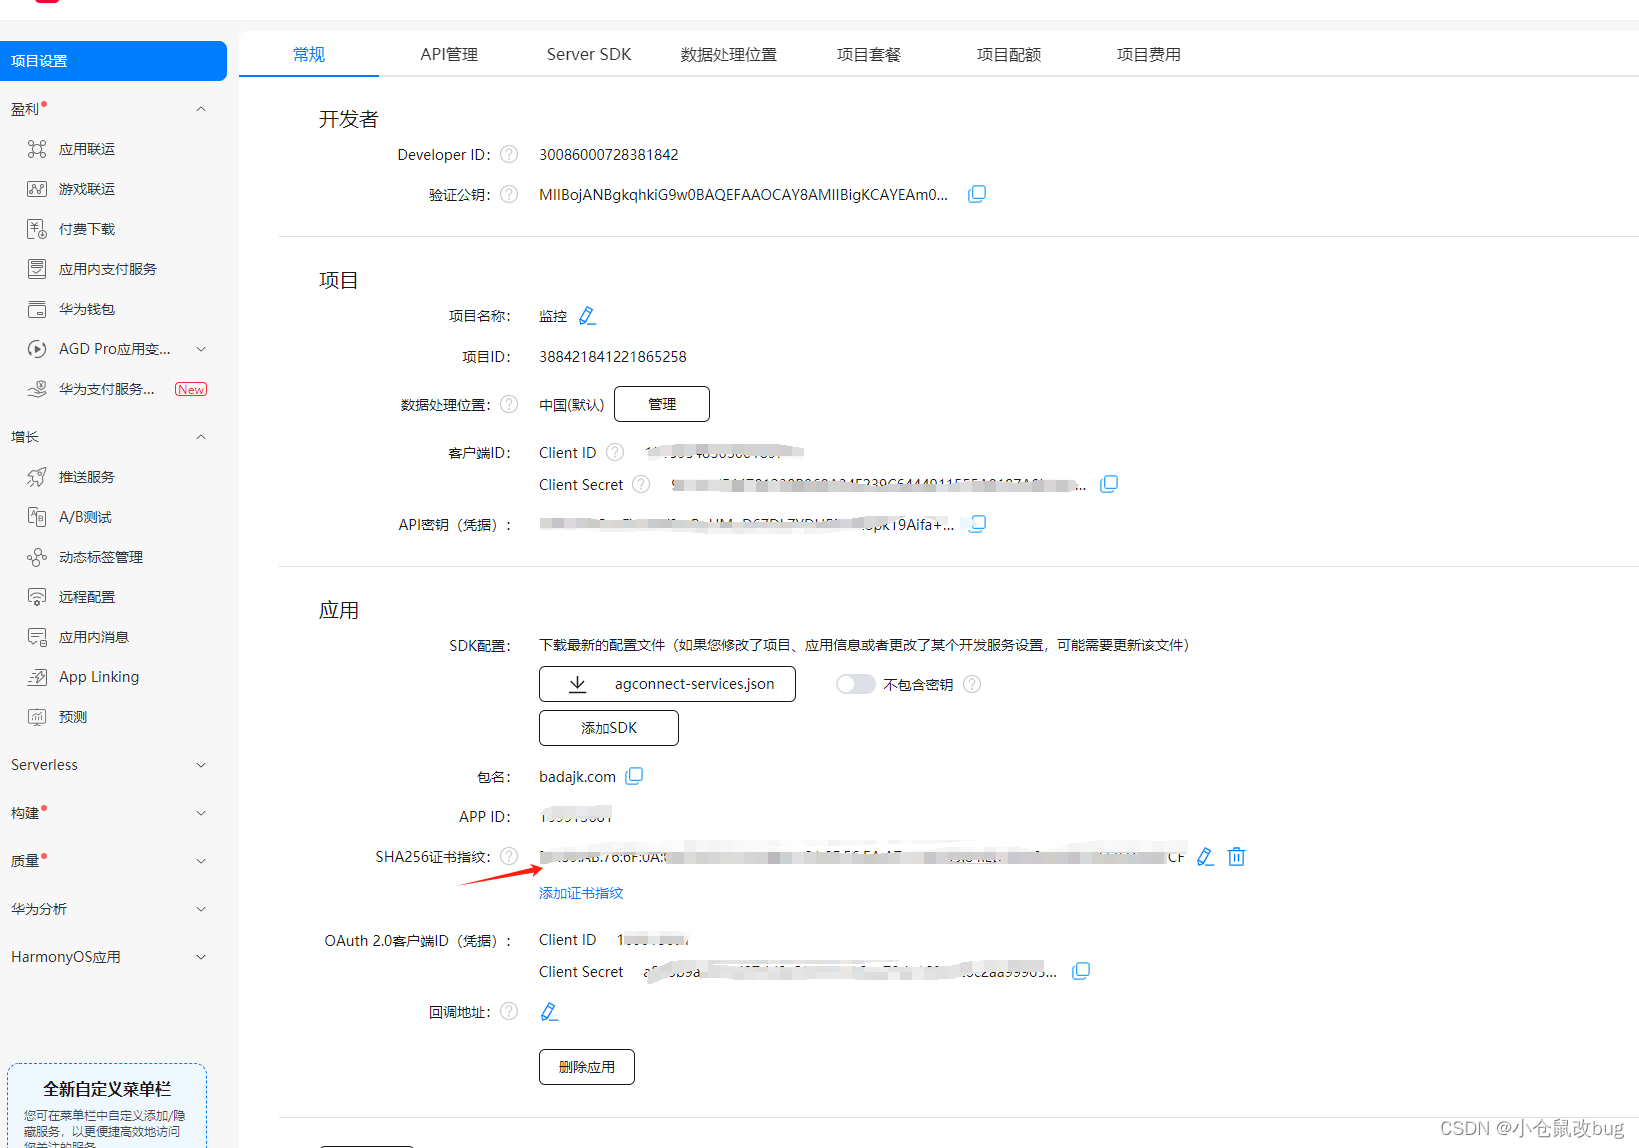
填这里。

按照官网一步步做完,每一步都需要,否则会失败。
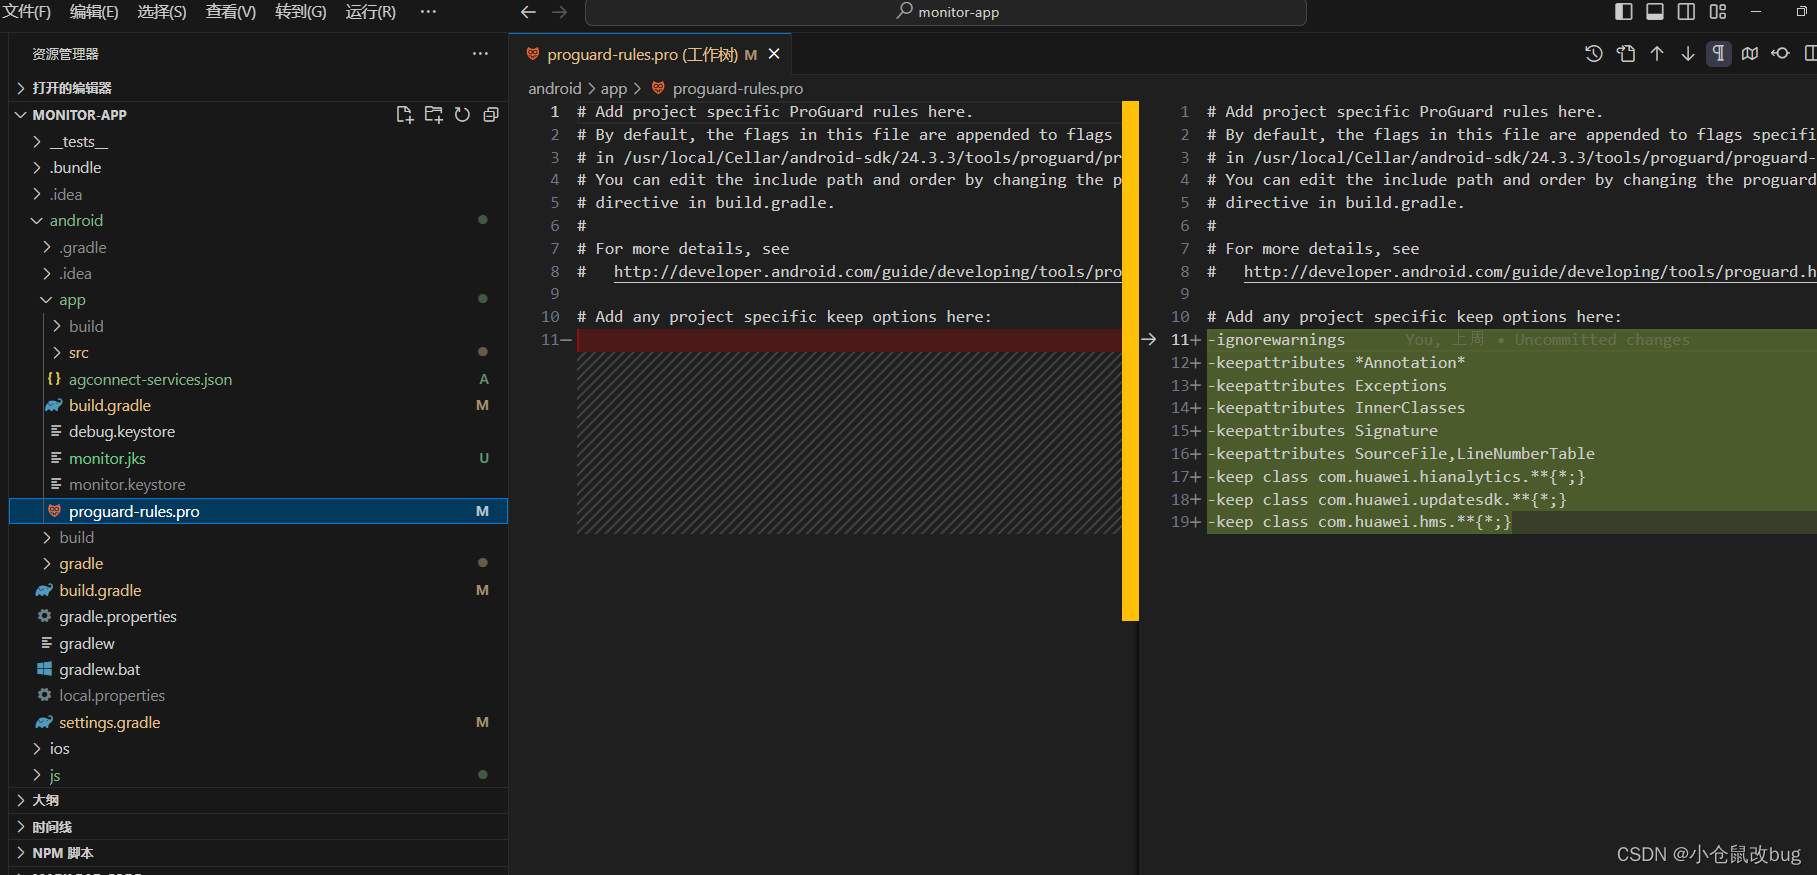
具体配置代码如下
// Top-level build file where you can add configuration options common to all sub-projects/modules. buildscript { ext { buildToolsVersion = "33.0.0" minSdkVersion = 21 compileSdkVersion = 33 targetSdkVersion = 33 // We use NDK 23 which has both M1 support and is the side-by-side NDK version from AGP. ndkVersion = "23.1." } repositories { google() mavenCentral() // 配置HMS Core SDK的Maven仓地址。 maven { url 'https://developer.huawei.com/repo/' } maven { url 'https://repo.huaweicloud.com/repository/maven/'} } dependencies { classpath("com.android.tools.build:gradle:7.0.3") classpath("com.facebook.react:react-native-gradle-plugin") classpath ('com.huawei.agconnect:agcp:1.9.1.301') } allprojects { repositories { mavenCentral() maven { allowInsecureProtocol = true url 'http://developer.huawei.com/repo/' } mavenLocal() google() maven { url 'https://www.jitpack.io' } maven { url 'https://maven.google.com' } maven { url 'https://repo.huaweicloud.com/repository/maven/'} } } } 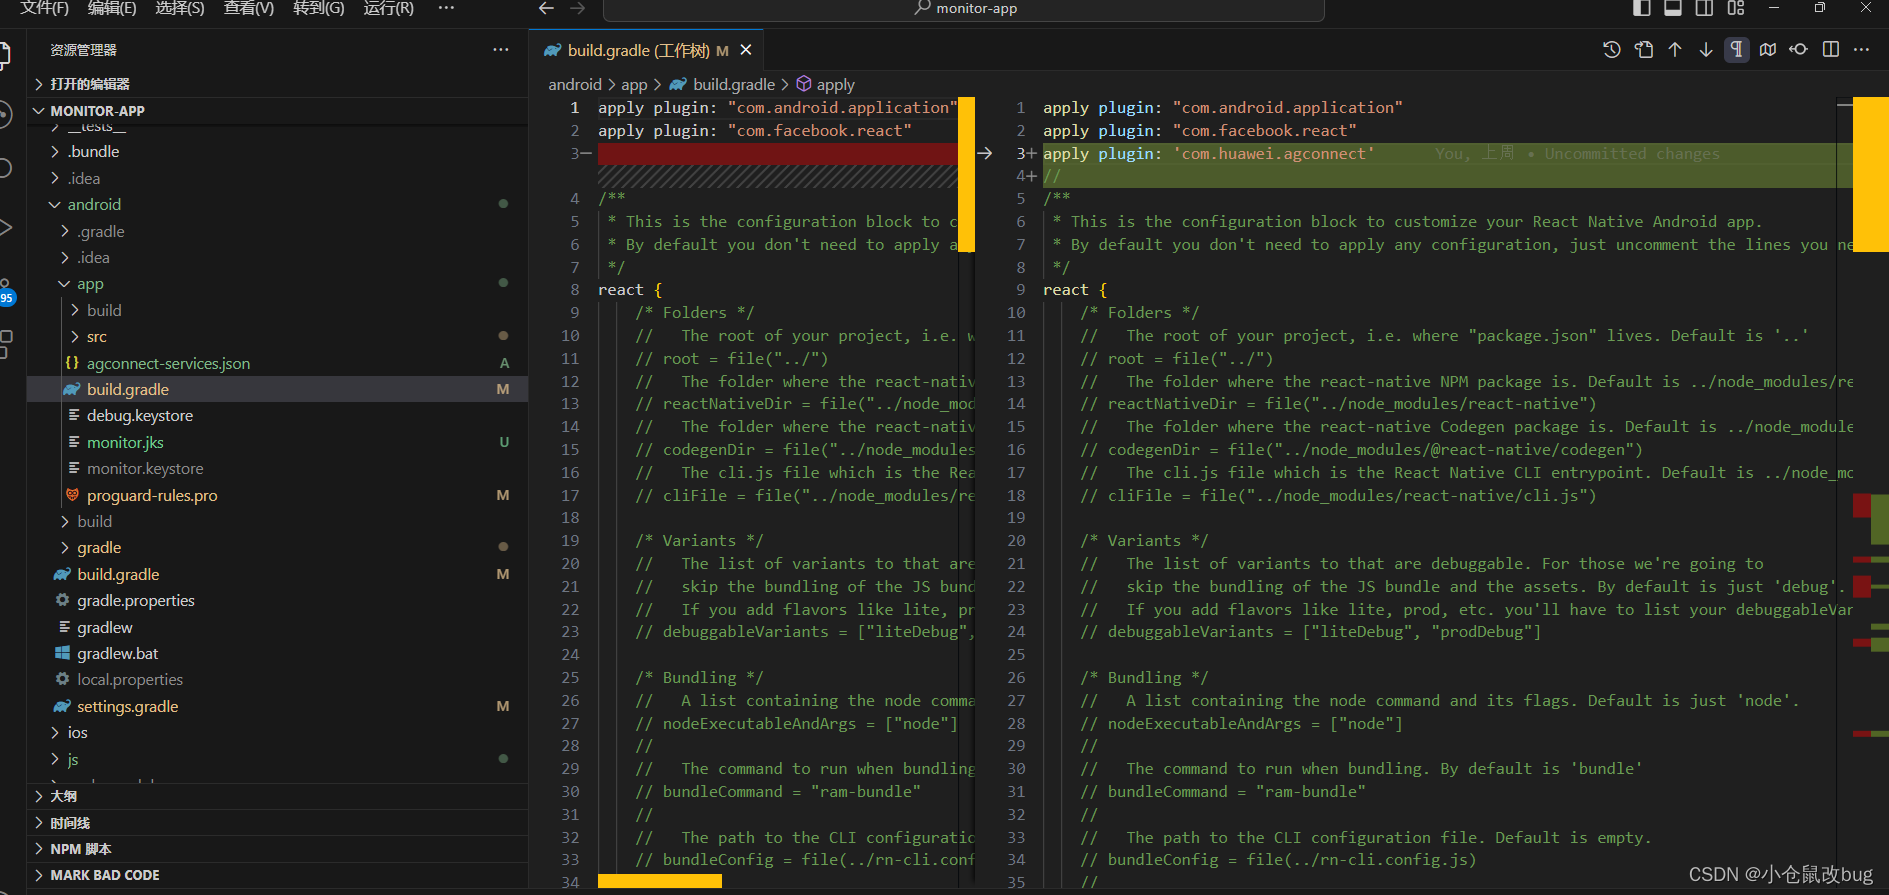

这一步keyAlias是生成指纹证书自己起的名字和设置的密码

此文件代码
<?xml version="1.0" encoding="utf-8"?> <manifest xmlns:android="http://schemas.android.com/apk/res/android"> <uses-permission android:name="android.permission.INTERNET" /> <application android:name=".MainApplication" android:allowBackup="true" android:icon="@mipmap/ic_launcher" android:label="@string/app_name" android:roundIcon="@mipmap/ic_launcher_round" android:theme="@style/AppTheme"> <service android:name="com.demo.HmsService" android:enabled="true" android:directBootAware="true" android:exported="false"> <intent-filter> <action android:name="com.huawei.push.action.MESSAGING_EVENT"/> </intent-filter> </service> <activity android:name=".MainActivity" android:configChanges="keyboard|keyboardHidden|orientation|screenLayout|screenSize|smallestScreenSize|uiMode" android:exported="true" android:label="@string/app_name" android:launchMode="singleTask" android:windowSoftInputMode="adjustResize"> <intent-filter> <action android:name="android.intent.action.MAIN" /> <category android:name="android.intent.category.LAUNCHER" /> </intent-filter> </activity> <meta-data android:name="JPUSH_CHANNEL" android:value="${JPUSH_CHANNEL}" /> <meta-data android:name="JPUSH_APPKEY" android:value="${JPUSH_APPKEY}" /> </application> </manifest>

 这个需要写,否则不成功。
implementation 'cn.jiguang.sdk.plugin:huawei:5.2.0'。
就可以了。
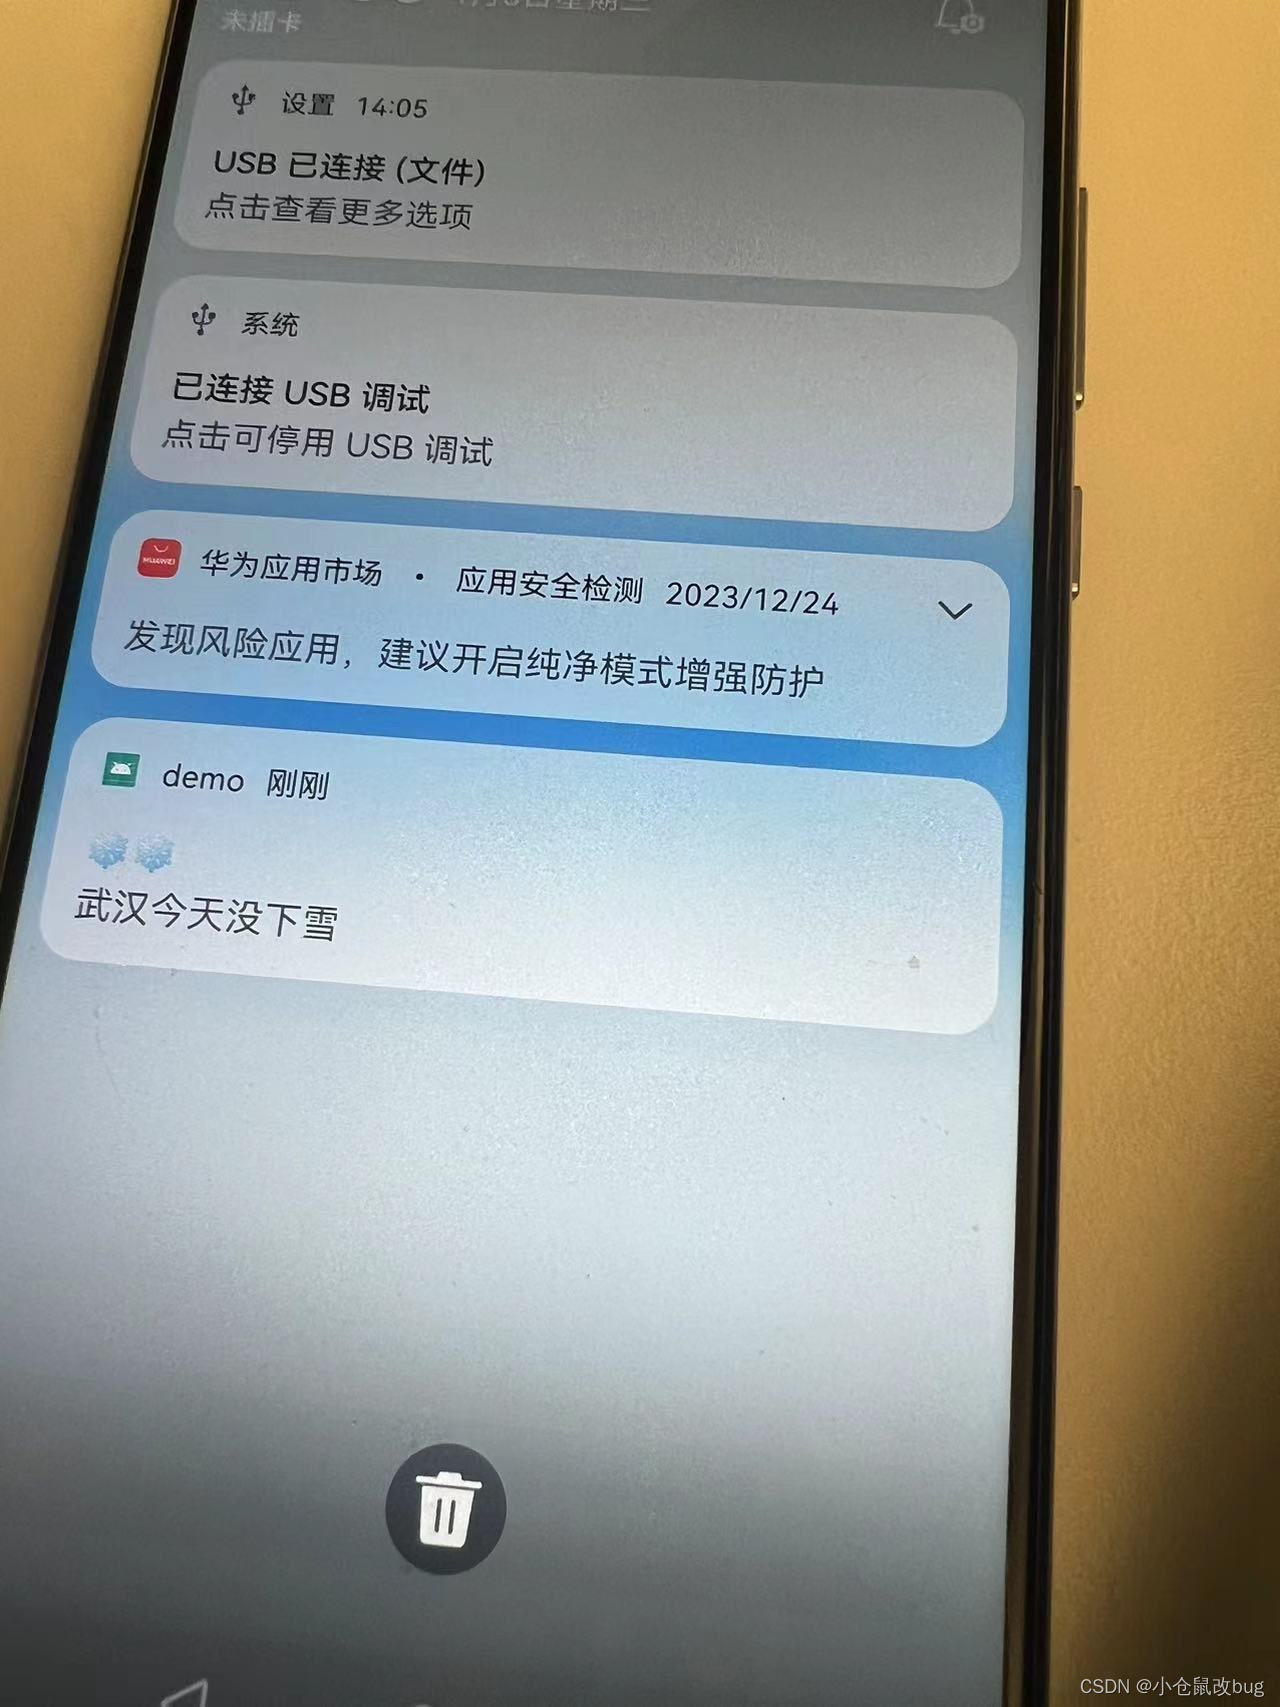
我关闭app后继续发送

成功了!!!!!
版权声明:本文内容由互联网用户自发贡献,该文观点仅代表作者本人。本站仅提供信息存储空间服务,不拥有所有权,不承担相关法律责任。如发现本站有涉嫌侵权/违法违规的内容,请联系我们,一经查实,本站将立刻删除。
如需转载请保留出处:https://51itzy.com/kjqy/28799.html