
Security参考文档:https://spring.io/guides/gs/securing-web/
thymeleaf参考文档:https://www.thymeleaf.org/doc/articles/springsecurity.html
thymeleaf集成security源码:https://github.com/thymeleaf/thymeleaf-extras-springsecurity
官网文档:https://docs.spring.io/spring-security/site/docs/5.2.2.RELEASE/reference/htmlsingle/#community
源码地址:https://github.com//springboot_integrate/tree/master/springboot-integrat-security
目录
简介
SpringBoot整合Security
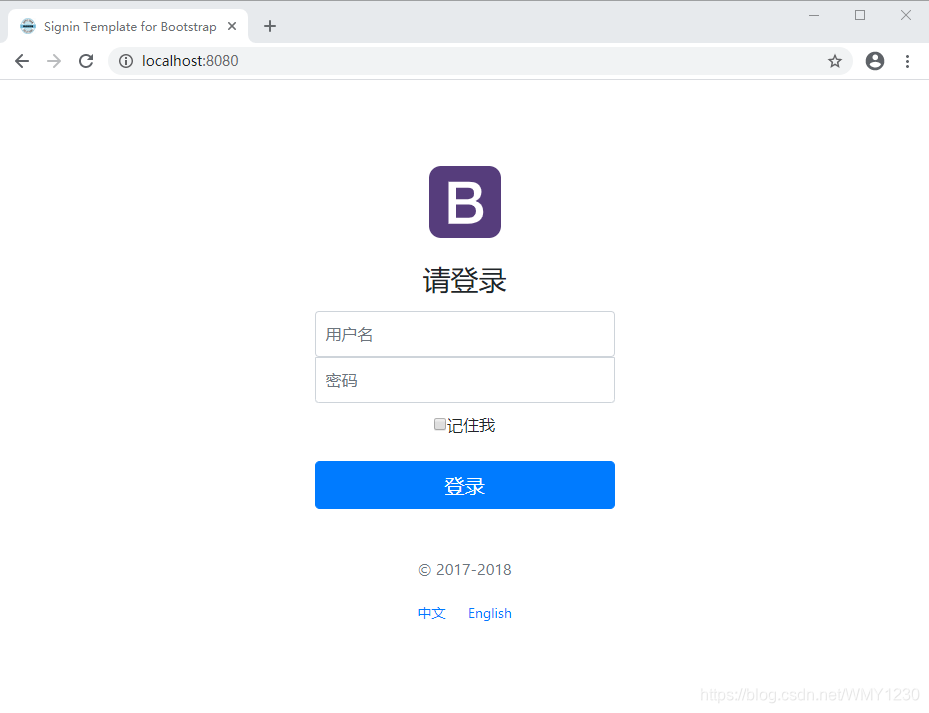
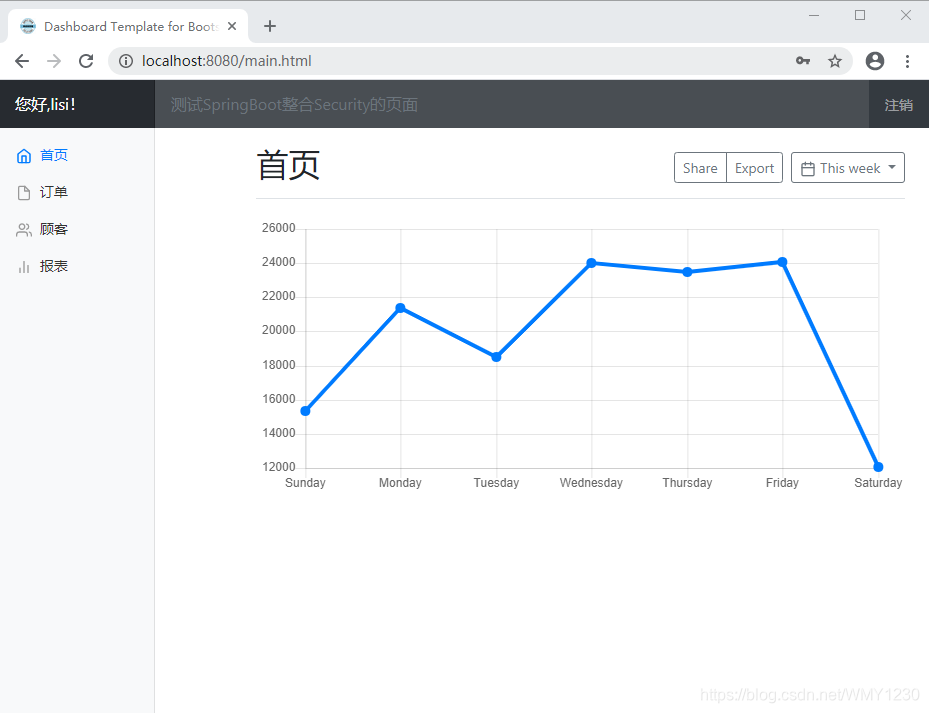
1)、效果图
2)、引入thymeleaf、security的pom文件
3)、编写security的配置类
1.定制请求授权的规则
2.开启自动配置的登录模式
4.开启自动配置的注销模式
5.定制认证规则
4)、security页面控制
1.获取登录名
2.角色权限
3.更多标签的使用
5)、页面跳转
Spring Security运行原理
1)、初始化认证配置规则
2)、初始化请求授权规则
3)、登录验证原理
整合过程中出现的错误信息
1)、密码认证
-
简介
Spring Security是一个功能强大且高度可定制的身份验证和访问控制框架。它是用于保护基于Spring的应用程序的实际标准。
Spring Security是一个框架,致力于为Java应用程序提供身份验证和授权。与所有Spring项目一样,Spring Security的真正强大之处在于可以轻松扩展以满足自定义要求
Spring Security是针对Spring项目的安全框架,也是Spring Boot底层安全模块默认的技术选型。他可以实现强大的web安全控制。对于安全控制,我们仅需引入spring-boot-starter-security模块,进行少量的配置,即可实现强大的安全管理。
特征
- 对身份验证和授权的全面且可扩展的支持
- 防止攻击,例如会话固定,点击劫持,跨站点请求伪造等
- Servlet API集成
- 与Spring Web MVC的可选集成
- 与thymeleaf的可选集成
核心类
- WebSecurityConfigurerAdapter:自定义Security策略

- AuthenticationManagerBuilder:自定义认证策略
- @EnableWebSecurity:开启WebSecurity模式
-
SpringBoot整合Security

1)、效果图


2)、引入thymeleaf、security的pom文件
使用bootstrap的demo作为基础模板页面,详细整合thymeleaf说明:https://blog.csdn.net/WMY1230/article/details/
<?xml version="1.0" encoding="UTF-8"?> <project xmlns="http://maven.apache.org/POM/4.0.0" xmlns:xsi="http://www.w3.org/2001/XMLSchema-instance" xsi:schemaLocation="http://maven.apache.org/POM/4.0.0 https://maven.apache.org/xsd/maven-4.0.0.xsd"> <modelVersion>4.0.0</modelVersion> <parent> <groupId>org.springframework.boot</groupId> <artifactId>spring-boot-starter-parent</artifactId> <version>2.2.4.RELEASE</version> <relativePath/> <!-- lookup parent from repository --> </parent> <groupId>com.wmy.integrate</groupId> <artifactId>springboot-integrat-security</artifactId> <version>0.0.1-SNAPSHOT</version> <name>springboot-integrat-security</name> <description>Demo project for Spring Boot</description> <properties> <java.version>1.8</java.version> </properties> <dependencies> <!--引入thymeleaf与security的标签使用 --> <dependency> <groupId>org.thymeleaf.extras</groupId> <artifactId>thymeleaf-extras-springsecurity5</artifactId> </dependency> <!--引入security--> <dependency> <groupId>org.springframework.boot</groupId> <artifactId>spring-boot-starter-security</artifactId> </dependency> <!--引入thymeleaf--> <dependency> <groupId>org.springframework.boot</groupId> <artifactId>spring-boot-starter-thymeleaf</artifactId> </dependency> <!--引入webjars--> <dependency> <groupId>org.webjars</groupId> <artifactId>jquery</artifactId> <version>3.3.1</version> </dependency> <dependency> <groupId>org.webjars</groupId> <artifactId>bootstrap</artifactId> <version>4.0.0</version> </dependency> <dependency> <groupId>org.springframework.boot</groupId> <artifactId>spring-boot-starter-web</artifactId> </dependency> <dependency> <groupId>org.springframework.boot</groupId> <artifactId>spring-boot-starter-test</artifactId> <scope>test</scope> <exclusions> <exclusion> <groupId>org.junit.vintage</groupId> <artifactId>junit-vintage-engine</artifactId> </exclusion> </exclusions> </dependency> <dependency> <groupId>org.springframework.security</groupId> <artifactId>spring-security-test</artifactId> <scope>test</scope> </dependency> </dependencies> <build> <plugins> <plugin> <groupId>org.springframework.boot</groupId> <artifactId>spring-boot-maven-plugin</artifactId> </plugin> </plugins> </build> </project> 3)、编写security的配置类
1.定制请求授权的规则
控制没有请求路径的权限功能,达到只有这个角色的权限才能访问
讯享网http.authorizeRequests()......
2.开启自动配置的登录模式
定制登录表单参数、登录请求、登录成功后跳转的请求、登录失败后跳转的请求
http.formLogin()......4.开启自动配置的注销模式
可以自己定制注销的请求路径默认是/logout,并且默认请求方式是post。当你使用超链接作为注销按钮发送请求时默认使用的get,因此需要自己指定请求的方式
讯享网http.logout()......
5.定制认证规则
认证规则可以从内存里面获取也可以从数据库进行获取验证,这里先使用内存进行认证。后面更新使用数据库的security认证方式。。。。。
auth.inMemoryAuthentication()...... auth.jdbcAuthentication()......@EnableWebSecurity
public class MySecurityConfig extends WebSecurityConfigurerAdapter {
/
* 定制请求授权规则
* @param http
* @throws Exception
*/
@Override
protected void configure(HttpSecurity http) throws Exception {
//所有角色都能访问
http.authorizeRequests().antMatchers("/").permitAll()
//订单管理员的访问权限
.antMatchers("/page/order/","/page/report/","/page/customer/").hasRole("orderManager")
//产品管理员的访问权限
.antMatchers("/page/product/","/page/report/").hasRole("productManager")
//系统管理员的访问权限
.antMatchers("/page/").hasRole("systemManager")
//登录才能访问
.antMatchers("/main.html").authenticated();
//开启自动配置的登录模式
http.formLogin()
//定制表单的名称
.usernameParameter("userName").passwordParameter("password")
//the URL "/login", redirecting to "/login?error" for authentication failure.
//这里配置默认是SpringSecurity的登录页面,需要配置成自己的登录页面
.loginPage("/")
//定制URL处理器登录请求
.loginProcessingUrl("/user/login")
//登录成功后跳转的页面
.successForwardUrl("/page/main")
//登录失败后跳转的页面
.failureForwardUrl("/");
//开启自动配置的注销功能,注销请求路径/logout并注销session
http.logout()
//由于页面采用的是超链接get请求方式进行注销,而自动配置默认使用的post请求
.logoutRequestMatcher(new AntPathRequestMatcher("/logout","GET"))
//配置注销成功跳转的url
.logoutSuccessUrl("/");
//开启自动配置的记住我,这里form表单的name默认是remember-me,也可以自己定义参数名
http.rememberMe();
}
/
* 定制认证规则
* @param auth
* @throws Exception
*/
@Override
protected void configure(AuthenticationManagerBuilder auth) throws Exception {
//在内存里面校验
auth.inMemoryAuthentication()
//这里需要对密码进行编码不然会抛异常,详细情况可以参考错误信息及官方文档
.passwordEncoder(new BCryptPasswordEncoder())
//分别赋予登录的角色编码
.withUser("admin").password(new BCryptPasswordEncoder().encode("123456")).roles("systemManager","productManager","orderManager")
.and()
.withUser("zhangsan").password(new BCryptPasswordEncoder().encode("123456")).roles("productManager")
.and()
.withUser("lisi").password(new BCryptPasswordEncoder().encode("123456")).roles("orderManager");
}
}4)、security页面控制
引入thymeleaf集成security的名称空间
xmlns:sec="http://www.thymeleaf.org/extras/spring-security"1.获取登录名
可以使用thymeleaf集成security的标签SPEL表达式获取
<!--也可以使用security的默认方式取登录名[[${#httpServletRequest.remoteUser}]]!--> <a class="navbar-brand col-sm-3 col-md-2 mr-0" href="#">您好,<span sec:authentication="name"></span>!</a>2.角色权限
判断当前登录人的角色是否有访问权限
<li class="nav-item" sec:authorize="hasAnyRole('systemManager','orderManager')"> <a class="nav-link" href="#" th:href="@{/page/order}" th:class="${activeUri=='order'?'nav-link active':'nav-link'}"> <svg xmlns="http://www.w3.org/2000/svg" width="24" height="24" viewBox="0 0 24 24" fill="none" stroke="currentColor" stroke-width="2" stroke-linecap="round" stroke-linejoin="round" class="feather feather-file"> <path d="M13 2H6a2 2 0 0 0-2 2v16a2 2 0 0 0 2 2h12a2 2 0 0 0 2-2V9z"></path> <polyline points="13 2 13 9 20 9"></polyline> </svg> 订单 </a> </li>3.更多标签的使用
thymeleaf参考文档:https://www.thymeleaf.org/doc/articles/springsecurity.html
thymeleaf集成security源码:https://github.com/thymeleaf/thymeleaf-extras-springsecurity
<!DOCTYPE html>
<html lang="en" xmlns:th="http://www.thymeleaf.org"
      xmlns:sec="http://www.thymeleaf.org/extras/spring-security">
<head>
    <meta charset="UTF-8">
    <title>Title</title>
</head>
<body>
<!--topbar-->
<nav class="navbar navbar-dark sticky-top bg-dark flex-md-nowrap p-0" th:fragment="topbar">
    <!--也可以使用security的默认方式取登录名[[${#httpServletRequest.remoteUser}]]!-->
    <a class="navbar-brand col-sm-3 col-md-2 mr-0" href="#">您好,<span sec:authentication="name"></span>!</a>
    <input class="form-control form-control-dark w-100" type="text" placeholder="测试SpringBoot整合Security的页面" aria-label="Search">
    <ul class="navbar-nav px-3">
        <li class="nav-item text-nowrap">
            <a class="nav-link" href="#" th:href="@{/logout}">注销</a>
        </li>
    </ul>
</nav>

<!--sidebar-->
<nav class="col-md-2 d-none d-md-block bg-light sidebar" id="sidebar">
    <div class="sidebar-sticky">
        <ul class="nav flex-column">
            <li class="nav-item">
                <a class="nav-link active"
                   th:class="${activeUri=='main.html'?'nav-link active':'nav-link'}"
                   href="#" th:href="@{/main.html}">
                    <svg xmlns="http://www.w3.org/2000/svg" width="24" height="24" viewBox="0 0 24 24" fill="none" stroke="currentColor" stroke-width="2" stroke-linecap="round" stroke-linejoin="round" class="feather feather-home">
                        <path d="M3 9l9-7 9 7v11a2 2 0 0 1-2 2H5a2 2 0 0 1-2-2z"></path>
                        <polyline points="9 22 9 12 15 12 15 22"></polyline>
                    </svg>
                    首页 <span class="sr-only">(current)</span>
                </a>
            </li>
            <li class="nav-item" sec:authorize="hasAnyRole('systemManager','orderManager')">
                <a class="nav-link" href="#" th:href="@{/page/order}" th:class="${activeUri=='order'?'nav-link active':'nav-link'}">
                    <svg xmlns="http://www.w3.org/2000/svg" width="24" height="24" viewBox="0 0 24 24" fill="none" stroke="currentColor" stroke-width="2" stroke-linecap="round" stroke-linejoin="round" class="feather feather-file">
                        <path d="M13 2H6a2 2 0 0 0-2 2v16a2 2 0 0 0 2 2h12a2 2 0 0 0 2-2V9z"></path>
                        <polyline points="13 2 13 9 20 9"></polyline>
                    </svg>
                    订单
                </a>
            </li>
            <li class="nav-item" sec:authorize="hasAnyRole('systemManager','productManager')">
                <a class="nav-link" href="#" th:href="@{/page/product}" th:class="${activeUri=='product'?'nav-link active':'nav-link'}">
                    <svg xmlns="http://www.w3.org/2000/svg" width="24" height="24" viewBox="0 0 24 24" fill="none" stroke="currentColor" stroke-width="2" stroke-linecap="round" stroke-linejoin="round" class="feather feather-shopping-cart">
                        <circle cx="9" cy="21" r="1"></circle>
                        <circle cx="20" cy="21" r="1"></circle>
                        <path d="M1 1h4l2.68 13.39a2 2 0 0 0 2 1.61h9.72a2 2 0 0 0 2-1.61L23 6H6"></path>
                    </svg>
                    产品
                </a>
            </li>
            <li class="nav-item" sec:authorize="hasAnyRole('systemManager','orderManager')">
                <a class="nav-link active" href="#" th:href="@{/page/customer}" th:class="${activeUri=='customer'?'nav-link active':'nav-link'}">
                    <svg xmlns="http://www.w3.org/2000/svg" width="24" height="24" viewBox="0 0 24 24" fill="none" stroke="currentColor" stroke-width="2" stroke-linecap="round" stroke-linejoin="round" class="feather feather-users">
                        <path d="M17 21v-2a4 4 0 0 0-4-4H5a4 4 0 0 0-4 4v2"></path>
                        <circle cx="9" cy="7" r="4"></circle>
                        <path d="M23 21v-2a4 4 0 0 0-3-3.87"></path>
                        <path d="M16 3.13a4 4 0 0 1 0 7.75"></path>
                    </svg>
                    顾客
                </a>
            </li>
            <li class="nav-item" sec:authorize="hasAnyRole('systemManager','orderManager','productManager')">
                <a class="nav-link" href="#" th:href="@{/page/report}" th:class="${activeUri=='report'?'nav-link active':'nav-link'}">
                    <svg xmlns="http://www.w3.org/2000/svg" width="24" height="24" viewBox="0 0 24 24" fill="none" stroke="currentColor" stroke-width="2" stroke-linecap="round" stroke-linejoin="round" class="feather feather-bar-chart-2">
                        <line x1="18" y1="20" x2="18" y2="10"></line>
                        <line x1="12" y1="20" x2="12" y2="4"></line>
                        <line x1="6" y1="20" x2="6" y2="14"></line>
                    </svg>
                    报表
                </a>
            </li>
            <li class="nav-item" sec:authorize="hasAnyRole('systemManager')">
                <a class="nav-link" href="#" th:href="@{/page/system}" th:class="${activeUri=='system'?'nav-link active':'nav-link'}">
                    <svg xmlns="http://www.w3.org/2000/svg" width="24" height="24" viewBox="0 0 24 24" fill="none" stroke="currentColor" stroke-width="2" stroke-linecap="round" stroke-linejoin="round" class="feather feather-layers">
                        <polygon points="12 2 2 7 12 12 22 7 12 2"></polygon>
                        <polyline points="2 17 12 22 22 17"></polyline>
                        <polyline points="2 12 12 17 22 12"></polyline>
                    </svg>
                    系统
                </a>
            </li>
        </ul>
    </div>
</nav>

</body>
</html>
5)、页面跳转
@RequestMapping("/page")
@Controller
public class PageController {

    /
     * 跳转到主页面
     * @return
     */
    @RequestMapping("/main")
    public String mianPage(){
        return "redirect:/main.html";
    }

    /
     * 跳转到订单页面
     * @return
     */
    @RequestMapping("/order")
    public String orderPage(){
        return "/page/order/order";
    }

    /
     * 跳转到产品页面
     * @return
     */
    @RequestMapping("/product")
    public String productPage(){
        return "/page/product/product";
    }

    /
     * 跳转到顾客页面
     * @return
     */
    @RequestMapping("/customer")
    public String customerPage(){
        return "/page/customer/customer";
    }

    /
     * 跳转到报表页面
     * @return
     */
    @RequestMapping("report")
    public String reportPage(){
        return "/page/report/report";
    }

    /
     * 跳转到系统页面
     * @return
     */
    @RequestMapping("/system")
    public String systemPage(){
        return "/page/system";
    }
}
-
Spring Security运行原理
1)、初始化认证配置规则
这里对配置的用户名、密码及角色配置初始化加载进入内存中。利用User里面的内部类UserBuilder对象进行保存。这里的角色并且都默认加了ROLE_前缀
public void init(final WebSecurity web) throws Exception { final HttpSecurity http = getHttp(); web.addSecurityFilterChainBuilder(http).postBuildAction(() -> { FilterSecurityInterceptor securityInterceptor = http .getSharedObject(FilterSecurityInterceptor.class); web.securityInterceptor(securityInterceptor); }); } protected final HttpSecurity getHttp() throws Exception { if (http != null) { return http; } DefaultAuthenticationEventPublisher eventPublisher = objectPostProcessor .postProcess(new DefaultAuthenticationEventPublisher()); localConfigureAuthenticationBldr.authenticationEventPublisher(eventPublisher); //初始化认证规则,并加入到内存中 AuthenticationManager authenticationManager = authenticationManager(); authenticationBuilder.parentAuthenticationManager(authenticationManager); authenticationBuilder.authenticationEventPublisher(eventPublisher); Map<Class<?>, Object> sharedObjects = createSharedObjects(); http = new HttpSecurity(objectPostProcessor, authenticationBuilder, sharedObjects); if (!disableDefaults) { // @formatter:off http .csrf().and() .addFilter(new WebAsyncManagerIntegrationFilter()) .exceptionHandling().and() .headers().and() .sessionManagement().and() .securityContext().and() .requestCache().and() .anonymous().and() .servletApi().and() .apply(new DefaultLoginPageConfigurer<>()).and() .logout(); // @formatter:on ClassLoader classLoader = this.context.getClassLoader(); List<AbstractHttpConfigurer> defaultHttpConfigurers = SpringFactoriesLoader.loadFactories(AbstractHttpConfigurer.class, classLoader); for (AbstractHttpConfigurer configurer : defaultHttpConfigurers) { http.apply(configurer); } } configure(http); return http; }
protected AuthenticationManager authenticationManager() throws Exception { if (!authenticationManagerInitialized) { configure(localConfigureAuthenticationBldr); if (disableLocalConfigureAuthenticationBldr) { authenticationManager = authenticationConfiguration .getAuthenticationManager(); } else { authenticationManager = localConfigureAuthenticationBldr.build(); } authenticationManagerInitialized = true; } return authenticationManager; } protected void configure(AuthenticationManagerBuilder auth) throws Exception { //在内存里面校验 auth.inMemoryAuthentication() //这里需要对密码进行编码不然会抛异常,详细情况可以参考错误信息及官方文档 .passwordEncoder(new BCryptPasswordEncoder()) //分别赋予登录的角色编码 .withUser("admin").password(new BCryptPasswordEncoder().encode("")).roles("systemManager","productManager","orderManager") .and() .withUser("zhangsan").password(new BCryptPasswordEncoder().encode("")).roles("productManager") .and() .withUser("lisi").password(new BCryptPasswordEncoder().encode("")).roles("orderManager"); } 
2)、初始化请求授权规则
这里初始化请求权限、登录、注销等规则信息,并且启动相关的配置比如可以配置上启动防止跨域请求的配置等等。。。。
protected final HttpSecurity getHttp() throws Exception { if (http != null) { return http; } DefaultAuthenticationEventPublisher eventPublisher = objectPostProcessor .postProcess(new DefaultAuthenticationEventPublisher()); localConfigureAuthenticationBldr.authenticationEventPublisher(eventPublisher); //初始化认证规则,并加入到内存中 AuthenticationManager authenticationManager = authenticationManager(); authenticationBuilder.parentAuthenticationManager(authenticationManager); authenticationBuilder.authenticationEventPublisher(eventPublisher); Map<Class<?>, Object> sharedObjects = createSharedObjects(); http = new HttpSecurity(objectPostProcessor, authenticationBuilder, sharedObjects); if (!disableDefaults) { // @formatter:off http .csrf().and() .addFilter(new WebAsyncManagerIntegrationFilter()) .exceptionHandling().and() .headers().and() .sessionManagement().and() .securityContext().and() .requestCache().and() .anonymous().and() .servletApi().and() .apply(new DefaultLoginPageConfigurer<>()).and() .logout(); // @formatter:on ClassLoader classLoader = this.context.getClassLoader(); List<AbstractHttpConfigurer> defaultHttpConfigurers = SpringFactoriesLoader.loadFactories(AbstractHttpConfigurer.class, classLoader); for (AbstractHttpConfigurer configurer : defaultHttpConfigurers) { http.apply(configurer); } } //初始化请求授权规则、登录、注销、记住我。。。。。 configure(http); return http; }加载到内存中的多个配置类
{Class@5308} "class org.springframework.security.config.annotation.web.configurers.CsrfConfigurer" -> {ArrayList@5483} size = 1 {Class@5315} "class org.springframework.security.config.annotation.web.configurers.ExceptionHandlingConfigurer" -> {ArrayList@5484} size = 1 {Class@5316} "class org.springframework.security.config.annotation.web.configurers.HeadersConfigurer" -> {ArrayList@5485} size = 1 {Class@5336} "class org.springframework.security.config.annotation.web.configurers.SessionManagementConfigurer" -> {ArrayList@5486} size = 1 {Class@5341} "class org.springframework.security.config.annotation.web.configurers.SecurityContextConfigurer" -> {ArrayList@5487} size = 1 {Class@5342} "class org.springframework.security.config.annotation.web.configurers.RequestCacheConfigurer" -> {ArrayList@5488} size = 1 {Class@5343} "class org.springframework.security.config.annotation.web.configurers.AnonymousConfigurer" -> {ArrayList@5489} size = 1 {Class@5345} "class org.springframework.security.config.annotation.web.configurers.ServletApiConfigurer" -> {ArrayList@5490} size = 1 {Class@5347} "class org.springframework.security.config.annotation.web.configurers.DefaultLoginPageConfigurer" -> {ArrayList@5491} size = 1 {Class@5357} "class org.springframework.security.config.annotation.web.configurers.LogoutConfigurer" -> {ArrayList@5492} size = 1 {Class@5367} "class org.springframework.security.config.annotation.web.configurers.ExpressionUrlAuthorizationConfigurer" -> {ArrayList@5493} size = 1 {Class@5381} "class org.springframework.security.config.annotation.web.configurers.FormLoginConfigurer" -> {ArrayList@5494} size = 1 {Class@5416} "class org.springframework.security.config.annotation.web.configurers.RememberMeConfigurer" -> {ArrayList@5495} size = 1
3)、登录验证原理
使用FilterChainProxy代理执行多个过滤器filter,拦截登录请求、注销等等。登录用到了UsernamePasswordAuthenticationFilter用户名密码验证的过滤器
@Override public void doFilter(ServletRequest request, ServletResponse response) throws IOException, ServletException { if (currentPosition == size) { if (logger.isDebugEnabled()) { logger.debug(UrlUtils.buildRequestUrl(firewalledRequest) + " reached end of additional filter chain; proceeding with original chain"); } // Deactivate path stripping as we exit the security filter chain this.firewalledRequest.reset(); originalChain.doFilter(request, response); } else { currentPosition++; Filter nextFilter = additionalFilters.get(currentPosition - 1); if (logger.isDebugEnabled()) { logger.debug(UrlUtils.buildRequestUrl(firewalledRequest) + " at position " + currentPosition + " of " + size + " in additional filter chain; firing Filter: '" + nextFilter.getClass().getSimpleName() + "'"); } nextFilter.doFilter(request, response, this); } } }0 = {WebAsyncManagerIntegrationFilter@5443} 1 = {SecurityContextPersistenceFilter@6879} 2 = {HeaderWriterFilter@6878} 3 = {CsrfFilter@6875} 4 = {LogoutFilter@6873} 5 = {UsernamePasswordAuthenticationFilter@5517} 6 = {RequestCacheAwareFilter@7008} 7 = {SecurityContextHolderAwareRequestFilter@7007} 8 = {RememberMeAuthenticationFilter@7006} 9 = {AnonymousAuthenticationFilter@7141} 10 = {SessionManagementFilter@7142} 11 = {ExceptionTranslationFilter@7143} 12 = {FilterSecurityInterceptor@7144} UsernamePasswordAuthenticationFilter,对用户名密码的验证,并获取登录人的角色,验证通过后添加记住我的cookie和session
public void doFilter(ServletRequest req, ServletResponse res, FilterChain chain) throws IOException, ServletException { HttpServletRequest request = (HttpServletRequest) req; HttpServletResponse response = (HttpServletResponse) res; if (!requiresAuthentication(request, response)) { chain.doFilter(request, response); return; } if (logger.isDebugEnabled()) { logger.debug("Request is to process authentication"); } Authentication authResult; try { //用户密码密码的验证及角色获取 authResult = attemptAuthentication(request, response); if (authResult == null) { // return immediately as subclass has indicated that it hasn't completed // authentication return; } //session的管理 sessionStrategy.onAuthentication(authResult, request, response); } catch (InternalAuthenticationServiceException failed) { logger.error( "An internal error occurred while trying to authenticate the user.", failed); unsuccessfulAuthentication(request, response, failed); return; } catch (AuthenticationException failed) { // Authentication failed unsuccessfulAuthentication(request, response, failed); return; } // Authentication success if (continueChainBeforeSuccessfulAuthentication) { chain.doFilter(request, response); } //验证成功添加cookie和session successfulAuthentication(request, response, chain, authResult); } public Authentication attemptAuthentication(HttpServletRequest request, HttpServletResponse response) throws AuthenticationException { if (postOnly && !request.getMethod().equals("POST")) { throw new AuthenticationServiceException( "Authentication method not supported: " + request.getMethod()); } String username = obtainUsername(request); String password = obtainPassword(request); if (username == null) { username = ""; } if (password == null) { password = ""; } username = username.trim(); UsernamePasswordAuthenticationToken authRequest = new UsernamePasswordAuthenticationToken( username, password); // Allow subclasses to set the "details" property setDetails(request, authRequest); return this.getAuthenticationManager().authenticate(authRequest); }ProviderManager,递归循环验证管理是支持验证。根据用户名获取缓存中的用户信息
public Authentication authenticate(Authentication authentication) throws AuthenticationException { Class<? extends Authentication> toTest = authentication.getClass(); AuthenticationException lastException = null; AuthenticationException parentException = null; Authentication result = null; Authentication parentResult = null; boolean debug = logger.isDebugEnabled(); for (AuthenticationProvider provider : getProviders()) { //遍历provider 是否支持class org.springframework.security.authentication.UsernamePasswordAuthenticationToken if (!provider.supports(toTest)) { continue; } if (debug) { logger.debug("Authentication attempt using " + provider.getClass().getName()); } try { //利用验证管理器去验证用户名和密码是否正确 result = provider.authenticate(authentication); if (result != null) { copyDetails(authentication, result); break; } } catch (AccountStatusException | InternalAuthenticationServiceException e) { prepareException(e, authentication); // SEC-546: Avoid polling additional providers if auth failure is due to // invalid account status throw e; } catch (AuthenticationException e) { lastException = e; } } //如果结果为空使用递归继续判定下一个管理器 if (result == null && parent != null) { // Allow the parent to try. try { result = parentResult = parent.authenticate(authentication); } catch (ProviderNotFoundException e) { // ignore as we will throw below if no other exception occurred prior to // calling parent and the parent // may throw ProviderNotFound even though a provider in the child already // handled the request } catch (AuthenticationException e) { lastException = parentException = e; } } if (result != null) { if (eraseCredentialsAfterAuthentication && (result instanceof CredentialsContainer)) { // Authentication is complete. Remove credentials and other secret data // from authentication ((CredentialsContainer) result).eraseCredentials(); } // If the parent AuthenticationManager was attempted and successful than it will publish an AuthenticationSuccessEvent // This check prevents a duplicate AuthenticationSuccessEvent if the parent AuthenticationManager already published it if (parentResult == null) { eventPublisher.publishAuthenticationSuccess(result); } return result; } // Parent was null, or didn't authenticate (or throw an exception). if (lastException == null) { lastException = new ProviderNotFoundException(messages.getMessage( "ProviderManager.providerNotFound", new Object[] { toTest.getName() }, "No AuthenticationProvider found for {0}")); } // If the parent AuthenticationManager was attempted and failed than it will publish an AbstractAuthenticationFailureEvent // This check prevents a duplicate AbstractAuthenticationFailureEvent if the parent AuthenticationManager already published it if (parentException == null) { prepareException(lastException, authentication); } throw lastException; } 
AbstractUserDetailsAuthenticationProvider->authenticate()验证用户密码是否正确并获取对应角色


AbstractUserDetailsAuthenticationProvider->createSuccessAuthentication()将查询的角色等详细赋值,
protected Authentication createSuccessAuthentication(Object principal, Authentication authentication, UserDetails user) { // Ensure we return the original credentials the user supplied, // so subsequent attempts are successful even with encoded passwords. // Also ensure we return the original getDetails(), so that future // authentication events after cache expiry contain the details UsernamePasswordAuthenticationToken result = new UsernamePasswordAuthenticationToken( principal, authentication.getCredentials(), authoritiesMapper.mapAuthorities(user.getAuthorities())); result.setDetails(authentication.getDetails()); return result; }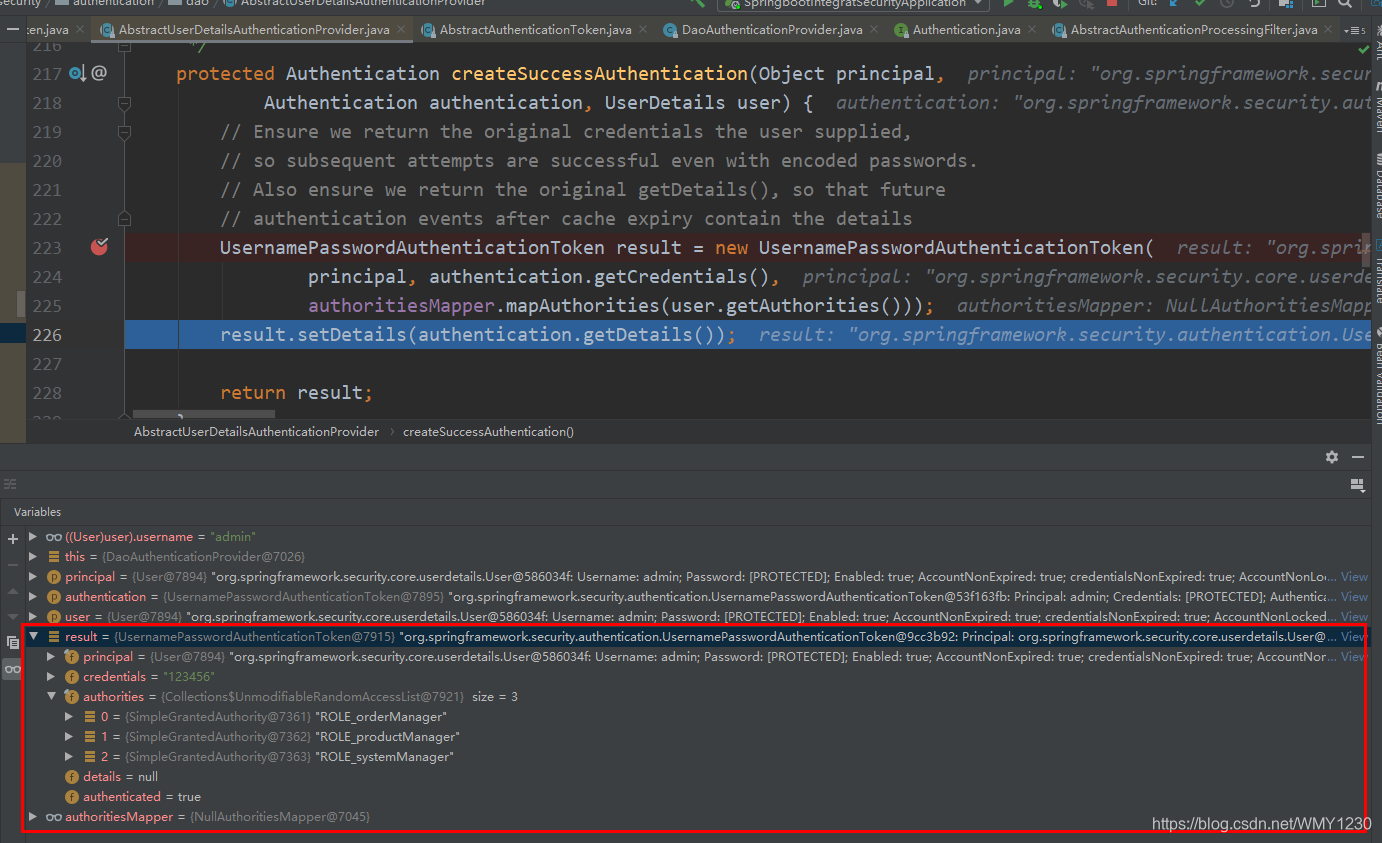
-
整合过程中出现的错误信息
1)、密码认证
java.lang.IllegalArgumentException: There is no PasswordEncoder mapped for the id "null"
SpringSecurity对密码需要进行编码认证,不支持使用明文认证的方式。
解决方案:https://docs.spring.io/spring-security/site/docs/5.2.2.RELEASE/reference/htmlsingle/#servlet-hello
密码的一般格式为:
{id} encodedPassword这样id的标识符是用于查找PasswordEncoder应使用的标识符,并且encodedPassword是所选的原始编码密码PasswordEncoder。在id必须在密码的开始,开始{
和结束}。如果id找不到,id则将为null。例如,以下可能是使用different编码的密码列表id。所有原始密码均为“密码”。
版权声明:本文内容由互联网用户自发贡献,该文观点仅代表作者本人。本站仅提供信息存储空间服务,不拥有所有权,不承担相关法律责任。如发现本站有涉嫌侵权/违法违规的内容,请联系我们,一经查实,本站将立刻删除。
如需转载请保留出处:https://51itzy.com/kjqy/13750.html