
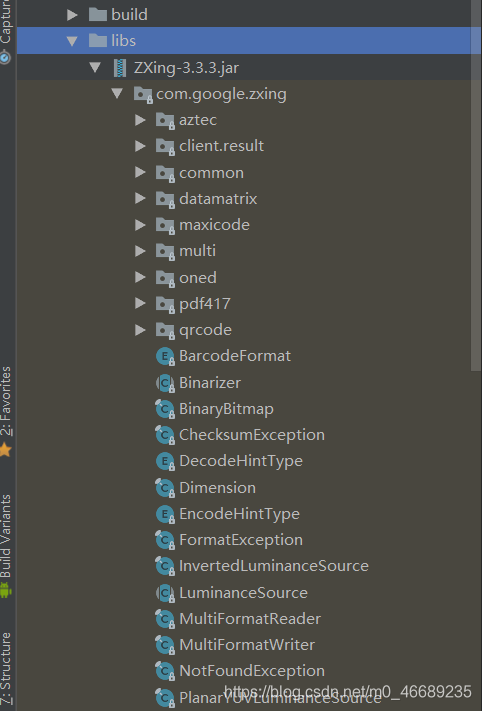
什么是Zxing?
ZXing是一个开放源码的,用Java实现的多种格式的1D/2D条码图像处理库,它包含了联系到其他语言的端口。Zxing可以实现使用手机的内置的摄像头完成条形码的扫描及解码。
怎么使用Zxing?
1.添加依赖
可以直接在app/build.gradle文件中在线依赖,也可以直接加入jar包
1.implementation 'com.google.zxing:core:3.3.3' 2.直接在libs下添加jar包 讯享网
这里我直接使用的是添加jar包(添加完jar包一定要同步一下,不然没用)
讯享网
2.新建一个Demo项目
我这里直接用的是AS中最简单的创建项目方式(即创建一个空的活动)
布局(采用的约束性布局,也就是直接拖动的)

讯享网<?xml version="1.0" encoding="utf-8"?> <android.support.constraint.ConstraintLayout xmlns:android="http://schemas.android.com/apk/res/android" xmlns:app="http://schemas.android.com/apk/res-auto" xmlns:tools="http://schemas.android.com/tools" android:layout_width="match_parent" android:layout_height="match_parent" tools:context=".MainActivity"> <Button android:id="@+id/create_btn" android:layout_width="wrap_content" android:layout_height="wrap_content" android:layout_marginStart="8dp" android:layout_marginLeft="8dp" android:layout_marginBottom="8dp" android:text="生成二维码" app:layout_constraintBottom_toBottomOf="parent" app:layout_constraintStart_toStartOf="parent" /> <Button android:id="@+id/show_btn" android:layout_width="wrap_content" android:layout_height="wrap_content" android:layout_marginEnd="8dp" android:layout_marginRight="8dp" android:layout_marginBottom="8dp" android:text="显示二维码内容" app:layout_constraintBottom_toBottomOf="parent" app:layout_constraintEnd_toEndOf="parent" /> <ImageView android:id="@+id/pic" android:layout_width="250dp" android:layout_height="250dp" android:layout_marginStart="8dp" android:layout_marginLeft="8dp" android:layout_marginTop="64dp" android:layout_marginEnd="8dp" android:layout_marginRight="8dp" app:layout_constraintEnd_toEndOf="parent" app:layout_constraintStart_toStartOf="parent" app:layout_constraintTop_toTopOf="parent" /> <TextView android:id="@+id/show_txt" android:layout_width="wrap_content" android:layout_height="wrap_content" android:layout_marginStart="8dp" android:layout_marginLeft="8dp" android:layout_marginTop="8dp" android:layout_marginEnd="8dp" android:layout_marginRight="8dp" android:textSize="30sp" app:layout_constraintEnd_toEndOf="parent" app:layout_constraintStart_toStartOf="parent" app:layout_constraintTop_toBottomOf="@+id/pic" /> </android.support.constraint.ConstraintLayout>
MainActivity
package com.example.dell.zxdemo; import android.graphics.Bitmap; import android.graphics.Color; import android.os.Bundle; import android.support.v7.app.AppCompatActivity; import android.view.View; import android.widget.Button; import android.widget.ImageView; import android.widget.TextView; import com.google.zxing.BarcodeFormat; import com.google.zxing.BinaryBitmap; import com.google.zxing.DecodeHintType; import com.google.zxing.EncodeHintType; import com.google.zxing.MultiFormatReader; import com.google.zxing.MultiFormatWriter; import com.google.zxing.NotFoundException; import com.google.zxing.RGBLuminanceSource; import com.google.zxing.Result; import com.google.zxing.WriterException; import com.google.zxing.common.BitMatrix; import com.google.zxing.common.HybridBinarizer; import com.google.zxing.qrcode.decoder.ErrorCorrectionLevel; import java.util.HashMap; public class MainActivity extends AppCompatActivity implements View.OnClickListener {
private Button create_btn; //用于创建二维码的按钮 private Button show_btn; //用于显示二维码内容的按钮 private ImageView pic; //展示二维码 private TextView show_txt; //显示二维码的内容 private HashMap hashMap; //用hasmap放置二维码的参数 private Bitmap bitmap;//声明一个bitmap对象用于放置图片; @Override protected void onCreate(Bundle savedInstanceState) {
super.onCreate(savedInstanceState); setContentView(R.layout.activity_main); initView();//初始化控件(这里用的是插件LayoutCreator) } private void initView() {
hashMap = new HashMap(); create_btn = (Button) findViewById(R.id.create_btn); show_btn = (Button) findViewById(R.id.show_btn); pic = (ImageView) findViewById(R.id.pic); show_txt = (TextView) findViewById(R.id.show_txt); create_btn.setOnClickListener(this); show_btn.setOnClickListener(this); } @Override public void onClick(View v) {
switch (v.getId()) {
case R.id.create_btn: create_QR_code(); //此方法用于创建二维码 break; case R.id.show_btn: show_QR_code();//此方法用于显示二维码的内容 break; } } private void create_QR_code() {
hashMap.put(EncodeHintType.ERROR_CORRECTION, ErrorCorrectionLevel.L); //定义二维码的纠错级别,为L hashMap.put(EncodeHintType.CHARACTER_SET, "utf-8"); //设置字符编码为utf-8 hashMap.put(EncodeHintType.MARGIN, 2); //设置margin属性为2,也可以不设置 String contents = "最简单的Demo"; //定义二维码的内容 BitMatrix bitMatrix = null; //这个类是用来描述二维码的,可以看做是个布尔类型的数组 try {
bitMatrix = new MultiFormatWriter().encode(contents, BarcodeFormat.QR_CODE, 250, 250, hashMap); //调用encode()方法,第一次参数是二维码的内容,第二个参数是生二维码的类型,第三个参数是width,第四个参数是height,最后一个参数是hints属性 } catch (WriterException e) {
e.printStackTrace(); } int width = bitMatrix.getWidth();//获取width int height = bitMatrix.getHeight();//获取height int[] pixels = new int[width * height]; //创建一个新的数组,大小是width*height for (int i = 0; i < width; i++) {
for (int j = 0; j < height; j++) {
//通过两层循环,为二维码设置颜色 if (bitMatrix.get(i, j)) {
pixels[i * width + j] = Color.BLACK; //设置为黑色 } else {
pixels[i * width + j] = Color.WHITE; //设置为白色 } } } bitmap = Bitmap.createBitmap(width, height, Bitmap.Config.RGB_565); //调用Bitmap的createBitmap(),第一个参数是width,第二个参数是height,最后一个是config配置,可以设置成RGB_565 bitmap.setPixels(pixels, 0, width, 0, 0, width, height); //调用setPixels(),第一个参数就是上面的那个数组,偏移为0,x,y也都可为0,根据实际需求来,最后是width ,和height pic.setImageBitmap(bitmap); //调用setImageBitmap()方法,将二维码设置到imageview控件里 } private void show_QR_code() {
hashMap.put(DecodeHintType.CHARACTER_SET, "utf-8");//设置解码的字符,为utf-8 int width = bitmap.getWidth();//现在是从那个bitmap中得到width和height int height = bitmap.getHeight(); int[] pixels = new int[width * height];//新建数组,大小为width*height bitmap.getPixels(pixels, 0, width, 0, 0, width, height); //和什么的setPixels()方法对应 Result result = null;//Result类主要是用于保存展示二维码的内容的 BinaryBitmap binaryBitmap = new BinaryBitmap(new HybridBinarizer(new RGBLuminanceSource(width, height, pixels))); //BinaryBitmap这个类是用于反转二维码的,HybridBinarizer这个类是zxing在对图像进行二值化算法的一个类 try {
result = new MultiFormatReader().decode(binaryBitmap);//调用MultiFormatReader()方法的decode(),传入参数就是上面用的反转二维码的 } catch (NotFoundException e) {
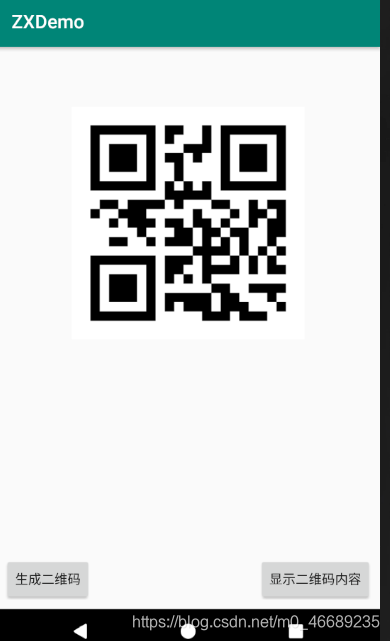
e.printStackTrace(); } show_txt.setText(result.toString());//设置文字 } } 效果图

遇到的难题(未解决)
不知道为啥就是设置颜色的话,如果把颜色反过来就直接报错,不能运行,程序直接崩
讯享网 for (int i = 0; i < width; i++) {
    for (int j = 0; j < height; j++) {
    //通过两层循环,为二维码设置颜色 if (bitMatrix.get(i, j)) {
    pixels[i * width + j] = Color.WHITE; //设置为白色的话根本扫不出来,会报错 } else {
    pixels[i * width + j] = Color.BLACK; //设置为黑色 } } }
End:
这个Demo可能过于简单,有些不足的或者错误的地方,还希望大家指出来!
版权声明:本文内容由互联网用户自发贡献,该文观点仅代表作者本人。本站仅提供信息存储空间服务,不拥有所有权,不承担相关法律责任。如发现本站有涉嫌侵权/违法违规的内容,请联系我们,一经查实,本站将立刻删除。
如需转载请保留出处:https://51itzy.com/kjqy/117996.html